What Are Widgets In Flutter ?
Flutter widgets are nothing but, the user interface controls. Designing a user interface is way different from Views in Android or UI Views in IOS in flutter. Not just the user interface, but also the styling and positioning comes under widgets in flutter.
Text is a widget. The button is a widget. But if you trust me padding and margin are also widgets in flutter. Everything is a widget in flutter. So we can say that widget is a blueprint and flutter uses these blueprints to create views.
Widget Tree
The widget tree is nothing but the infinite tree of parent and child widgets. It is what forms the layout that’s visible on the screen. Widgets are nested inside each other in parent-child structure to form layouts. At first, the parent-child widget tree might scare you, but with practice, you can do things better
How Many Types Of Widgets Are There In Flutter ?
In flutter, there are a lot of in-built widgets like text, button, container, listview etc,.widgets are classified into two types.
- Stateless Widgets
- Stateful Widgets
Stateless Widgets
Stateless widgets are static, which means they don’t change once they are initialized. They don’t store any real-time data. For example, the Text widget cannot store any data so it’s a stateless widget. Examples of stateless widgets are icons, text, etc.
Stateful Widgets
Stateful widgets are dynamic in nature, which means they can change based on conditions. They can store real-time data. Based on that data, we can update the UI.TextField, Slider, form, etc are examples of stateful widgets.
Before we start learning widgets, this article assumes you’ve already set up a flutter environment on your PC or Laptop. If not just refer to the below links.
Windows: How to install flutter on windows with android studio.
Mac: How to install flutter on mac with Xcode.
Ubuntu: How to install flutter on ubuntu.
Visual studio code: How to install flutter with visual studio code.
Setup
We have to create a project to work with widgets. So let’s create a project.
- Start a new project in whatever IDE you are using. Name it whatever you want.
- Open main.dart file, which is located in the libs folder of the project.
- Delete all the text data in the file and type void main() {}.
- Now, if you restart the app, you should see a blank screen.
Flutter Widgets
Now let’s see some widgets and their properties with examples. We will cover a few widgets like text, buttons, container.
Text
A text widget is used to display text in the application. It has many properties like color, size, etc. Let’s see the code.
import 'package:flutter/cupertino.dart';
import 'package:flutter/gestures.dart';
import 'package:flutter/material.dart';
void main() {
runApp(MyApp());
}
class MyApp extends StatelessWidget {
@override
Widget build(BuildContext context) {
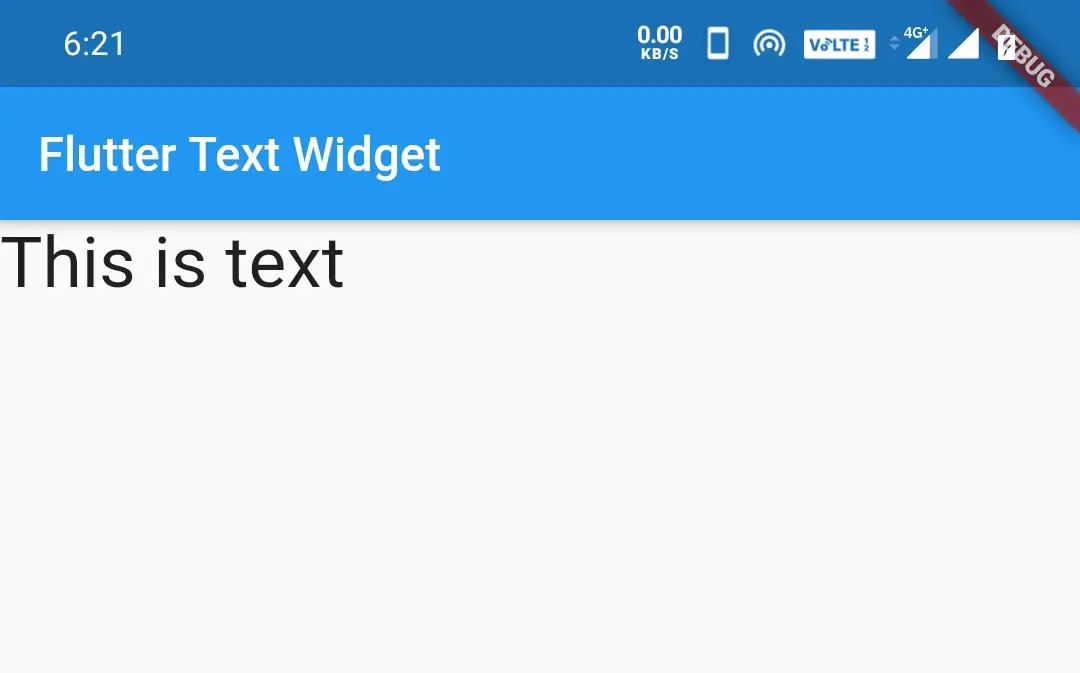
return MaterialApp(
home: Scaffold(
appBar: AppBar(
title: Text("Flutter Text Widget"),
),
body: Text("This is text")
),
);
}
}
Output:

fontSize:
Used to increase the font size of the text.
Text("This is text", style: TextStyle(fontSize: 30))
Output:
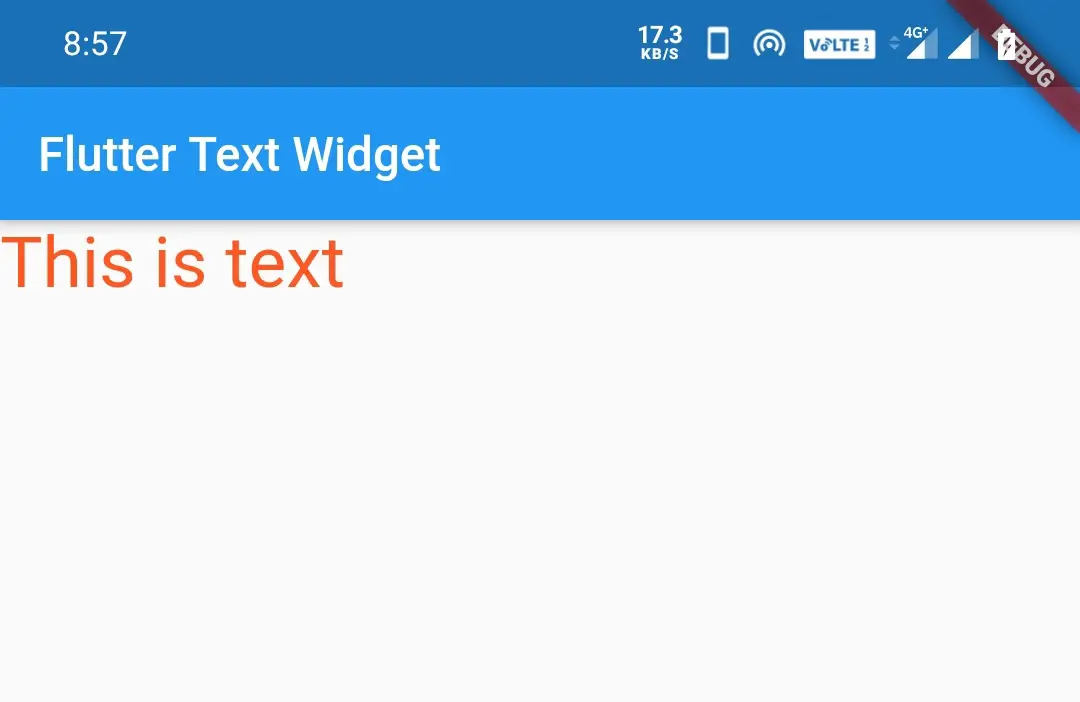
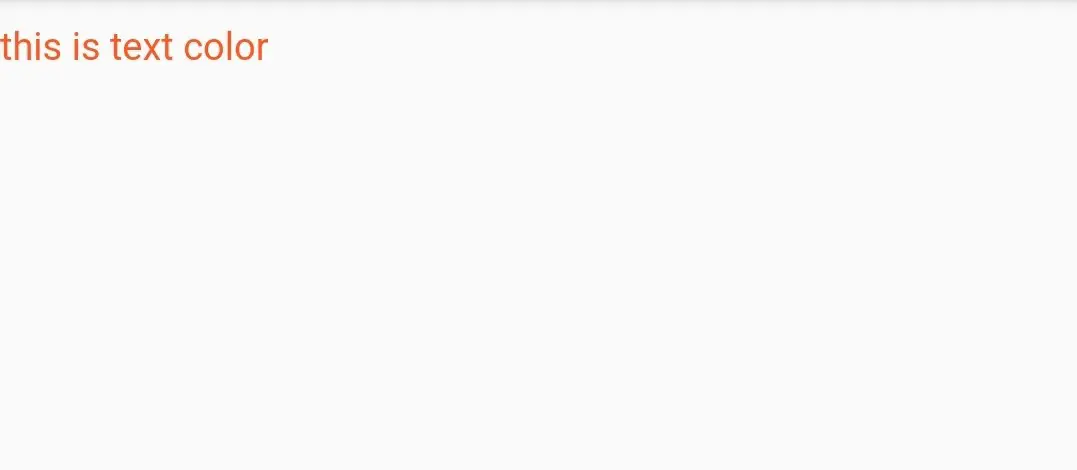
Color:
Used to define the color of the text.
Text("This is text",style: TextStyle(fontSize: 30, color: Colors.deepOrange))
Output:
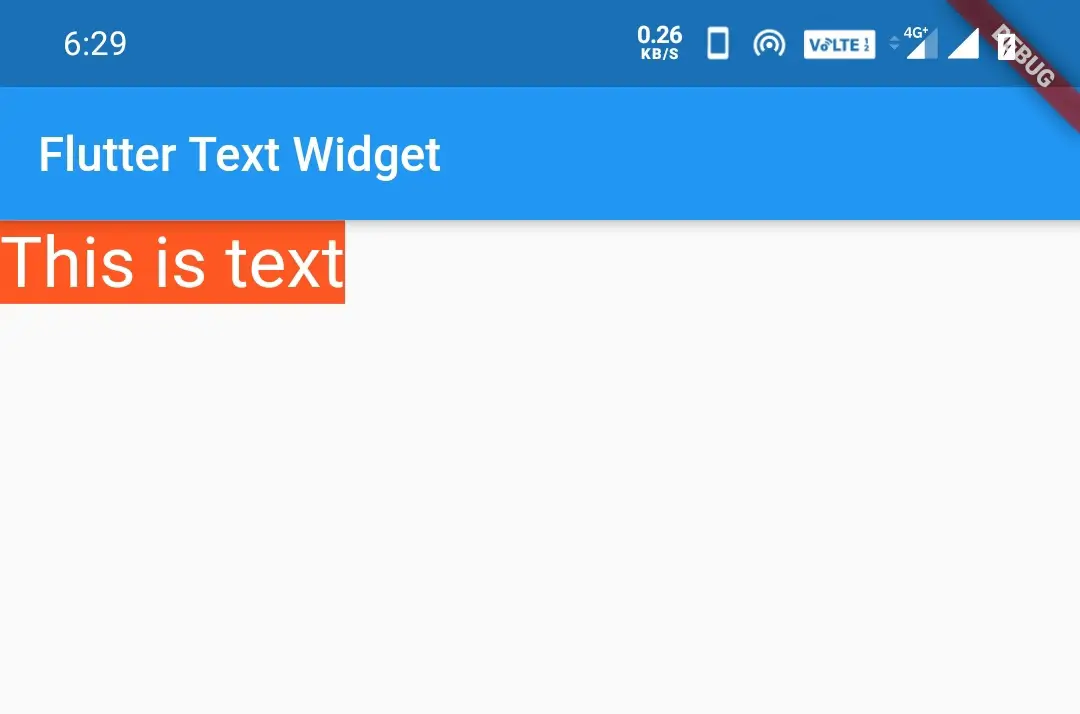
backgroundColor:
Used to define background color for the text.
Text("This is text",style: TextStyle(fontSize: 30, color: Colors.white,backgroundColor: Colors.deepOrange))
Output:
Also, read flutter text widget tutorial to know more about the text widget in detail.
Button
The button is another widget that is used in most of the flutter apps. Flutter offers different types of buttons. They are used in forms to submit information to severs. To perform some actions while the user clicks on it. We will use the raised button in the following examples.
import 'package:flutter/cupertino.dart';
import 'package:flutter/gestures.dart';
import 'package:flutter/material.dart';
void main() {
runApp(MyApp());
}
class MyApp extends StatelessWidget {
@override
Widget build(BuildContext context) {
return MaterialApp(
home: Scaffold(
appBar: AppBar(
title: Text("Flutter Button Widget"),
),
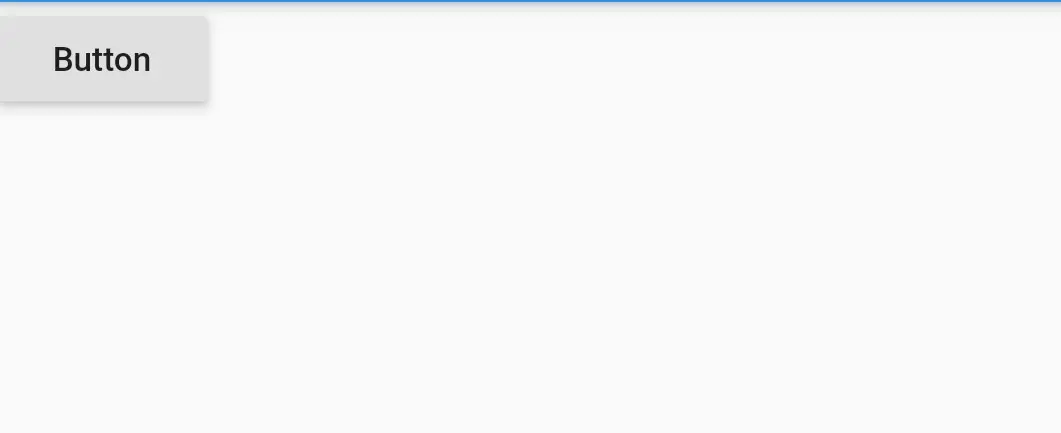
body: RaisedButton(
child: const Text('Button'),
)
),
);
}
}
Output:
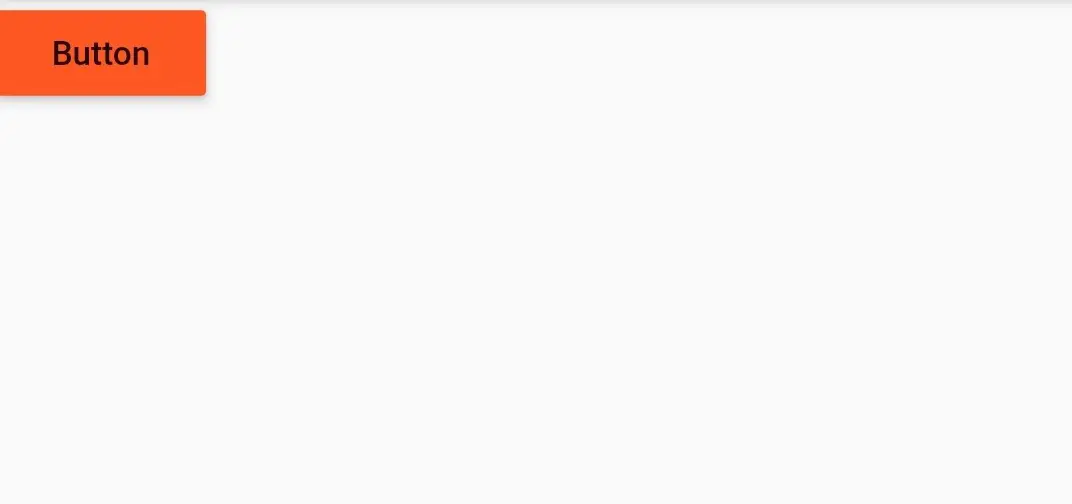
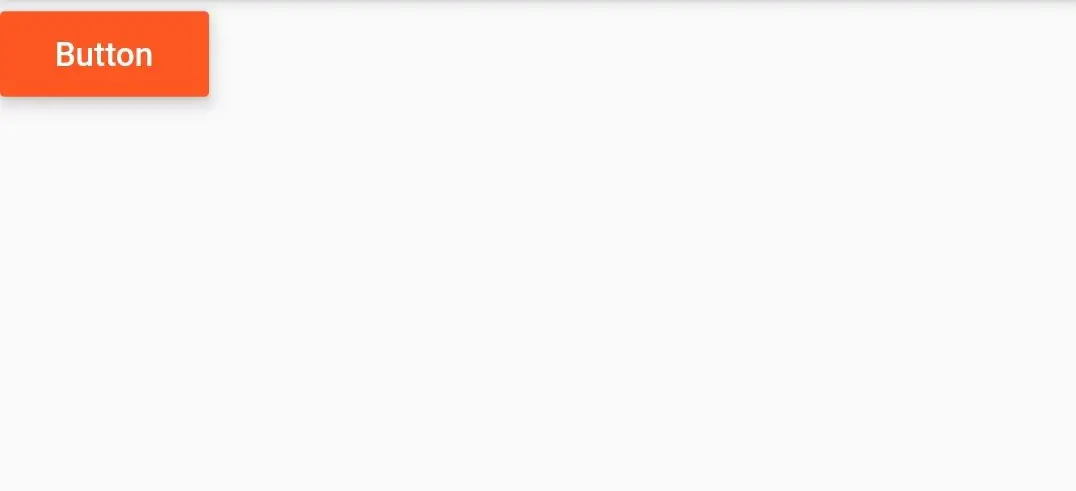
color:
Adds background color to the button.
RaisedButton(
          child: const Text('Button'),
          color: Colors.deepOrange,
          onPressed: () {
          },
        )
Output:
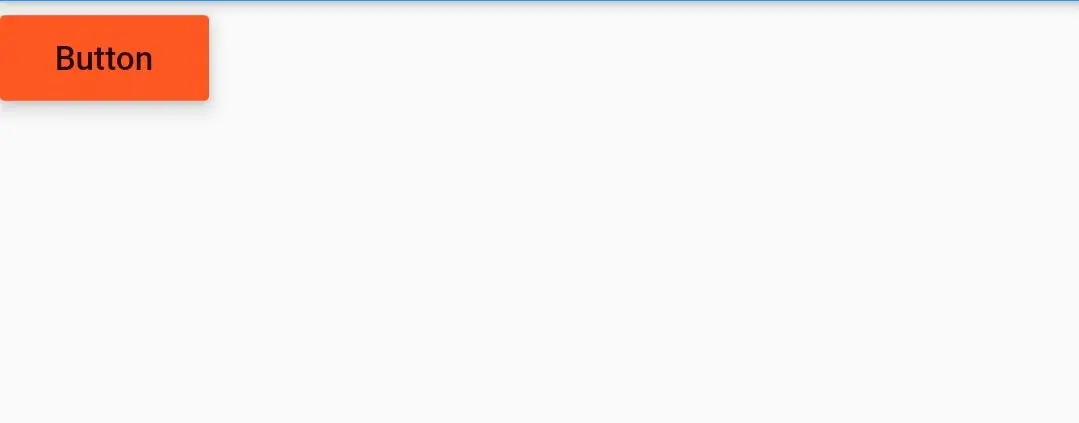
elevation:
Defines how much the button should rise.
RaisedButton(
          child: const Text('Button'),
          color: Colors.deepOrange,
          elevation: 6.0,
          onPressed: () {
          },
        )
Output:
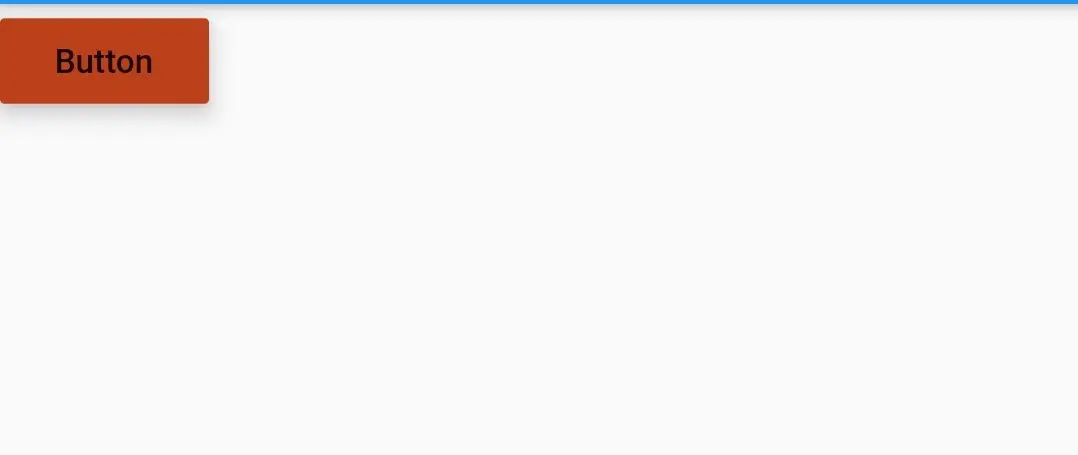
splashColor:
The color that is to be displayed when the button is clicked.
RaisedButton(
          child: const Text('Button'),
          color: Colors.deepOrange,
          elevation: 6.0,
          splashColor: Colors.black54,
          onPressed: () {
          },
        )
Output:
textColor:
To define the text color of the button.
 RaisedButton(
          child: const Text('Button'),
          color: Colors.deepOrange,
          elevation: 6.0,
          splashColor: Colors.black54,
          textColor: Colors.white,
          onPressed: () {
          },
        )
Output:
Also, read flutter RaisedButton widget example to know more about the button.
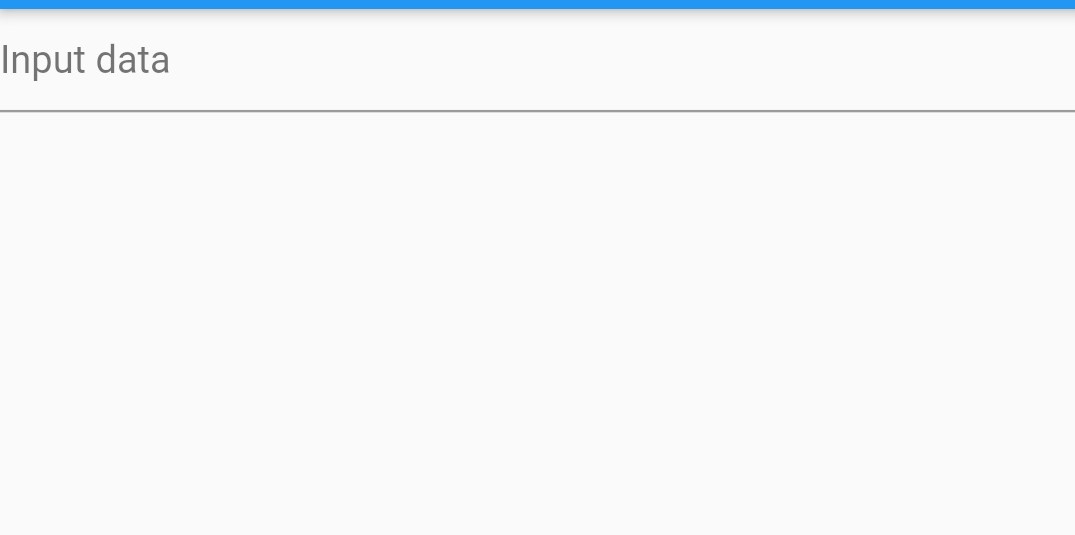
TextField
TextField is used to take input from the user. It is used in situations like filling forms, submitting feedback, etc. When the user clicks on this, the keyboard will automatically pop up.
import 'package:flutter/cupertino.dart';
import 'package:flutter/gestures.dart';
import 'package:flutter/material.dart';

void main() {
  runApp(MyApp());
}
class MyApp extends StatelessWidget {
  @override
  Widget build(BuildContext context) {
    return MaterialApp(
      home: Scaffold(
        appBar: AppBar(
          title: Text("Flutter Text Widget"),
        ),
        body: TextField(
        decoration: InputDecoration(
            hintText: 'Input data'
          ),
        )
      ),
    );
  }
}
Output:
inputBorder:
This is used to remove the input border that is below the textField.
TextField(
        decoration: InputDecoration(
            hintText: 'Input data',
            border: InputBorder.none
          ),
        )
Output:

hintStyle:
This is used to add color, font size, etc. to hint text.
TextField(
        decoration: InputDecoration(
            hintText: 'Input data',
            border: InputBorder.none,
            hintStyle: TextStyle(color: Colors.deepOrange),
          ),
        )
Output:
To know more about the TextField widget in detail read flutter TextField widget tutorial.
I have written an article about flutter layouts where you can explore more about layout widgets.
That’s all about flutter widgets in detail with example. Let’s explore each widget in detail in future articles. Have a great day!!
Do like and share if you find this article helpful. Thank you!!
Reference: Flutter Official Documentation.


Leave a Reply