
Flutter Stepper
Stepper is a material widget in flutter that displays progress in the form of steps. Stepper is useful if we have to collect a lot of data from the user. We can divide the queries into different steps so that it will be easy for the user to provide info. For example, while registering a user we might have to collect personal details, contact details & account details. In such cases we can use stepper.
Flutter provides a widget call Stepper which allows us to add a stepper to our application. In this tutorial you will learn how to use stepper widget in flutter. You will also learn how to customize a stepper widget and an example which demonstrates the usage of stepper widget.
Creating Stepper In Flutter
To create a stepper we have to call the constructor of the stepper class provided by flutter and provide required properties. There is one required property for stepper widget which is steps. The value for this property should be a list whose children are step widgets. Let’s see the constructor of stepper class.
Flutter Stepper Constructor :
 Stepper(
    {Key? key,
    required List<Step> steps,
    ScrollPhysics? physics,
    StepperType type,
    int currentStep,
    ValueChanged<int>? onStepTapped,
    VoidCallback? onStepContinue,
    VoidCallback? onStepCancel,
    ControlsWidgetBuilder? controlsBuilder}
)
Basic implementation of stepper widget.
Stepper(
          steps: [
            step(),
            step(),
            .....
          ],
        )
As we need to provide list of step widgets as children for a stepper, let’s see how to use a step widget in flutter and its properties.
Flutter Step
Step is a material widget in flutter which is intended to be used as child in Stepper. The step can have a title and subtitle, an icon within its circle, some content and a state that governs its styling. To create a step we have to call its constructor and provide required properties.
Flutter Step Constructor :
Step(
   {required Widget title,
   Widget? subtitle,
   required Widget content,
   StepState state,
   bool isActive}
)
Flutter Step Properties
The properties of a step are:
- title: Use this property to set title to the step. This property is a required property and accepts widget as value. Usually a text widget.
- subtitle: Use this property to add subtitle to the step. It accepts widget as value. Usually a text widget.
- content: We will use this property to provide content of the step. It is a required property and accepts any widget a value.
- state: Use this property to set the state of the step like completed, disabled, editing, indexed, error. Based on the state the icons will change.
- isActive: Use this property to indicate whether the step is active or inactive. It accepts boolean as value.
Now, let’s create a step and provide required properties.
Stepper(
          steps: [
            Step(
              title: new Text('Login Info'),
              content: Column(
                children: <Widget>[
                  TextFormField(
                    decoration: InputDecoration(labelText: 'Email Address'),
                  ),
                  TextFormField(
                    decoration: InputDecoration(labelText: 'Password'),
                  ),
                ],
              ),
              isActive: true,
              state: StepState.editing
            ),
          ],
        )
Output :

Note : Each step will automatically create continue and cancel controls which will help in moving between steps. Continue will take you to next step where cancel will take to previous step.
Now that we know what is a step and how to create a step, let’s see the properties of stepper widget.
Flutter Stepper Properties
The properties of a stepper are :
- steps
- type
- currentStep
- onStepTapped
- onStepContinue
- onStepCancel
- controlsBuilder
steps
Accepts a list of step widgets as value. Use this property to provide steps to the stepper.
Stepper(
          steps: [
            Step(),
            Step(),
          ]
        )
type
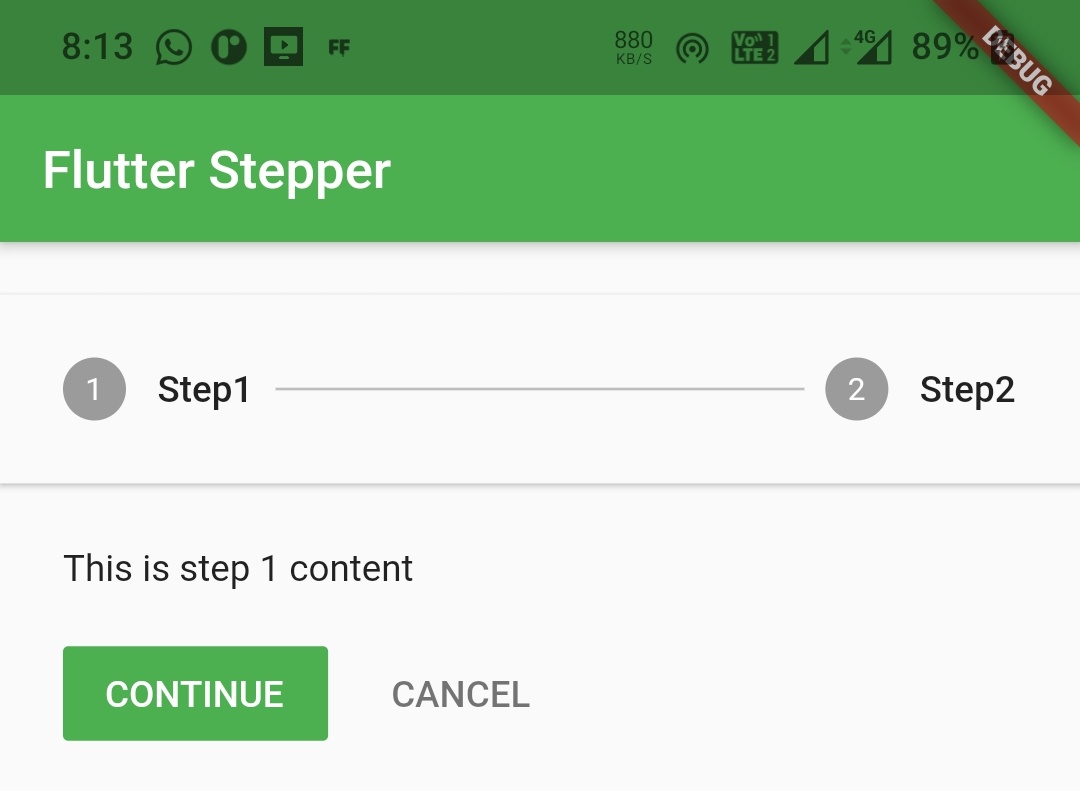
Accepts a StepperType as value. It is used to change the orientation of the stepper like horizontal / vertical. By default it is horizontal.
Stepper(
          steps: [
            Step(
              title: Text("Step1"),
              content: Text("This is step 1 content"),
            ),
            Step(
                title: Text("Step2"),
                content: Text("This is step 2 content")
            )
          ],
          type: StepperType.horizontal,
)
Output :
currentStep
Accepts int as value. Use this property to update which step is currently active.
Stepper(
          steps: [
            Step(
              title: Text("Step1"),
              content: Text("This is step 1 content"),
            ),
            Step(
                title: Text("Step2"),
                content: Text("This is step 2 content")
            )
          ],
          type: StepperType.horizontal,
          currentStep: 0,
)
onStepTapped
It is a callback which gets invoked when we tap on a step. You have to Implement the logic for moving to the step tapped by the user inside this callback. This callback will return the step number that is tapped so that we can update which step is active.
Stepper(
          steps: [
            Step(
              title: Text("Step1"),
              content: Text("This is step 1 content"),
            ),
            Step(
                title: Text("Step2"),
                content: Text("This is step 2 content")
            )
          ],
          type: StepperType.horizontal,
          currentStep: 0,
          onStpTapped: (int step){

          }
)
onStepContinue
It is a callback that gets invoked when we tap on continue control of a step. You have to Implement the logic for moving to the next step inside this callback.
Stepper(
          steps: [
            Step(
              title: Text("Step1"),
              content: Text("This is step 1 content"),
            ),
            Step(
                title: Text("Step2"),
                content: Text("This is step 2 content")
            )
          ],
          type: StepperType.horizontal,
          currentStep: 0,
          onStpTapped: (int step){

          },
          onStepContinue: (){

          }
)
onStepCancel
It is a callback that gets invoked when we tap on cancel control of a step. You have to Implement the logic for moving to the previous step inside this callback.
Stepper(
          steps: [
            Step(
              title: Text("Step1"),
              content: Text("This is step 1 content"),
            ),
            Step(
                title: Text("Step2"),
                content: Text("This is step 2 content")
            )
          ],
          type: StepperType.horizontal,
          currentStep: 0,
          onStpTapped: (int step){

          },
          onStepContinue: (){

          },
          onStepCancel: (){

          },
)
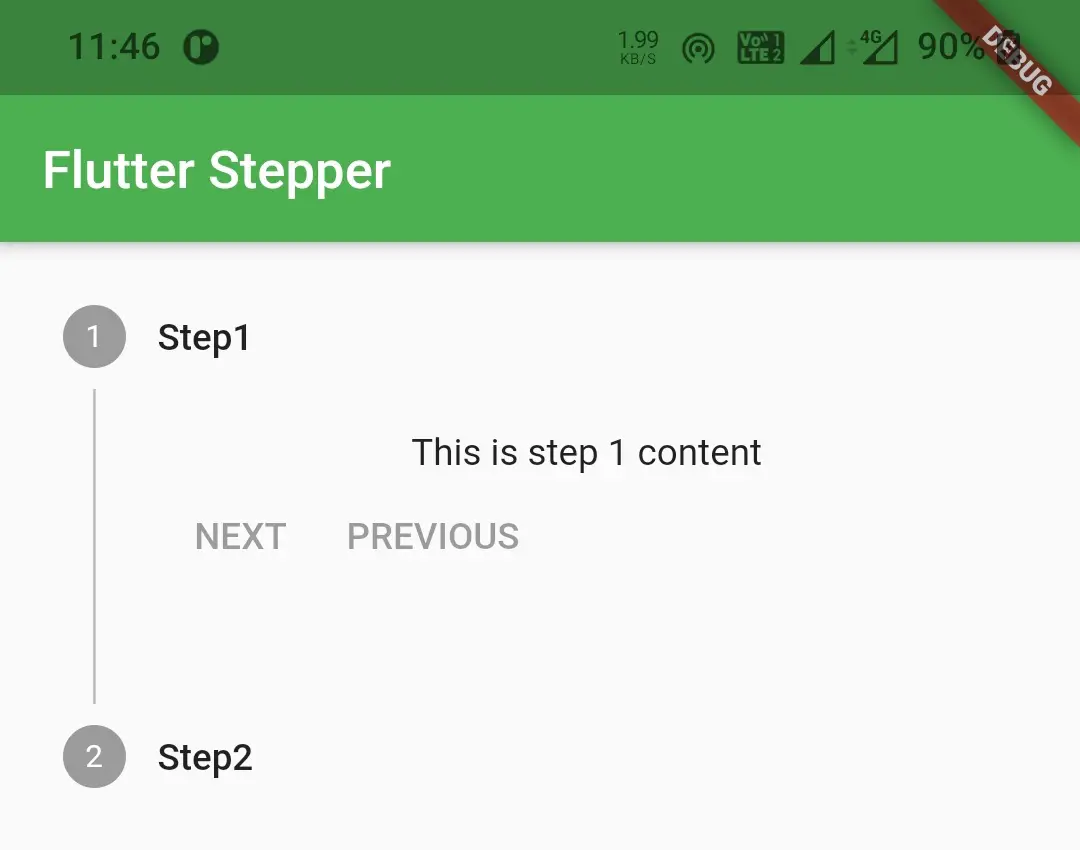
controlsBuilder
We will use this property if we want to add our custom text to step’s continue and cancel controls.
Stepper(
        steps: [
          Step(
            title: Text("Step1"),
            content: Text("This is step 1 content"),
          ),
          Step(
            title: Text("Step2"),
            content: Text("This is step 2 content")
          )
        ],
        currentStep: currentStep,
        controlsBuilder: (context, {onStepCancel, onStepContinue}) {
          return Row(
            children: <Widget>[
              TextButton(
                onPressed: onStepContinue,
                child: const Text('NEXT'),
              ),
              TextButton(
                onPressed: onStepCancel,
                child: const Text('PREVIOUS'),
              ),
            ],
          );
        },
      ),
Output :
Flutter Stepper Example
Let’s have an example which demonstrates the usage of stepper widget in flutter. In this example we will create a stepper which will guide a user through the process of registering in an application. The process involves three steps where the user have to provide personal info, address info and bank details. To maintain the currently active step info we will create a variable currentStep and set it to 0. Whenever the user taps a step, continue or cancel we will update this value.
int currentStep = 0;
Create a function getSteps() which returns a List of type step. Inside this function we will return a list containing our steps.
List<Step> getSteps()
  {
    return[
      Step(
        title: new Text('Personal Info'),
        content: Column(
          children: <Widget>[
            TextFormField(
              decoration: InputDecoration(labelText: 'Name'),
            ),
            TextFormField(
              decoration: InputDecoration(labelText: 'Email Address'),
            ),
          ],
        ),
        isActive: currentStep >= 0,
        state: currentStep == 0 ?
        StepState.editing : StepState.complete,
      ),
      Step(
        title: new Text('Address Details'),
        content: Column(
          children: <Widget>[
            TextFormField(
              decoration: InputDecoration(labelText: 'Home Address'),
            ),
            TextFormField(
              decoration: InputDecoration(labelText: 'Mobile No'),
            ),
          ],
        ),
        isActive: currentStep >= 1,
        state: currentStep == 1 ?
        StepState.editing : currentStep < 1 ? StepState.disabled: StepState.complete,
      ),
      Step(
        title: new Text("Bank Details"),
        content: Column(
          children: <Widget>[
            TextFormField(
              decoration: InputDecoration(labelText: 'Account No'),
            ),
            TextFormField(
              decoration: InputDecoration(labelText: 'IFSC Code'),
            ),
          ],
        ),
        isActive:currentStep >= 2,
        state: currentStep == 2 ?
        StepState.editing : currentStep < 2 ? StepState.disabled: StepState.complete,
      ),
    ];
  }
Now, Let’s add stepper widget to the body of scaffold. Provide the above function to the steps property & currentStep variable created above to currentStep property of stepper. We will also implement the logic for onStepTapped, onStepContinue & onStepCancel callbacks.
return Scaffold(
      appBar: AppBar(
        title: Text("Flutter Stepper"),
      ),
      body: Stepper(
        steps:getSteps(),
        currentStep: currentStep,
        onStepTapped: (int step)
        {
          setState(() {
            currentStep = step;
          });
        },
        onStepCancel: ()
        {
          currentStep > 0 ?
          setState(() => currentStep -= 1) : null;
        },
        onStepContinue: ()
        {
          currentStep < 2 ?
          setState(() => currentStep += 1): null;
        },
      ),
    );
Let’s get all the above code snippets together to complete our stepper example in flutter.
import 'package:flutter/material.dart';

void main() {
  runApp(MyApp());
}

class MyApp extends StatelessWidget {
  @override
  Widget build(BuildContext context) {
    return MaterialApp(
      title: 'Flutter App Learning',
      theme: ThemeData(
        primarySwatch: Colors.green,
      ),
      home: MyHomePage()
    );
  }
}

class MyHomePage extends StatefulWidget {
  MyHomePage({Key? key}) : super(key: key);
  @override
  _MyHomePageState createState() => _MyHomePageState();
}

class _MyHomePageState extends State<MyHomePage> {
  int currentStep = 0;
  @override
  Widget build(BuildContext context) {
    return Scaffold(
      appBar: AppBar(
        title: Text("Flutter Stepper"),
      ),
      body: Stepper(
        steps:getSteps(),
        currentStep: currentStep,
        onStepTapped: (int step)
        {
          setState(() {
            currentStep = step;
          });
        },
        onStepCancel: ()
        {
          currentStep > 0 ?
          setState(() => currentStep -= 1) : null;
        },
        onStepContinue: ()
        {
          currentStep < 2 ?
          setState(() => currentStep += 1): null;
        },
      ),
    );
  }

  List<Step> getSteps()
  {
    return[
      Step(
        title: new Text('Personal Info'),
        content: Column(
          children: <Widget>[
            TextFormField(
              decoration: InputDecoration(labelText: 'Name'),
            ),
            TextFormField(
              decoration: InputDecoration(labelText: 'Email Address'),
            ),
          ],
        ),
        isActive: currentStep >= 0,
        state: currentStep == 0 ?
        StepState.editing : StepState.complete,
      ),
      Step(
        title: new Text('Address Details'),
        content: Column(
          children: <Widget>[
            TextFormField(
              decoration: InputDecoration(labelText: 'Home Address'),
            ),
            TextFormField(
              decoration: InputDecoration(labelText: 'Mobile No'),
            ),
          ],
        ),
        isActive: currentStep >= 1,
        state: currentStep == 1 ?
        StepState.editing : currentStep < 1 ? StepState.disabled: StepState.complete,
      ),
      Step(
        title: new Text("Bank Details"),
        content: Column(
          children: <Widget>[
            TextFormField(
              decoration: InputDecoration(labelText: 'Account No'),
            ),
            TextFormField(
              decoration: InputDecoration(labelText: 'IFSC Code'),
            ),
          ],
        ),
        isActive:currentStep >= 2,
        state: currentStep == 2 ?
        StepState.editing : currentStep < 2 ? StepState.disabled: StepState.complete,
      ),
    ];
  }
}
Output :
That brings an end to the tutorial on how to create a stepper in flutter. We have also seen an example on how to add and use Stepper widget in our flutter project. Let’s catch up with some other widget in the next post. Have a great day !!
Do like & share my facebook page. Subscribe to newsletter if you find this post helpful. Thank you !!
Reference : Flutter Official Documentation.


Hello codesinsider,
I like your articles it was so simple and quickly understandable.
I have a request to your team can you post articles on Google Maps with null safety like google Map, styles, markers, route directions, Places auto-complete, getting geo coordinates by placing a marker on the map.
as a beginner, it become difficult to understand all these concepts Since your posts are very simple to understand so I requesting you to provide more articles on this.
It will be helpful to me and all who are started with flutter.
Thank You
Your Lovely follower.
Thank you so much shanmukha. I appreciate your comments and I’m glad you like my content. And I will definitely work on the concepts you mentioned.