
In this android AutoCompleteTextView, example tutorial you will learn what is autocompletetextview.We will see how to implement it in android studio with examples.
Android AutoCompleteTextView
Android AutoCompleteTextView is a TextView that can be editable which is similar to EditText.What makes it different is it displays a drop down with list of suggestions based on user input.The user can choose an item from the list or continue to type manually.
Check this android UI controls tutorial to know more about UI controls
Creating AutoCompleteTextView in Android
Creating AutoCompleteTextView in android can be done in two ways.One is to define it in XML(layout)file.The other way is creating an object of it in Java programatically.
Creating AutoCompleteTextView in XML(layout)
<?xml version="1.0" encoding="utf-8"?>
<LinearLayout
    xmlns:android="http://schemas.android.com/apk/res/android"
    android:layout_width="match_parent"
    android:layout_height="match_parent"
    android:orientation="vertical"
    android:background="@color/white"
    android:id="@+id/layout"
    android:padding="20dp">


   <AutoCompleteTextView
       android:id="@+id/auto"
       android:layout_width="match_parent"
       android:layout_height="wrap_content"
       android:hint="search mobiles"/>

</LinearLayout>
Creating AutoCompleteTextView in JAVA(Programatically)
package androidlaouts.codesinsider.com.androidlayouts;

import android.graphics.Color;
import android.graphics.Typeface;
import android.support.v7.app.AppCompatActivity;
import android.os.Bundle;
import android.text.Html;
import android.view.Gravity;
import android.view.View;
import android.widget.AutoCompleteTextView;
import android.widget.Button;
import android.widget.CompoundButton;
import android.widget.EditText;
import android.widget.LinearLayout;
import android.widget.TextView;
import android.widget.Toast;
import android.widget.ToggleButton;

public class LayoutExample extends AppCompatActivity {
    @Override
    protected void onCreate(Bundle savedInstanceState) {
        super.onCreate(savedInstanceState);
        setContentView(R.layout.android_ui);

        AutoCompleteTextView textView = new AutoCompleteTextView(this);
        LinearLayout layout = findViewById(R.id.layout);
        layout.addView(textView);
    }
}
To display the suggestions for AutoCompleteTextView, we need to set the value for threshold attribute.Threshold value is nothing but the number of charecters after which the suggestions should appear.
Eg : Threshold = 2 makes the AutoCompleteTextView display a list of suggestions only after the user types 2 charecters.
The list of suggestions for AutoCompleteTextView will be populated form data adapter.
Generally AutoCompleteTextView is used to display text values so we will use ArrayAdapter for populating the suggestions list.
Android ArrayAdapter
In android ArraAdapter is used to display single type of data backed by an array like list of names, list of numbers, books etc.
Code snippet for array adapter in JAVA
ArrayAdapter(context context, layout resource, array of data);
Getting value from AutoCompleteTextView
AutoCompleteTextView textView = new AutoCompleteTextView(this);
String text = textView.getText().toString();
Android AutoCompleteTextview Attributes
Since AutoCompleteTextView is subclass of EditText we can inherit all the properties of EditText to AutocompleteTextview.So all the attributes of EditText will work for AutoCompleteTextView.
Refer Android EditText Attributes section of this Android EditText example Tutorial.
Item Click Listener & Item SelectedListener
Whenever the user clicks an item from the dropdown list it triggers a click event and the OnItemClickListener() method on AutoCompleteTextView object listens the click event and executes the code inside onItemClick() method.
In case of an AutoCompleteTextView the OnItemSelectedListener() is similar to OnItemClickListener() since clicking and selecting almost does the same thing which is getting data of that selected item.
Code snippet for ItemClickListener
final AutoCompleteTextView textView = findViewById(R.id.auto);
textView.setOnItemClickListener(new AdapterView.OnItemClickListener() {
        @Override
        public void onItemClick(AdapterView<?> adapterView, View view, int position, long l) {
                //your logic here
        }
});
Code snippet for ItemSelectedListener
final AutoCompleteTextView textView = findViewById(R.id.auto);
textView.setOnItemSelectedListener(new AdapterView.OnItemSelectedListener() {
        @Override
        public void onItemSelected(AdapterView<?> adapterView, View view, int postion, long l) {
                //your logic here
            }

        @Override
        public void onNothingSelected(AdapterView<?> adapterView) {

        }
});
Android AutocompleteTextView Example
Lets see an example of implementing AutocompleteTextview where we bind a list of courses to AutoCompleteTextView and displaing the course name that was clicked by the user in a Toast message.
First we have to declare AutoCompletetextView in XML so lets do it.
Creating AutoCompleteTextView in XML
   <AutoCompleteTextView
       android:id="@+id/auto"
       android:layout_width="match_parent"
       android:layout_height="wrap_content"
       android:hint="search courses"/>
Now that we have declared AutocompleteTextView in XML we have to use that in java to set data.
final AutoCompleteTextView textView = findViewById(R.id.auto);
We have to create an array of data which we want to display as suggestions.
Declaring an array of data in Activity(JAVA)
String [] tech = {"java", "android","html", "css", "ios", "nodejs", "angular", "python"};
Now we have to create an arrayAdapter and bind the string array to arrayAdapter.
ArrayAdapter adapter = new ArrayAdapter(this, android.R.layout.simple_list_item_1,tech);
Now set the adapter to AutoCompleteTextView object and set threshold
textView.setAdapter(adapter);
textView.setThreshold(1);
Implementing clickListener on AutoCompleteTextView object and displaying a toast message when the user clicks on any item from the suggestions.
textView.setOnItemClickListener(new AdapterView.OnItemClickListener() {
    @Override
    public void onItemClick(AdapterView<?> adapterView, View view, int i, long l) {
            String text = textView.getText().toString();
            Toast.makeText(LayoutExample.this, text, Toast.LENGTH_SHORT).show();
        }
});
The final XML file will look like this
<?xml version="1.0" encoding="utf-8"?>
<LinearLayout
    xmlns:android="http://schemas.android.com/apk/res/android"
    android:layout_width="match_parent"
    android:layout_height="match_parent"
    android:orientation="vertical"
    android:background="@color/white"
    android:id="@+id/layout"
    android:padding="20dp">

   <AutoCompleteTextView
       android:id="@+id/auto"
       android:layout_width="match_parent"
       android:layout_height="wrap_content"
       android:hint="search courses"/>

</LinearLayout>
The final Activity(JAVA) file will look like this
package androidlaouts.codesinsider.com.androidlayouts;

import android.graphics.Color;
import android.graphics.Typeface;
import android.support.v7.app.AppCompatActivity;
import android.os.Bundle;
import android.text.Html;
import android.view.Gravity;
import android.view.View;
import android.widget.AdapterView;
import android.widget.ArrayAdapter;
import android.widget.AutoCompleteTextView;
import android.widget.Button;
import android.widget.CompoundButton;
import android.widget.EditText;
import android.widget.LinearLayout;
import android.widget.TextView;
import android.widget.Toast;
import android.widget.ToggleButton;

public class LayoutExample extends AppCompatActivity {

    String [] tech = {"java", "android","html", "css", "ios", "nodejs", "angular", "python"};
    @Override
    protected void onCreate(Bundle savedInstanceState) {
        super.onCreate(savedInstanceState);
        setContentView(R.layout.android_ui);

        final AutoCompleteTextView textView = findViewById(R.id.auto);
        ArrayAdapter adapter = new ArrayAdapter(this, android.R.layout.simple_list_item_1,tech);
        textView.setThreshold(1);
        textView.setAdapter(adapter);
        textView.setOnItemClickListener(new AdapterView.OnItemClickListener() {
            @Override
            public void onItemClick(AdapterView<?> adapterView, View view, int i, long l) {
                String text = textView.getText().toString();
                Toast.makeText(LayoutExample.this, text, Toast.LENGTH_SHORT).show();
                }
        });
    }
}
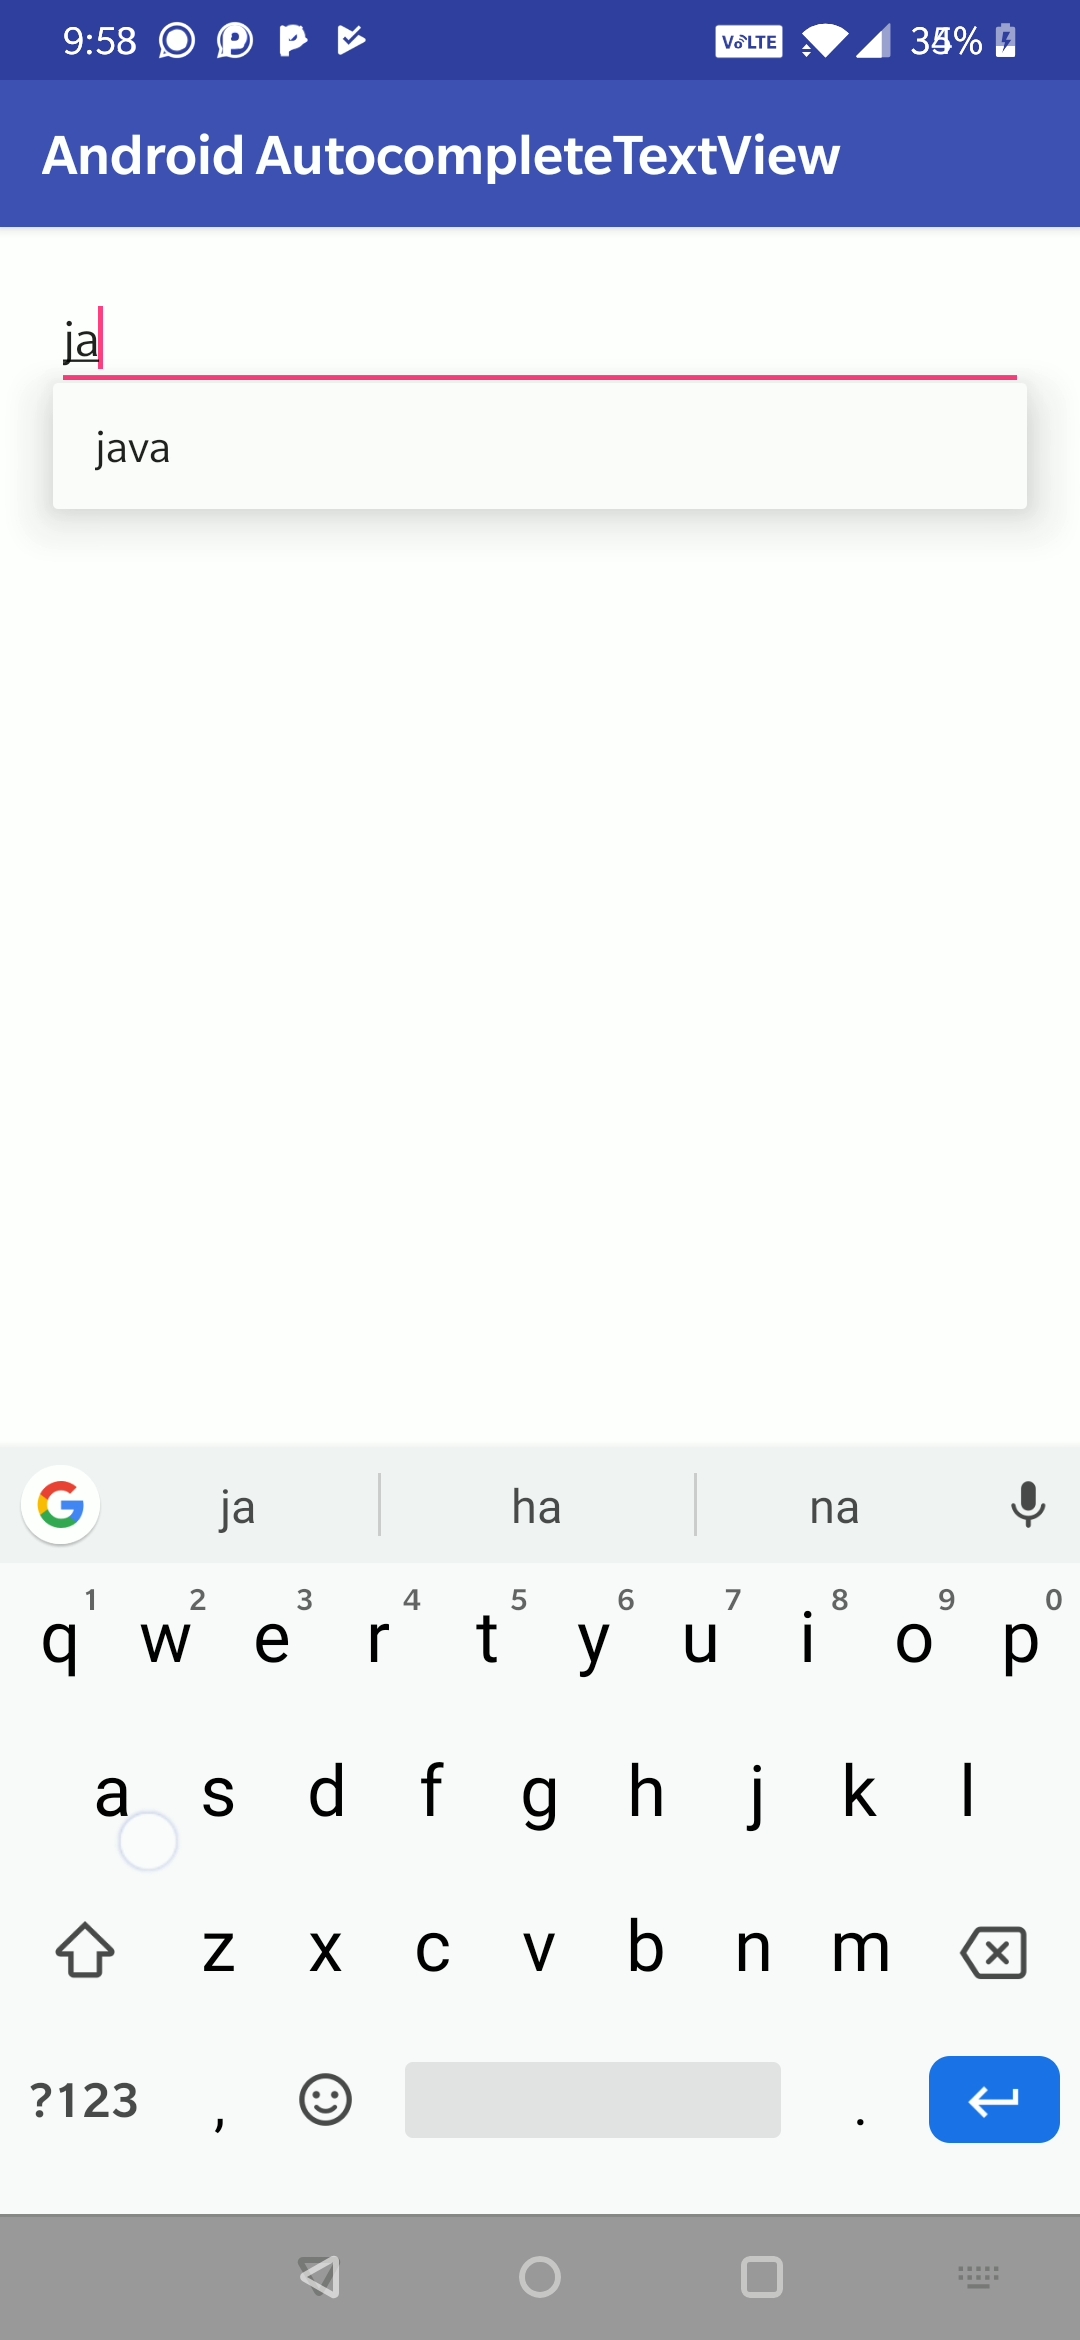
Output for the above code snippets
This bring an end to Android AutoCompleteTetView example tutorial.We will learn some other user interface control in next article.Have a great day!!
Do like and share if you find this post helpful.Thank you!!
Reference: Android Official Documentation.


Leave a Reply