Flutter Row and Column
Row and Column widgets are very useful in designing Flutter Layouts. We can do most of the layout designs using row and Column widgets. We will use a row widget if we want to arrange elements horizontally and a column widget to arrange the elements vertically.
In this tutorial, we will learn how to use row and column widgets in flutter with example. w will also customize the widgets with different properties.
Row Widget In Flutter
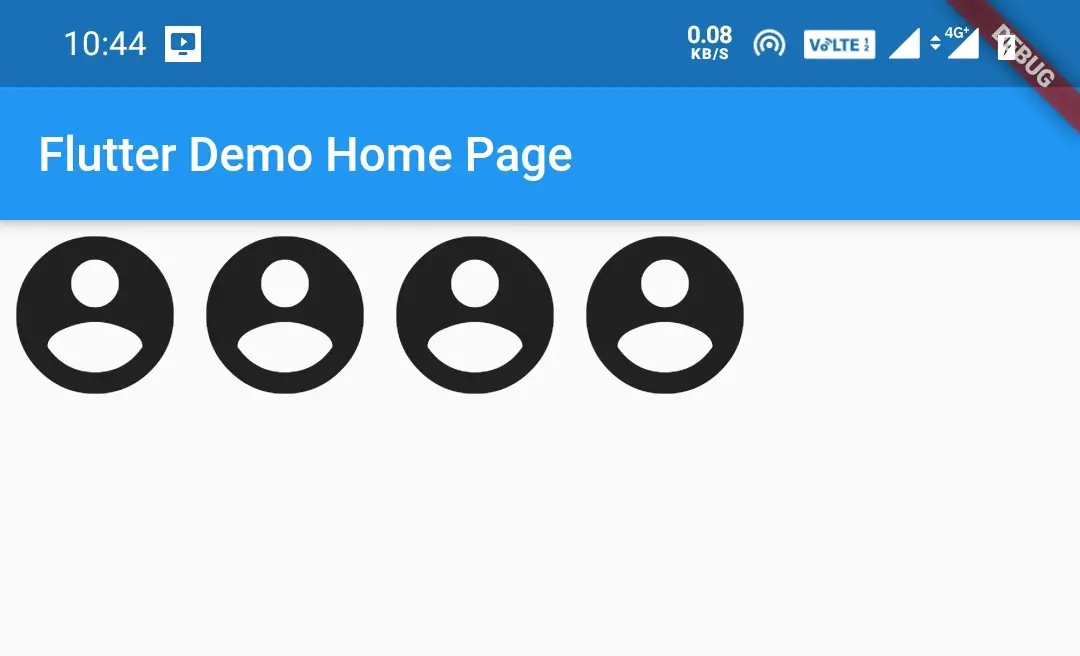
A Row is a widget in flutter that displays its children side by side horizontally. If we want a child of the row to expand to full width we have to wrap it in an Expanded widget. A row widget cannot scroll. If you want to display a list of widgets and want them to scroll if there is not enough space consider using listview instead.
Row(
        children:<Widget> [
          Icon(Icons.account_circle,size: 80,),
          Icon(Icons.account_circle,size: 80,),
          Icon(Icons.account_circle,size: 80,),
          Icon(Icons.account_circle,size: 80,),
        ],
      ),
Column Widget In Flutter
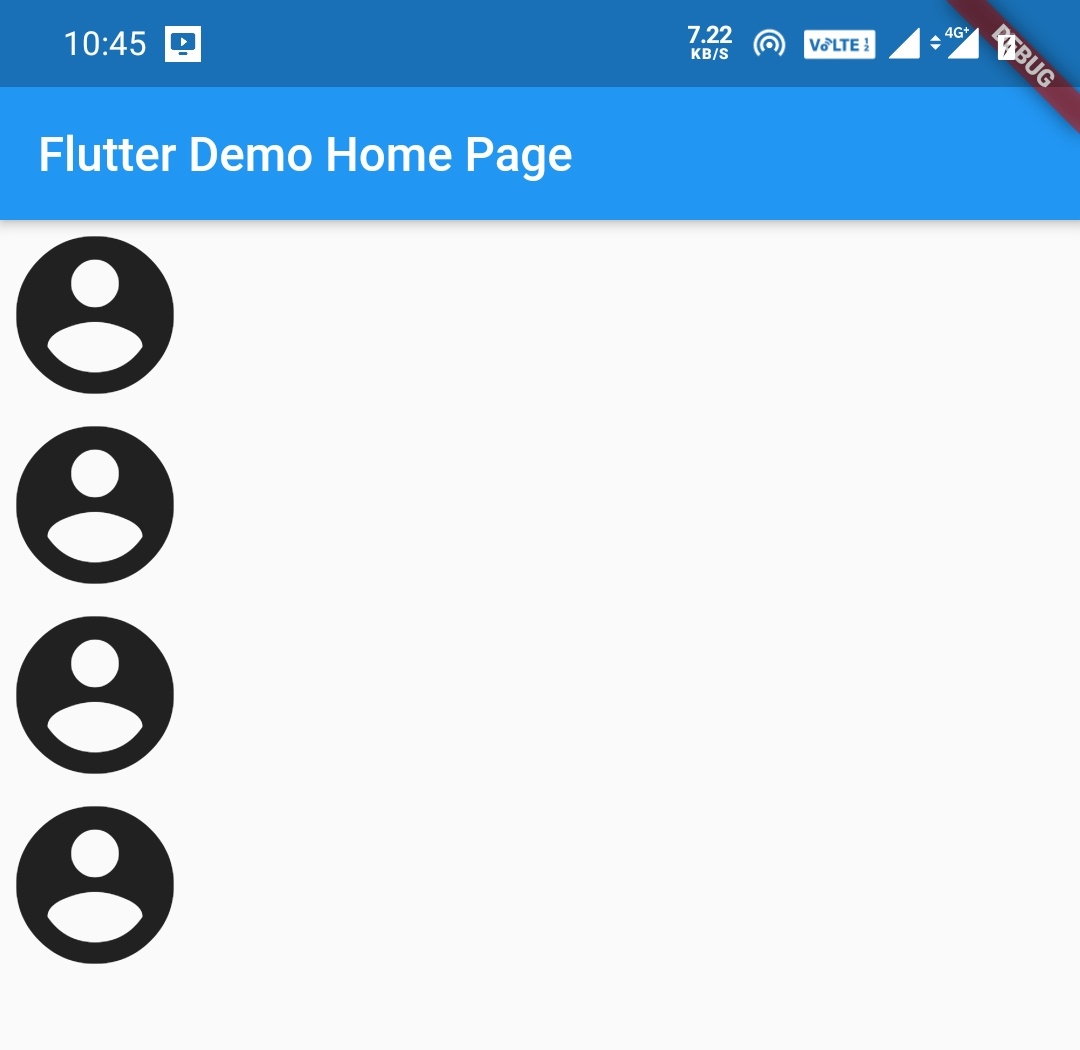
A Column is a widget in flutter that displays its children one after another in the vertical direction. If we want a child of the column to expand to the full height we have to wrap it in an Expanded widget. A column widget cannot scroll. If you want to display a list of widgets and want them to scroll if there is not enough space consider using listview instead.
Column(
        children:<Widget> [
          Icon(Icons.account_circle,size: 80,),
          Icon(Icons.account_circle,size: 80,),
          Icon(Icons.account_circle,size: 80,),
          Icon(Icons.account_circle,size: 80,),
        ],
      ),
Both Row and Column in flutter have everything in common so let’s work with both of them at the same time.
How To Create Row & Column in flutter ?
We can create a row or column widget by calling their constructors and providing the required properties. Let’s have a look at the constructors of row and column widgets.
Row Constructor:
Row(

    {Key? key,
    MainAxisAlignment mainAxisAlignment = MainAxisAlignment.start,
    MainAxisSize mainAxisSize = MainAxisSize.max,
    CrossAxisAlignment crossAxisAlignment = CrossAxisAlignment.center,
    TextDirection? textDirection,
    VerticalDirection verticalDirection = VerticalDirection.down,
    TextBaseline? textBaseline,
    List<Widget> children = const <Widget>[]}

)
Column Constructor:
Column(

    {Key? key,
    MainAxisAlignment mainAxisAlignment = MainAxisAlignment.start,
    MainAxisSize mainAxisSize = MainAxisSize.max,
    CrossAxisAlignment crossAxisAlignment = CrossAxisAlignment.center,
    TextDirection? textDirection,
    VerticalDirection verticalDirection = VerticalDirection.down,
    TextBaseline? textBaseline,
    List<Widget> children = const <Widget>[]}

)
Flutter Row & Column Properties
The properties of row and column widgets are the same. Let’s see them below.
- mainAxisAlignment
- mainAxisSize
- crossAxisAlignment
- textDirection
- verticalDirection
- txtBaseline
- children
Flutter Row and Column Widgets MainAxisAlignment
For a row MainAxis is from left to right which is horizontal and for the column, it’s top to bottom which is vertical.
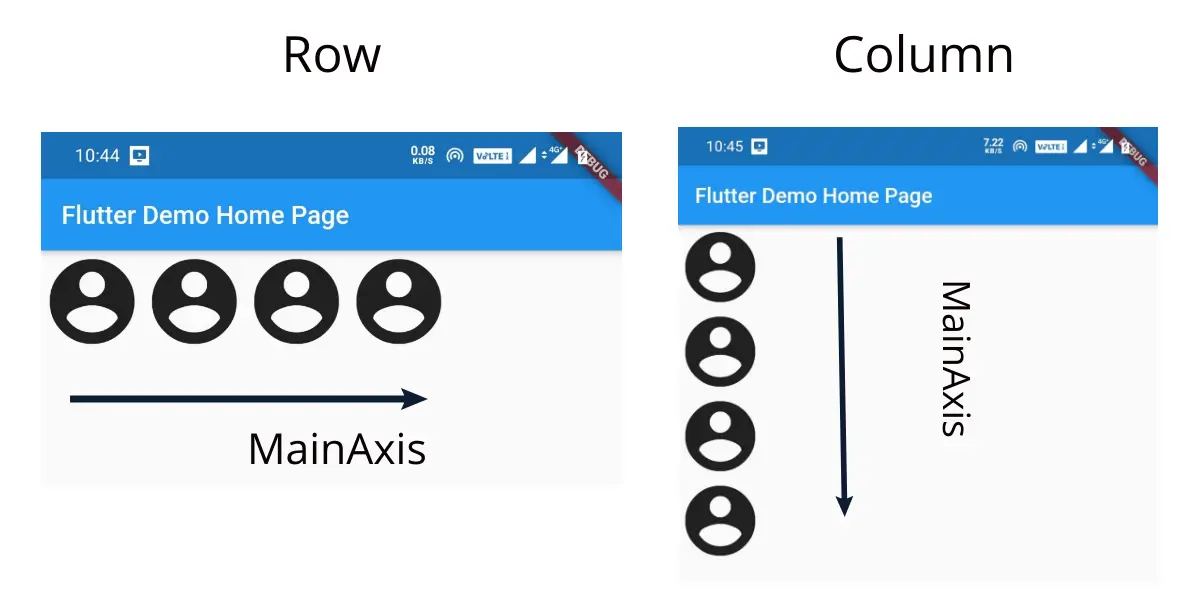
MainAxisAlignment has so many values so let’s have a look at them with examples.
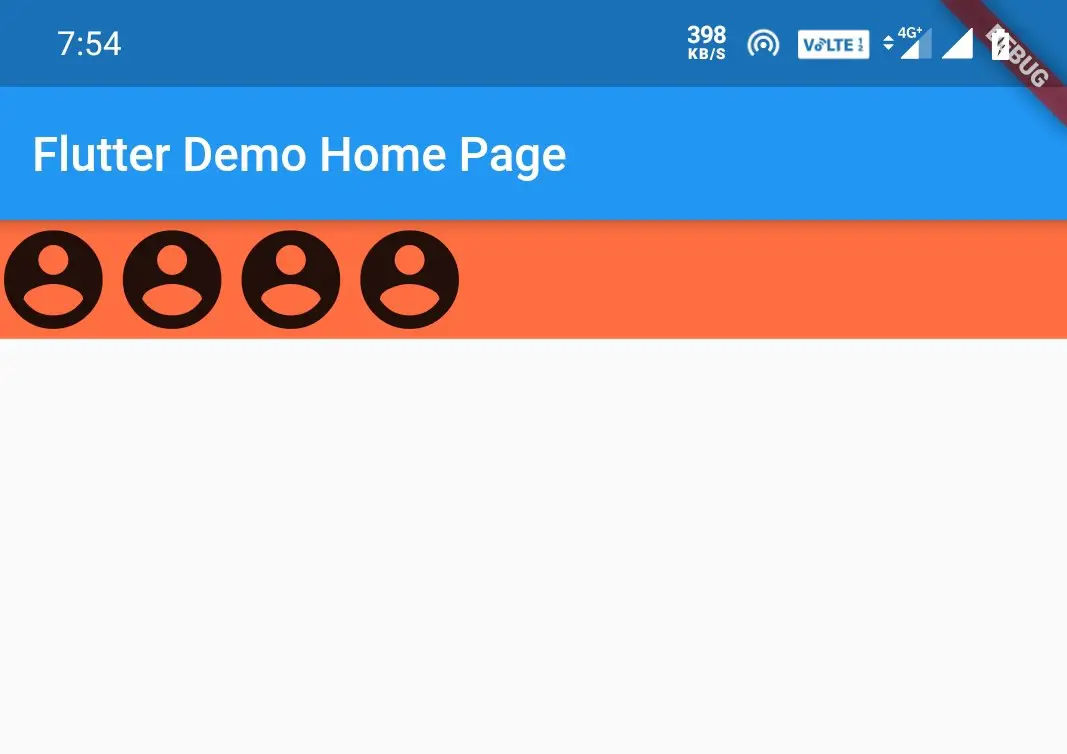
MainAxisAlignment.start
Row
This will make the children align horizontally at the start/left.
Container(
        color: Colors.deepOrangeAccent,
        child:Row(
        mainAxisAlignment: MainAxisAlignment.start,
        children: <Widget>[
          Icon(Icons.account_circle, size: 50),
          Icon(Icons.account_circle, size: 50),
          Icon(Icons.account_circle, size: 50),
          Icon(Icons.account_circle, size: 50),
        ],
      ),
      ),
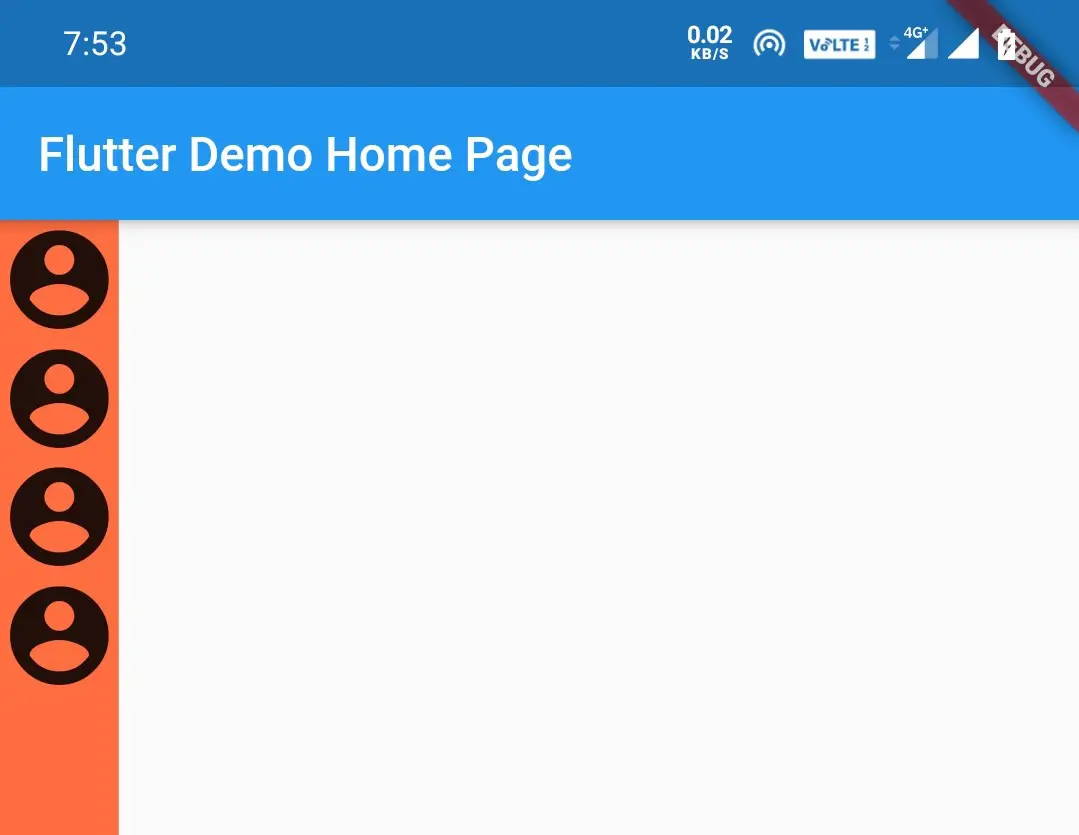
Column
This will make the children align Vertically at the top.
Container(
        color: Colors.deepOrangeAccent,
        child:Column(
        mainAxisAlignment: MainAxisAlignment.start,
        children: <Widget>[
          Icon(Icons.account_circle, size: 50),
          Icon(Icons.account_circle, size: 50),
          Icon(Icons.account_circle, size: 50),
          Icon(Icons.account_circle, size: 50),
        ],
      ),
      ),
MainAxisAlignment.center
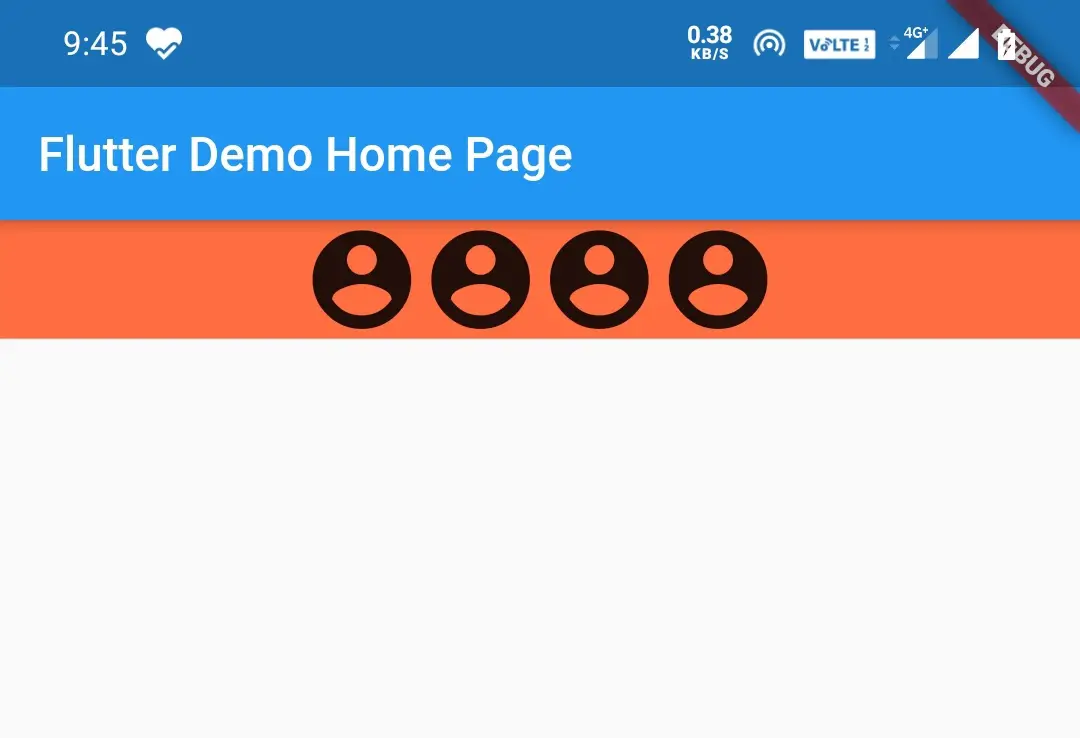
Row
This will make the children align horizontally in the center.
Container(
        color: Colors.deepOrangeAccent,
        child:Row(
        mainAxisAlignment: MainAxisAlignment.center,
        children: <Widget>[
          Icon(Icons.account_circle, size: 50),
          Icon(Icons.account_circle, size: 50),
          Icon(Icons.account_circle, size: 50),
          Icon(Icons.account_circle, size: 50),
        ],
      ),
      ),
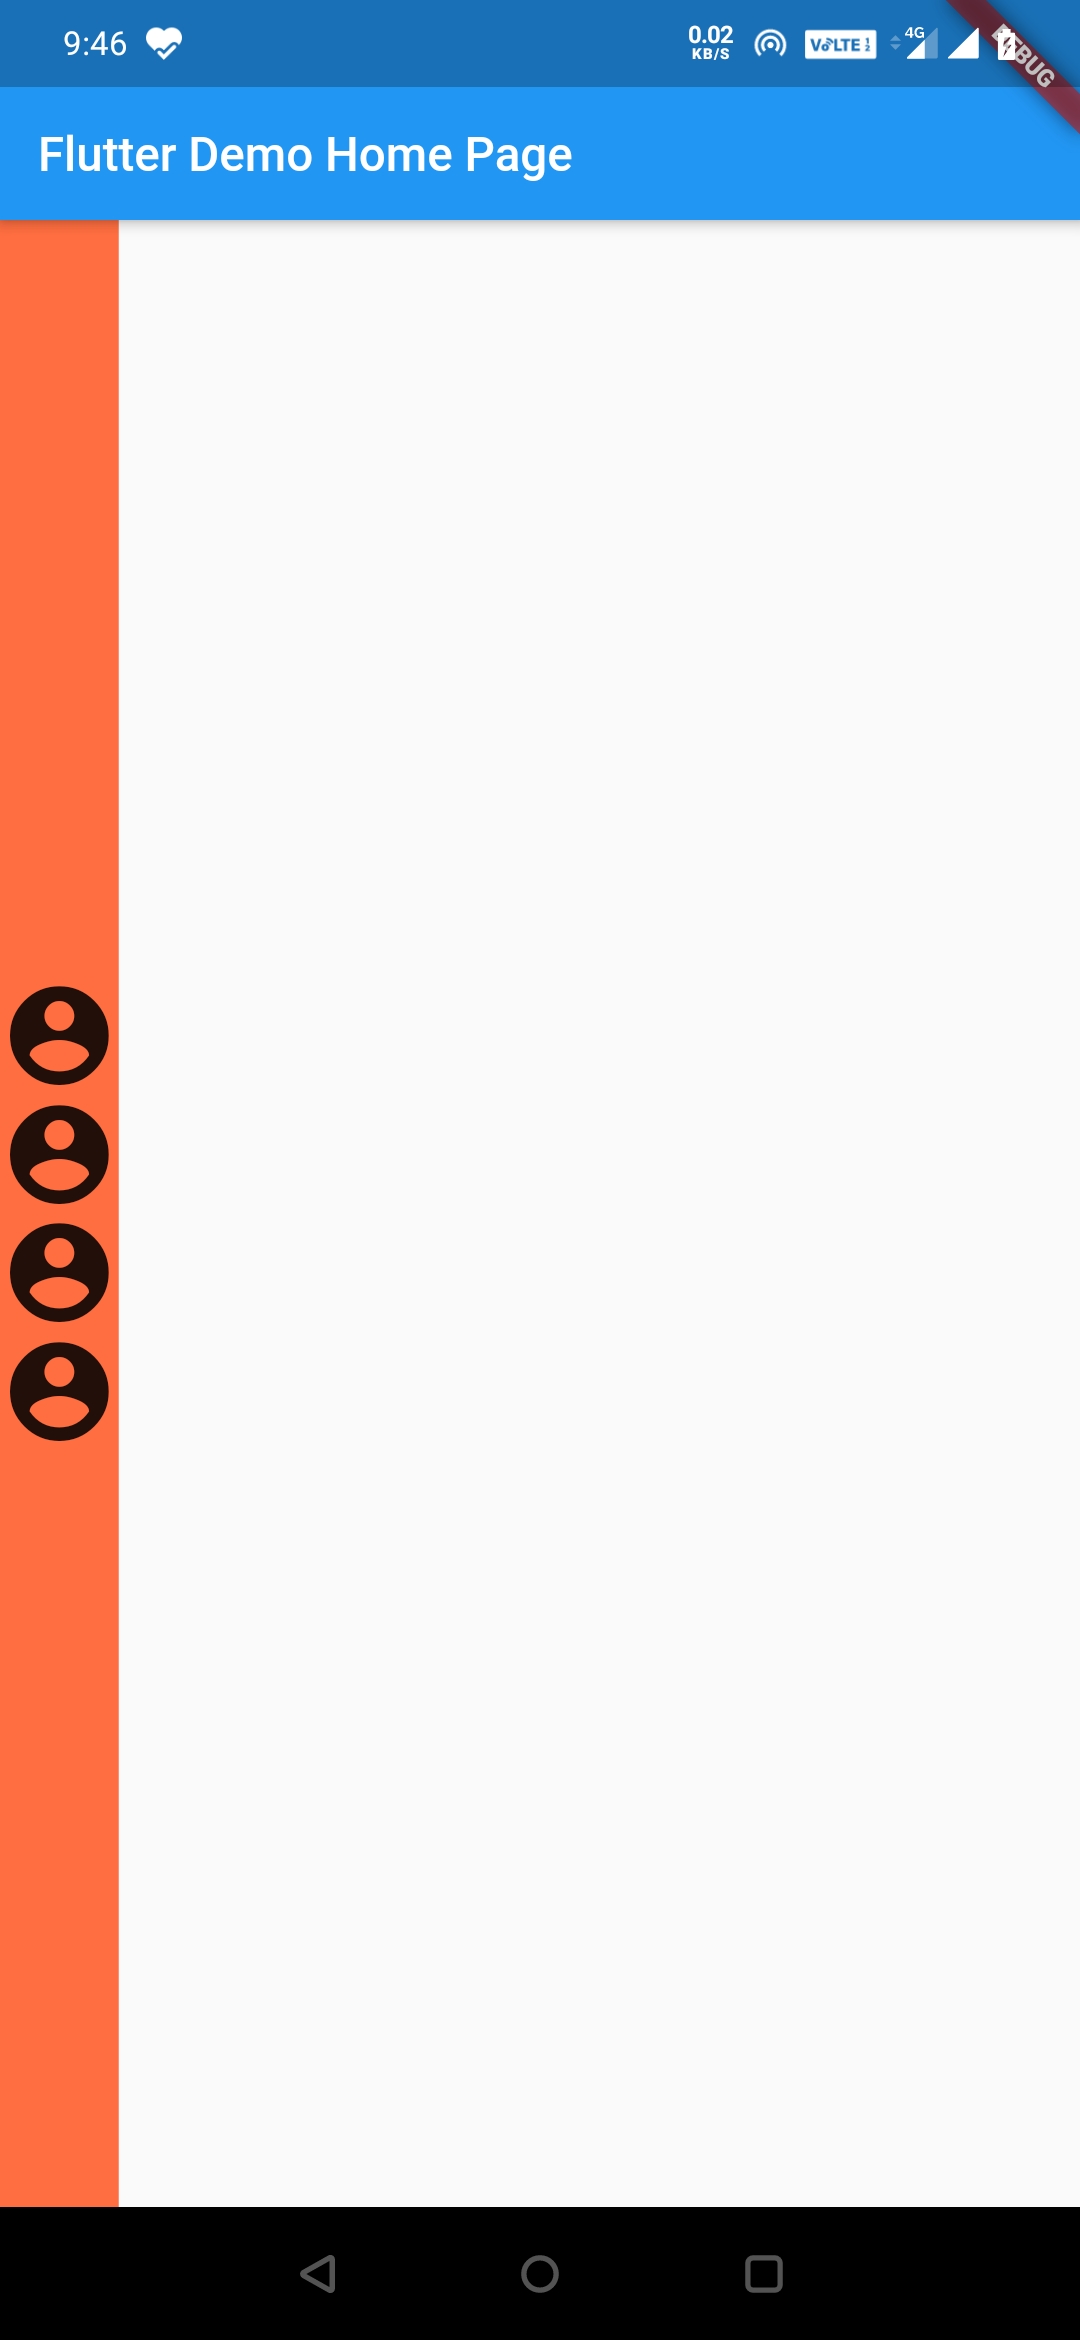
Column
This will make the children align vertically in the center.
Container(
        color: Colors.deepOrangeAccent,
        child:Column(
        mainAxisAlignment: MainAxisAlignment.center,
        children: <Widget>[
          Icon(Icons.account_circle, size: 50),
          Icon(Icons.account_circle, size: 50),
          Icon(Icons.account_circle, size: 50),
          Icon(Icons.account_circle, size: 50),
        ],
      ),
      ),
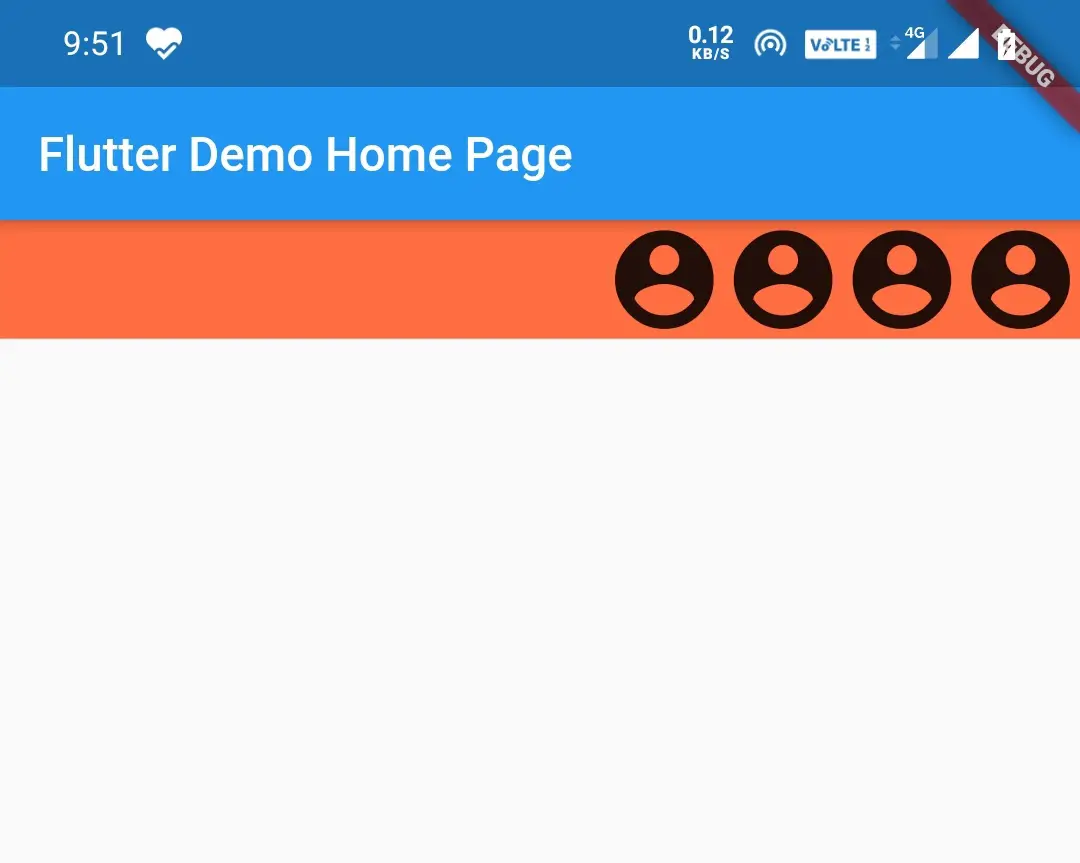
MainAxisAlignment.end
Row
This will make the children align horizontally at the end.
Container(
        color: Colors.deepOrangeAccent,
        child:Row(
        mainAxisAlignment: MainAxisAlignment.end,
        children: <Widget>[
          Icon(Icons.account_circle, size: 50),
          Icon(Icons.account_circle, size: 50),
          Icon(Icons.account_circle, size: 50),
          Icon(Icons.account_circle, size: 50),
        ],
      ),
      ),
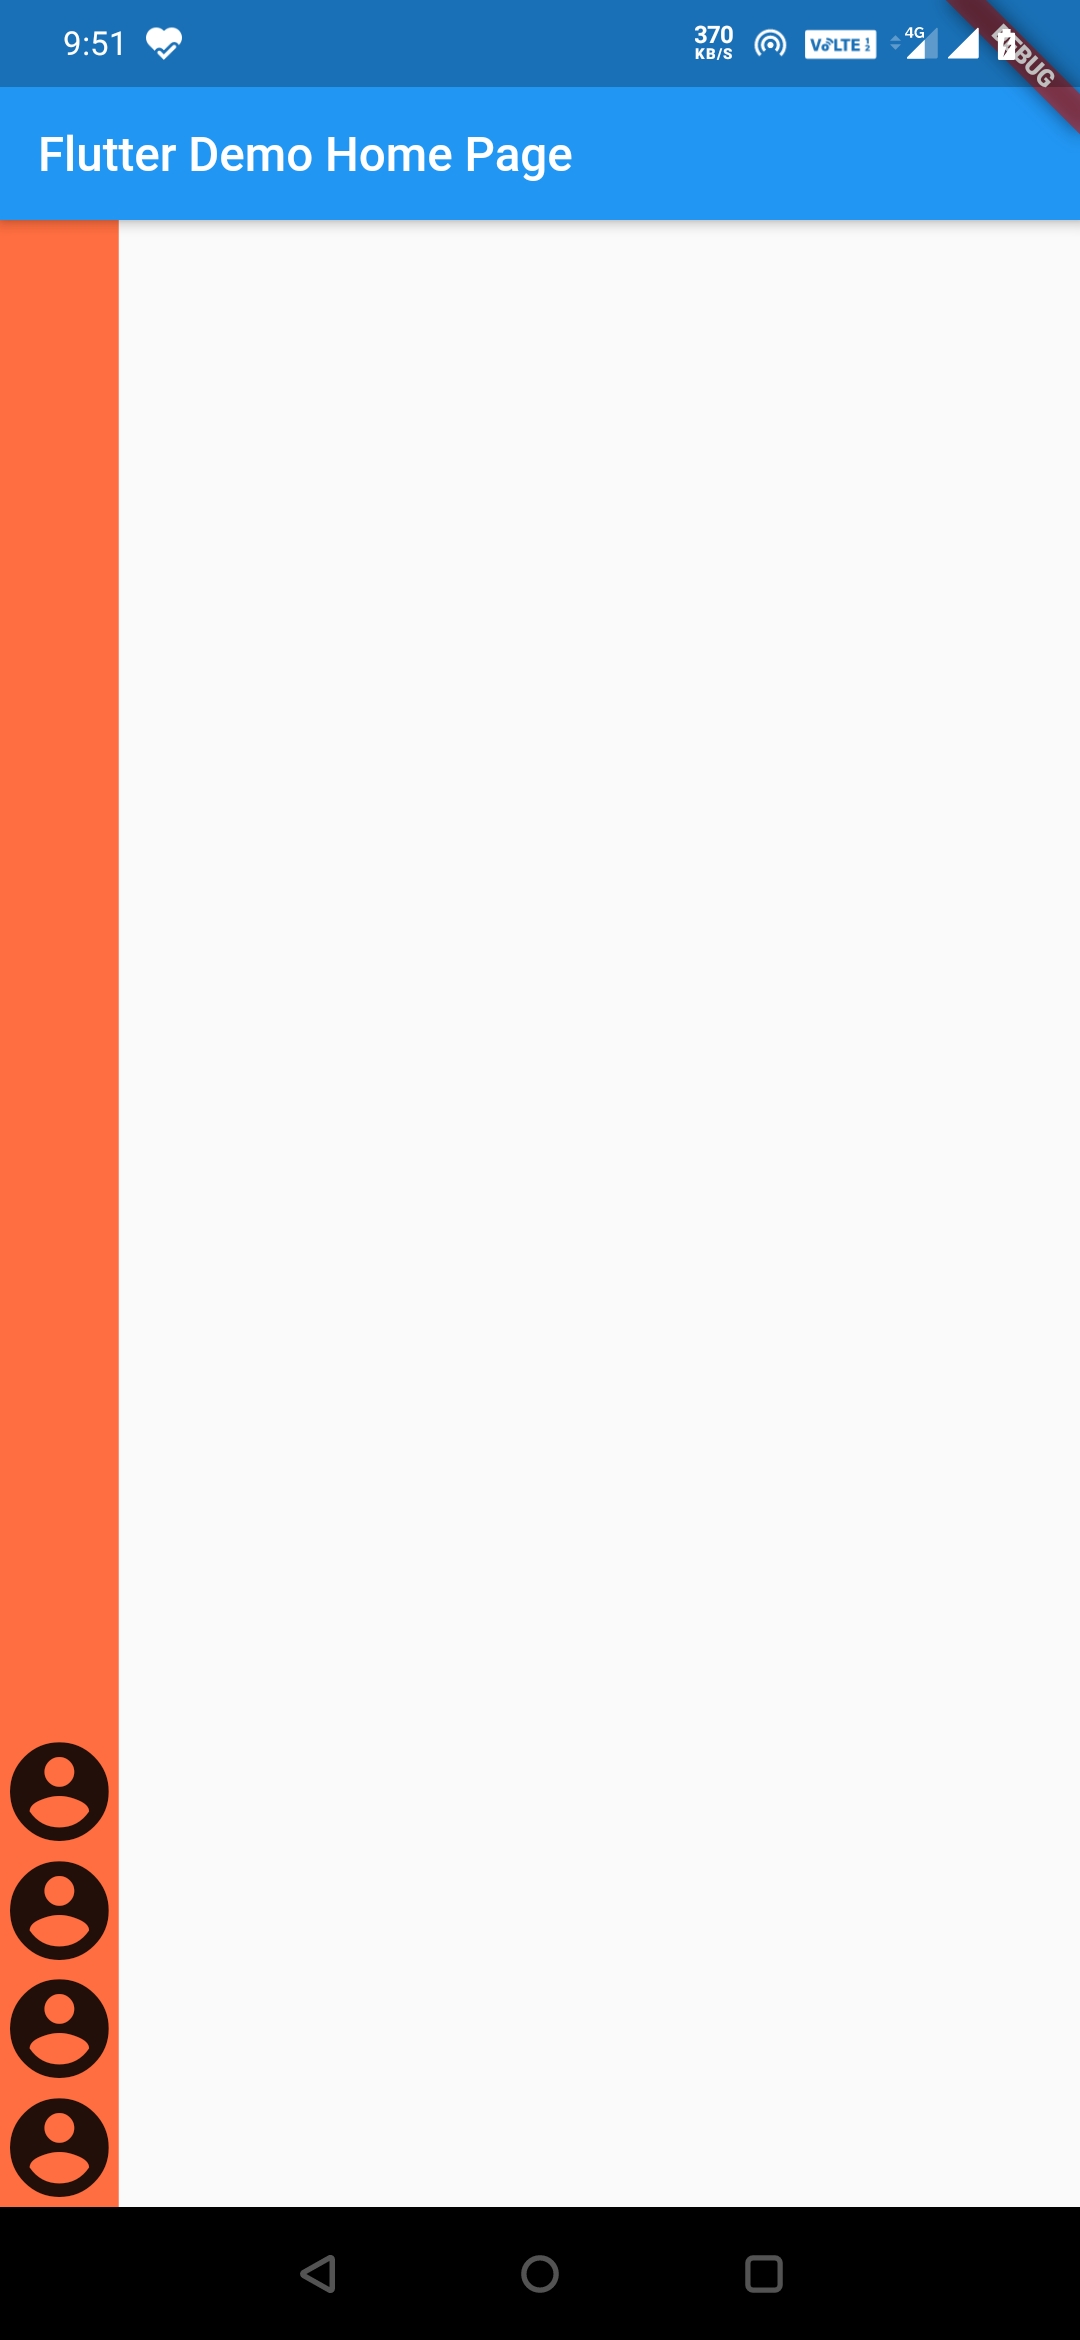
Column
This will make the children align vertically at the bottom.
Container(
        color: Colors.deepOrangeAccent,
        child:Column(
        mainAxisAlignment: MainAxisAlignment.end,
        children: <Widget>[
          Icon(Icons.account_circle, size: 50),
          Icon(Icons.account_circle, size: 50),
          Icon(Icons.account_circle, size: 50),
          Icon(Icons.account_circle, size: 50),
        ],
      ),
      ),
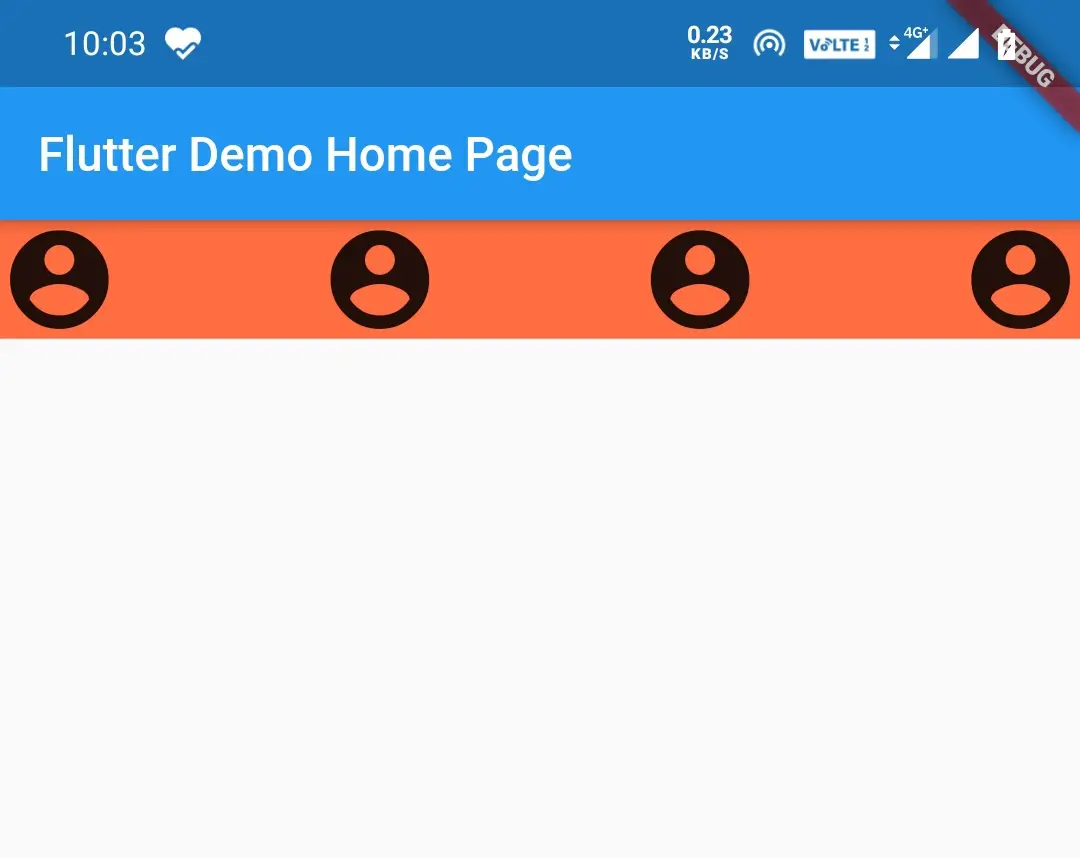
MainAxisAlignment.spaceBetween
Row
This creates an equal amount of space between the children.
Container(
        color: Colors.deepOrangeAccent,
        child:Row(
        mainAxisAlignment: MainAxisAlignment.spaceBetween,
        children: <Widget>[
          Icon(Icons.account_circle, size: 50),
          Icon(Icons.account_circle, size: 50),
          Icon(Icons.account_circle, size: 50),
          Icon(Icons.account_circle, size: 50),
        ],
      ),
      ),
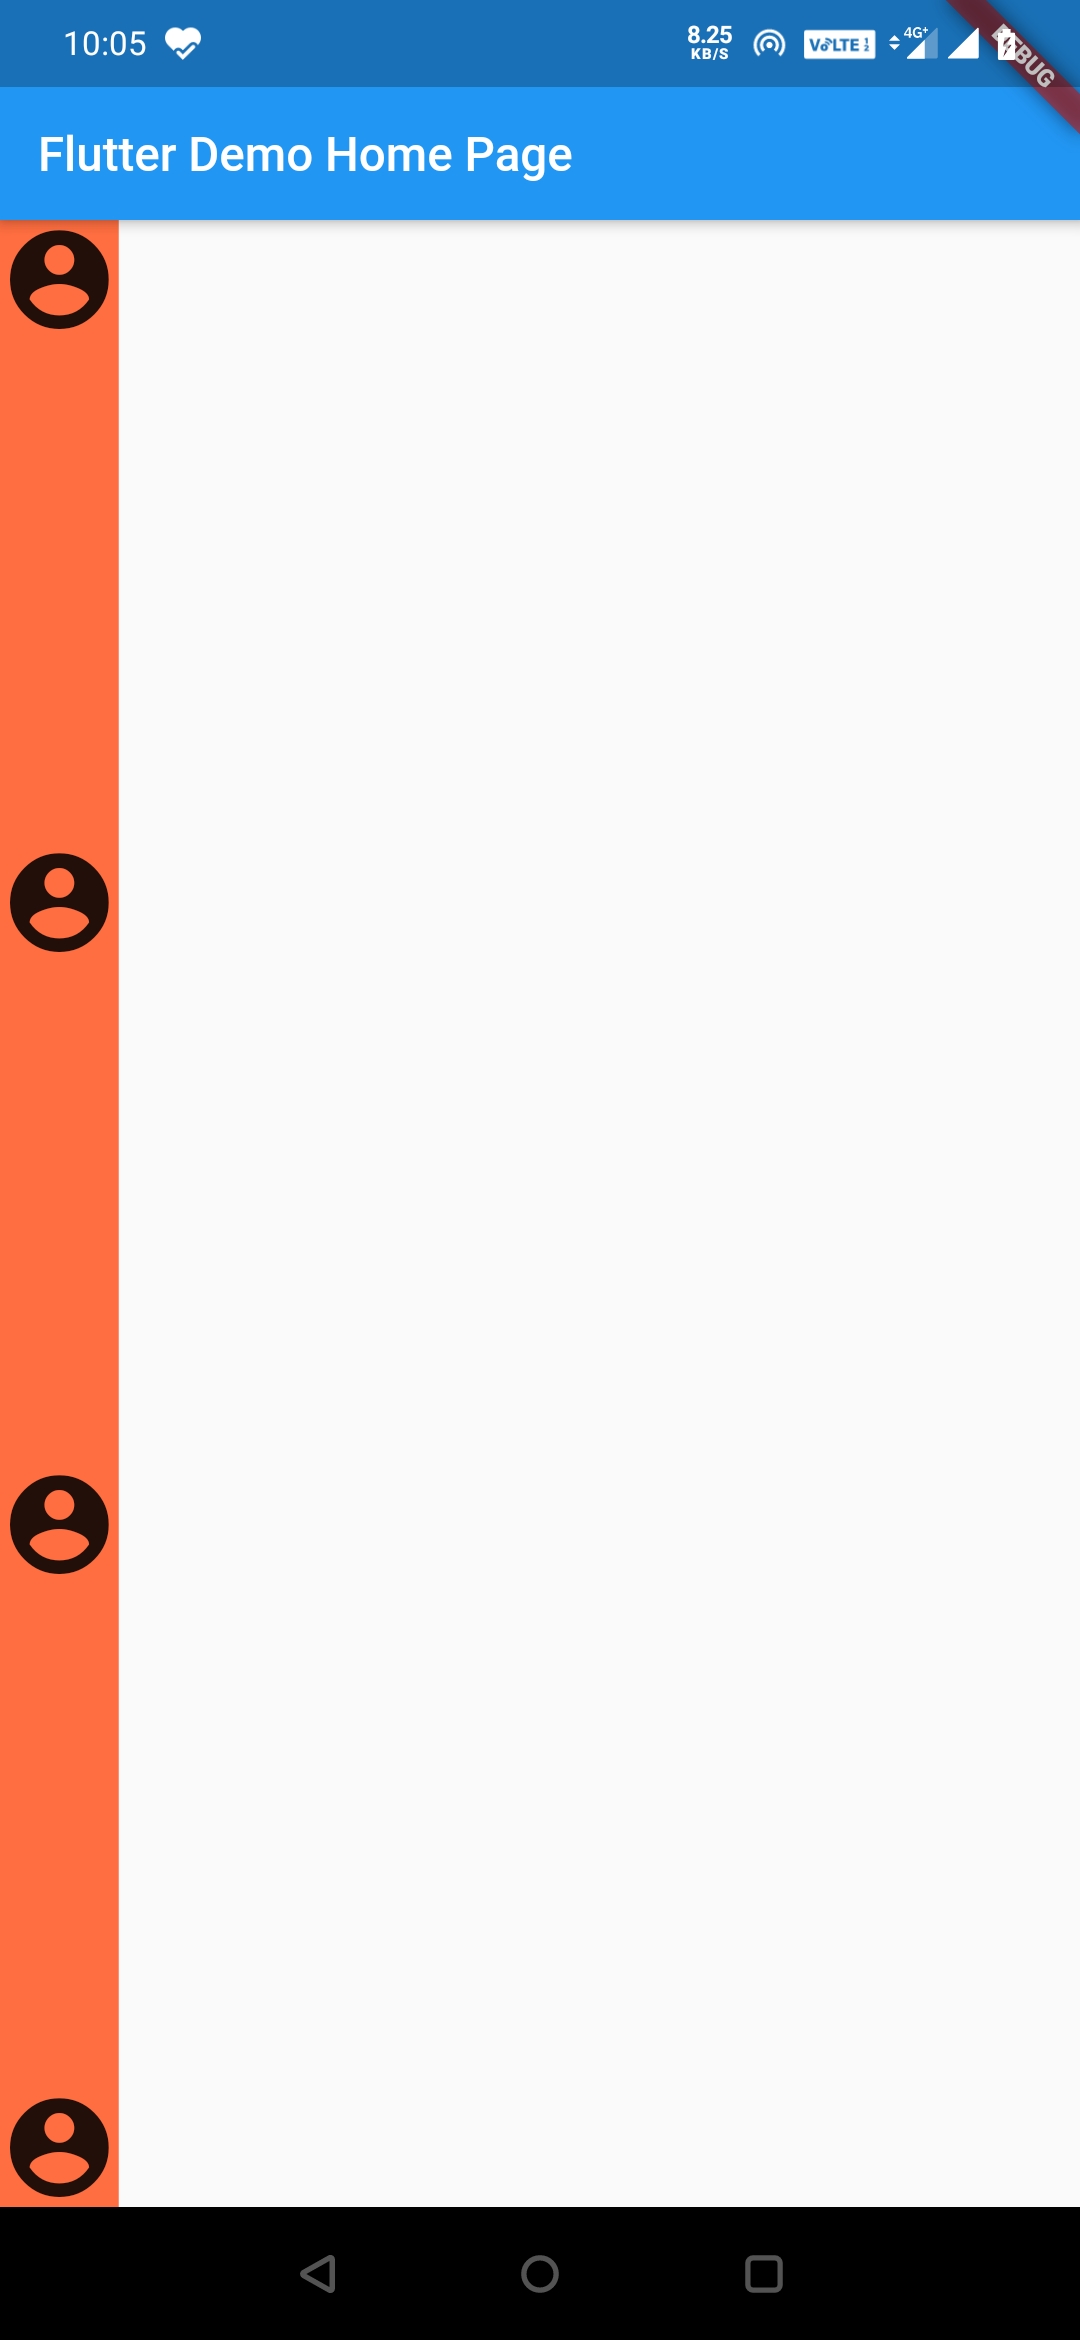
Column
This creates an equal amount of space between children.
Container(
        color: Colors.deepOrangeAccent,
        child:Column(
        mainAxisAlignment: MainAxisAlignment.spaceBetween,
        children: <Widget>[
          Icon(Icons.account_circle, size: 50),
          Icon(Icons.account_circle, size: 50),
          Icon(Icons.account_circle, size: 50),
          Icon(Icons.account_circle, size: 50),
        ],
      ),
      ),
MainAxisAlignment.spaceEvenly
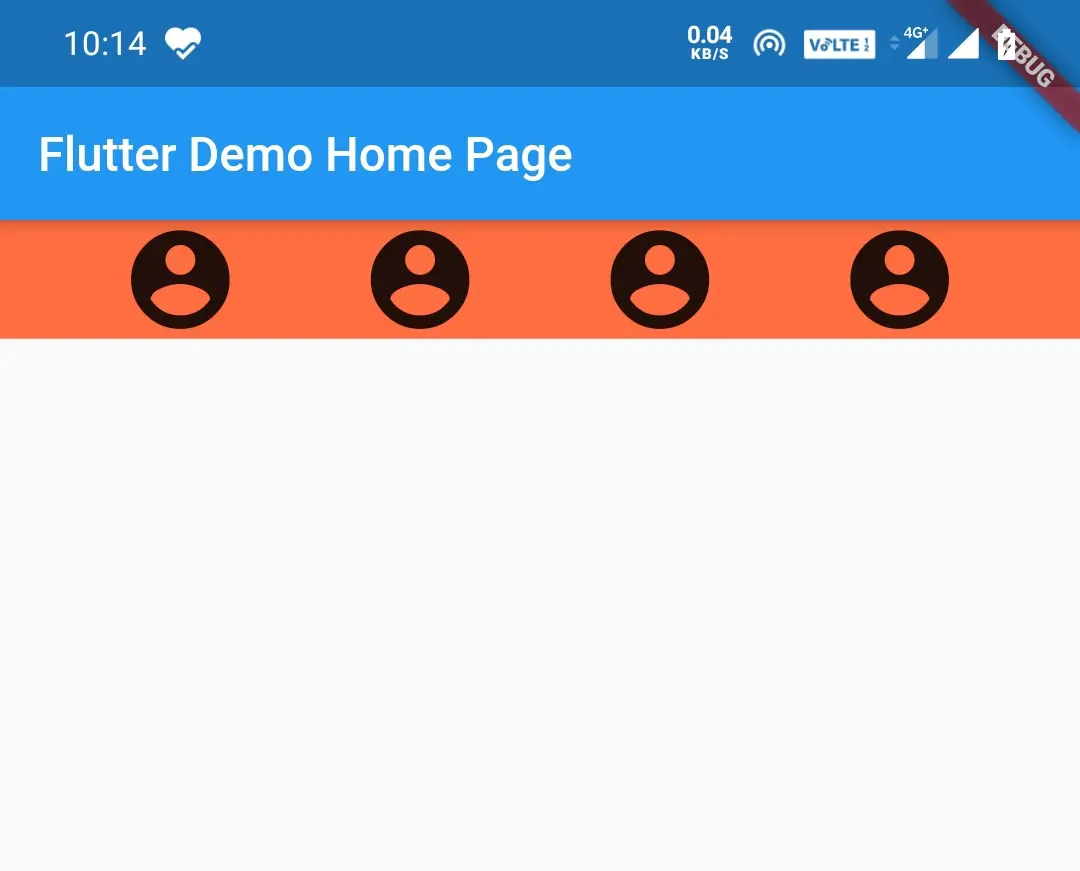
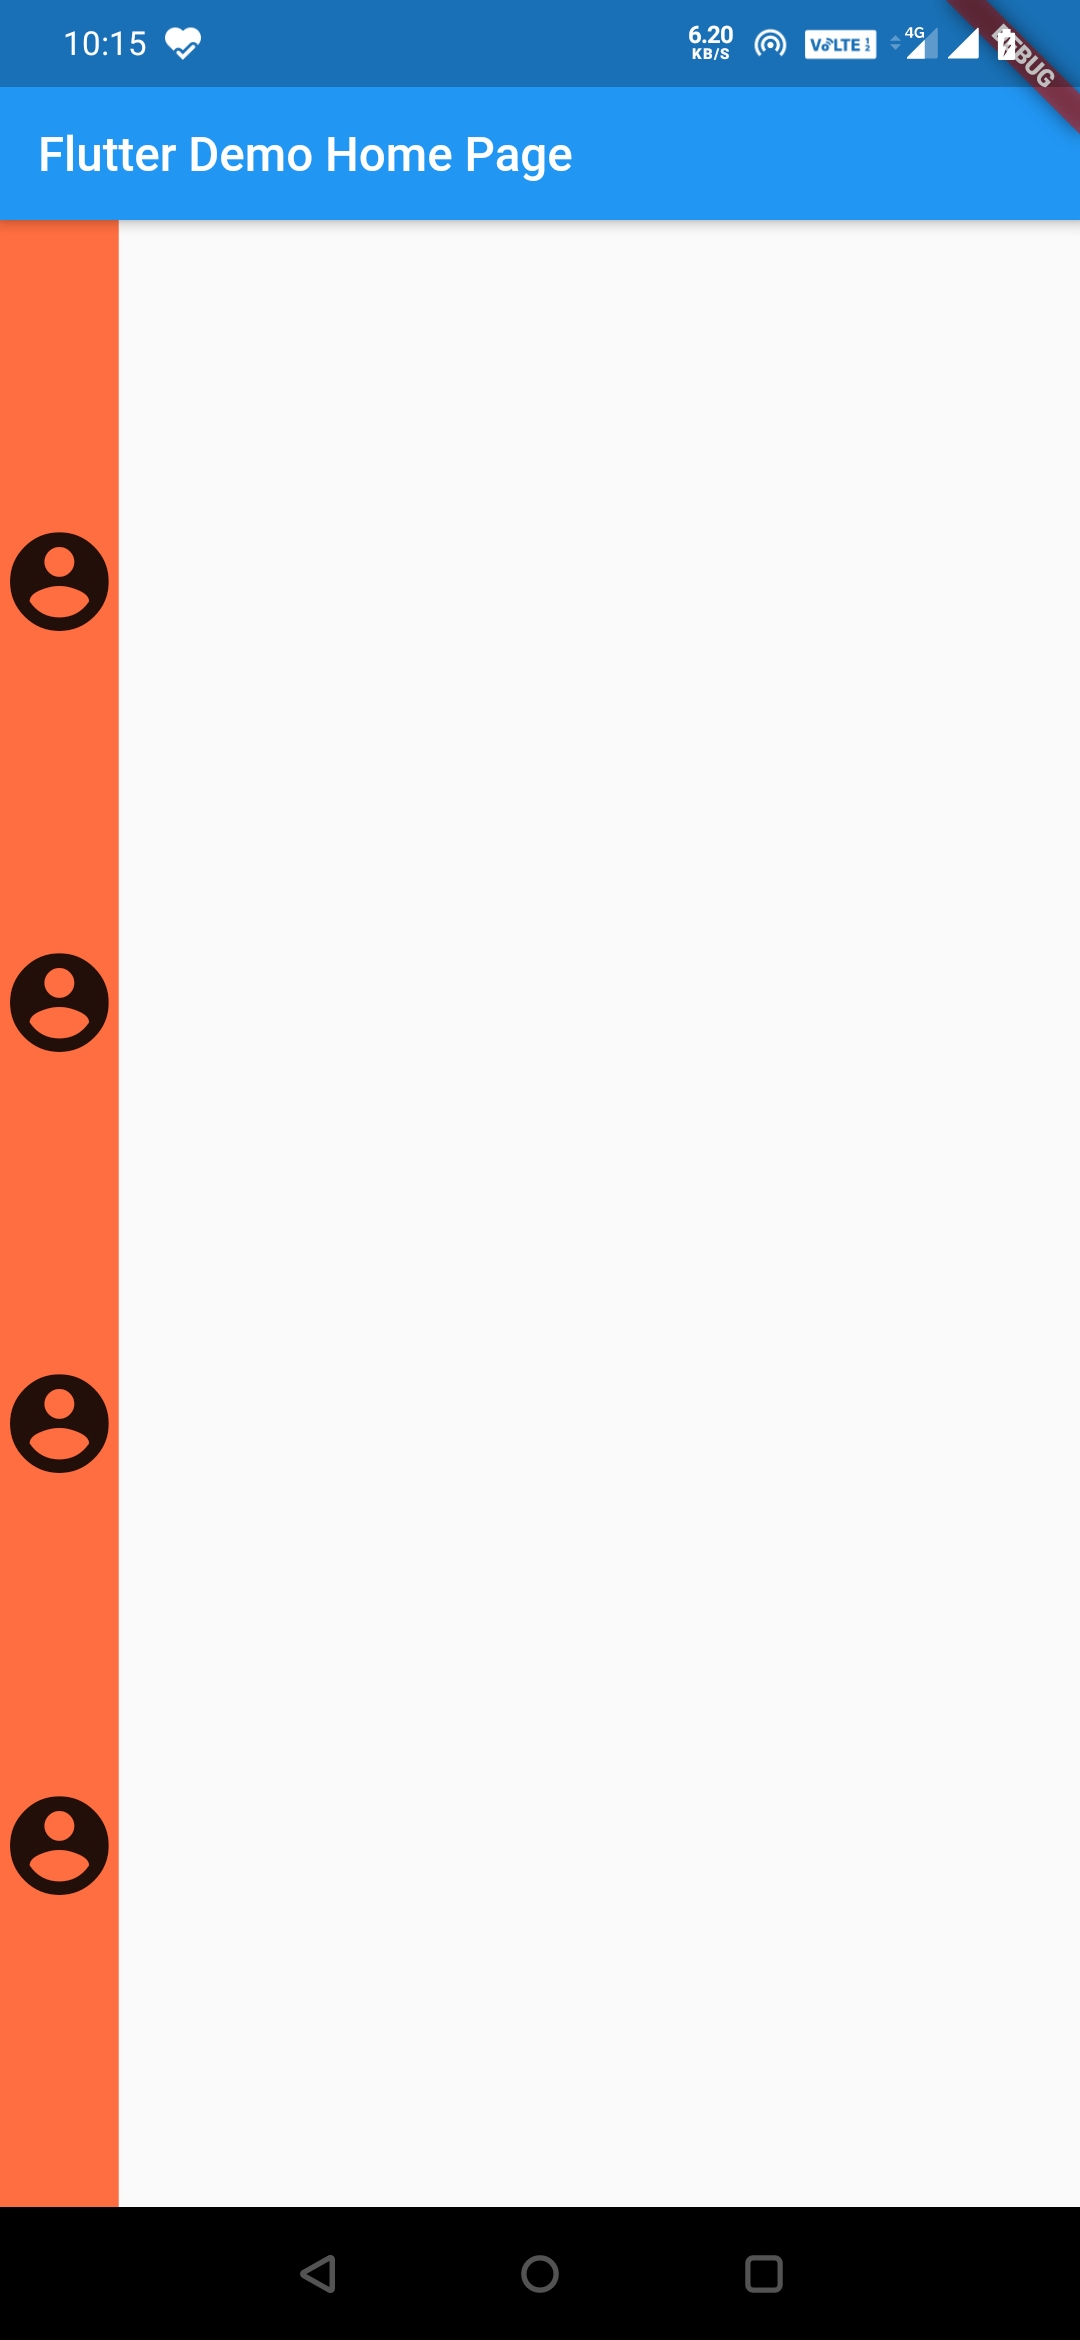
This creates space evenly before and after each child, which means the space before the first child will be equal to the space between the first child and second child and so on.
Row
Container(
        color: Colors.deepOrangeAccent,
        child:Row(
        mainAxisAlignment: MainAxisAlignment.spaceEvenly,
        children: <Widget>[
          Icon(Icons.account_circle, size: 50),
          Icon(Icons.account_circle, size: 50),
          Icon(Icons.account_circle, size: 50),
          Icon(Icons.account_circle, size: 50),
        ],
      ),
      ),
Column
Container(
        color: Colors.deepOrangeAccent,
        child:Column(
        mainAxisAlignment: MainAxisAlignment.spaceEvenly,
        children: <Widget>[
          Icon(Icons.account_circle, size: 50),
          Icon(Icons.account_circle, size: 50),
          Icon(Icons.account_circle, size: 50),
          Icon(Icons.account_circle, size: 50),
        ],
      ),
      ),
MainAxisAlignment.spaceAround
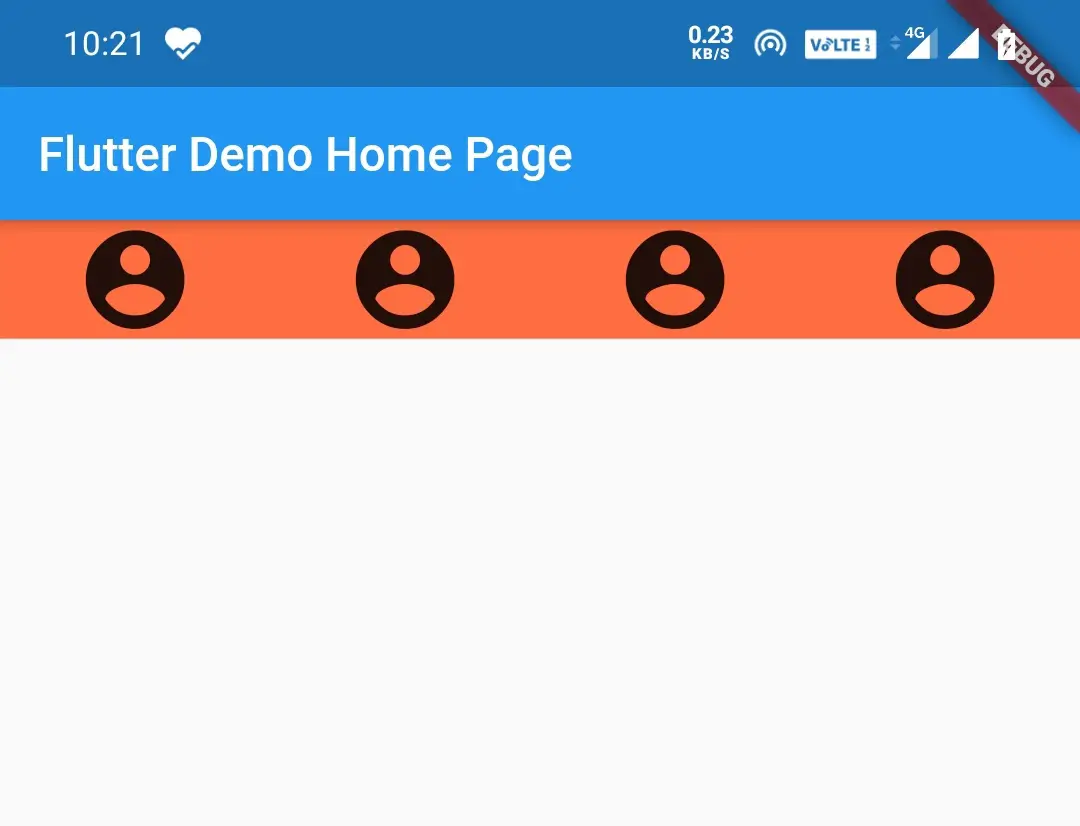
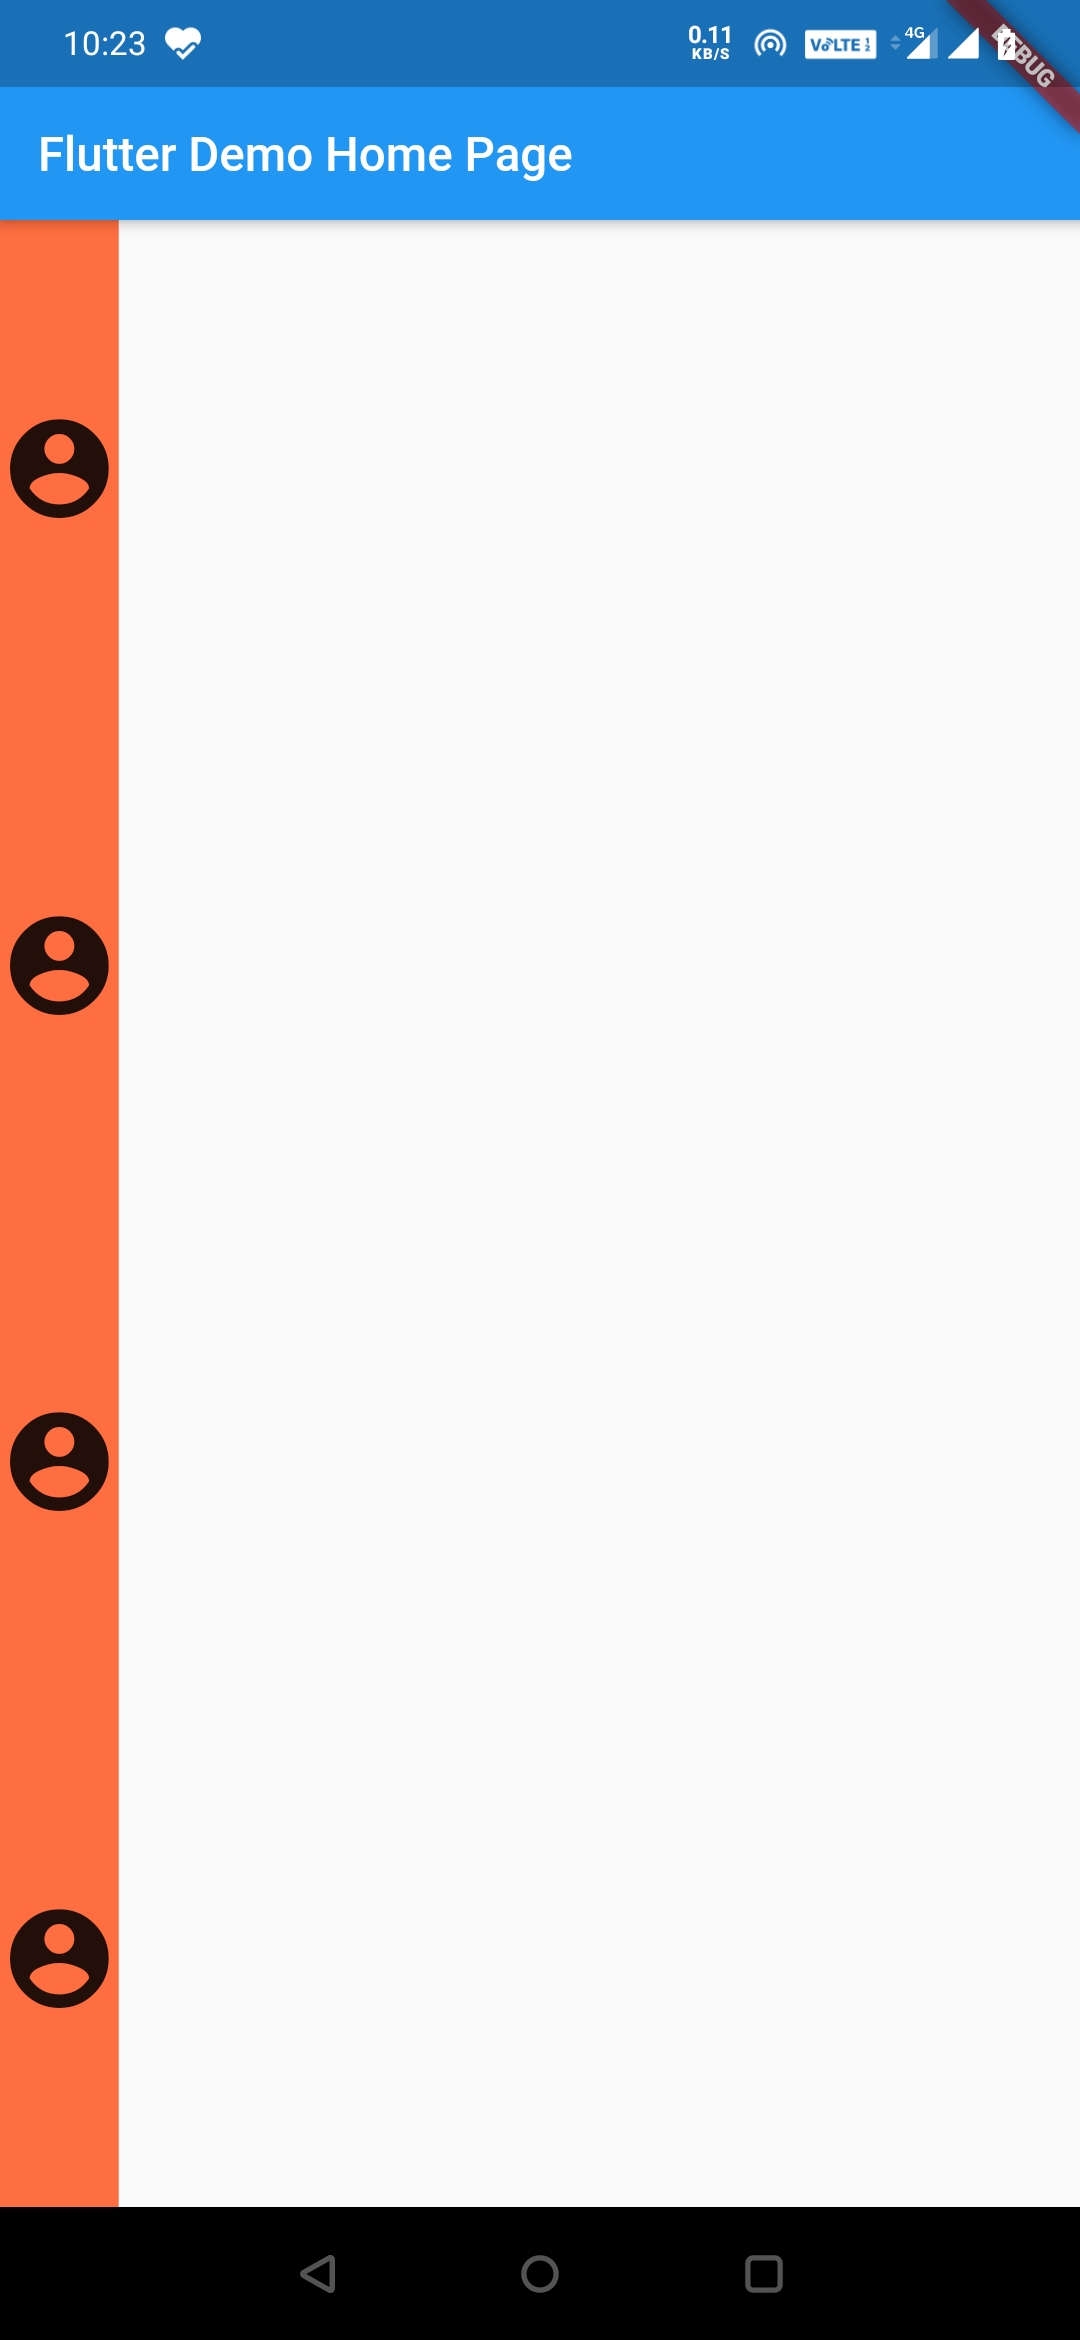
This will create an equal amount of space before and after each child.
Row
Container(
        color: Colors.deepOrangeAccent,
        child:Row(
        mainAxisAlignment: MainAxisAlignment.spaceAround,
        children: <Widget>[
          Icon(Icons.account_circle, size: 50),
          Icon(Icons.account_circle, size: 50),
          Icon(Icons.account_circle, size: 50),
          Icon(Icons.account_circle, size: 50),
        ],
      ),
      ),
Column
Container(
        color: Colors.deepOrangeAccent,
        child:Column(
        mainAxisAlignment: MainAxisAlignment.spaceAround,
        children: <Widget>[
          Icon(Icons.account_circle, size: 50),
          Icon(Icons.account_circle, size: 50),
          Icon(Icons.account_circle, size: 50),
          Icon(Icons.account_circle, size: 50),
        ],
      ),
      ),
Flutter Row and Column Widgets CrossAxisAlignment
For a row CrossAxis is from top to bottom which is vertical and for the column, it’s left to right which is horizontal. If you observe the MainAxis of a row is equal to the cross-axis of a column and vice versa.
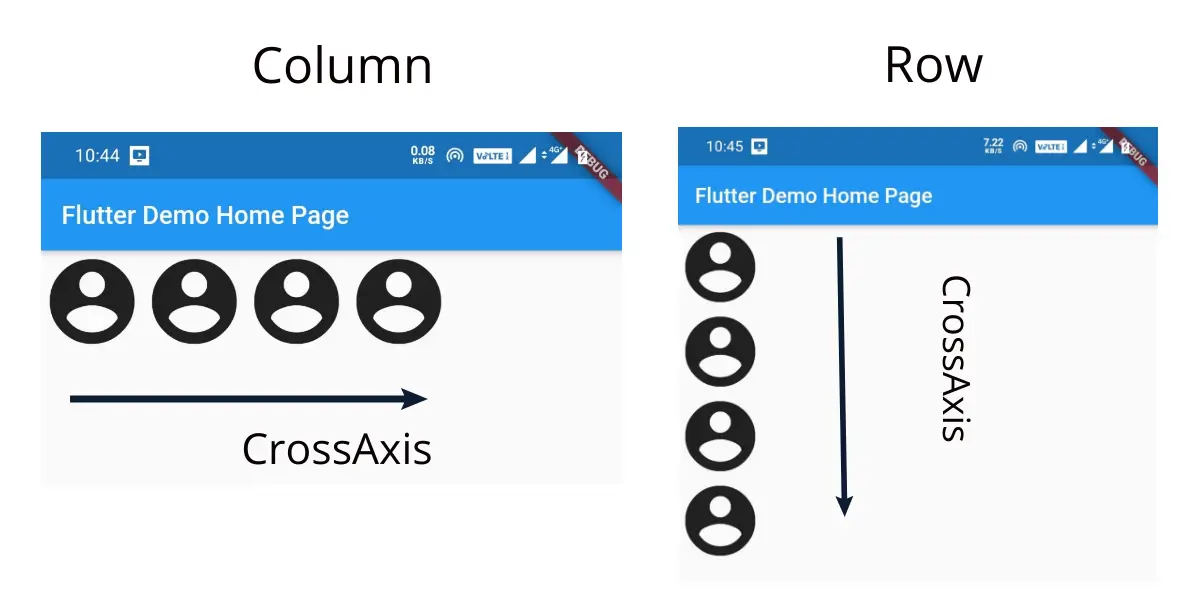
CrossAxisAlignment has so many values so let’s have a look at them with examples.
CrossAxisAlignment.start
Row
This will make the children align vertically at the top.
Container(
        color: Colors.deepOrangeAccent,
        child:Row(
          crossAxisAlignment: CrossAxisAlignment.start,
          children: <Widget>[
            Icon(Icons.account_circle, size: 50),
            Icon(Icons.account_circle, size: 50),
            Icon(Icons.account_circle, size: 50),
            Icon(Icons.account_circle, size: 50),
          ],
        ),
      ),

Column
This will make the children align horizontally at the start/left.
Container(
        color: Colors.deepOrangeAccent,
        child:Column(
          crossAxisAlignment: CrossAxisAlignment.start,
          children: <Widget>[
            Icon(Icons.account_circle, size: 50),
            Icon(Icons.account_circle, size: 50),
            Icon(Icons.account_circle, size: 50),
            Icon(Icons.account_circle, size: 50),
          ],
        ),
      ),

CrossAxisAlignment.center
Row
This will make the children align vertically at the center.
Container(
        color: Colors.deepOrangeAccent,
        child:Row(
          crossAxisAlignment: CrossAxisAlignment.center,
          children: <Widget>[
            Icon(Icons.account_circle, size: 50),
            Icon(Icons.account_circle, size: 50),
            Icon(Icons.account_circle, size: 50),
            Icon(Icons.account_circle, size: 50),
          ],
        ),
      ),

Column
This will make the children align horizontally at the center.
Container(
        color: Colors.deepOrangeAccent,
        child:Column(
          crossAxisAlignment: CrossAxisAlignment.center,
          children: <Widget>[
            Icon(Icons.account_circle, size: 50),
            Icon(Icons.account_circle, size: 50),
            Icon(Icons.account_circle, size: 50),
            Icon(Icons.account_circle, size: 50),
          ],
        ),
      ),

CrossAxisAlignment.End
Row
This will make the children align vertically at the bottom.
Container(
        color: Colors.deepOrangeAccent,
        child:Row(
          crossAxisAlignment: CrossAxisAlignment.end,
          children: <Widget>[
            Icon(Icons.account_circle, size: 50),
            Icon(Icons.account_circle, size: 50),
            Icon(Icons.account_circle, size: 50),
            Icon(Icons.account_circle, size: 50),
          ],
        ),
      ),

Column
This will make the children align horizontally at the end.
Container(
        color: Colors.deepOrangeAccent,
        child:Column(
          crossAxisAlignment: CrossAxisAlignment.end,
          children: <Widget>[
            Icon(Icons.account_circle, size: 50),
            Icon(Icons.account_circle, size: 50),
            Icon(Icons.account_circle, size: 50),
            Icon(Icons.account_circle, size: 50),
          ],
        ),
      ),

CrossAxisAlignment.strech
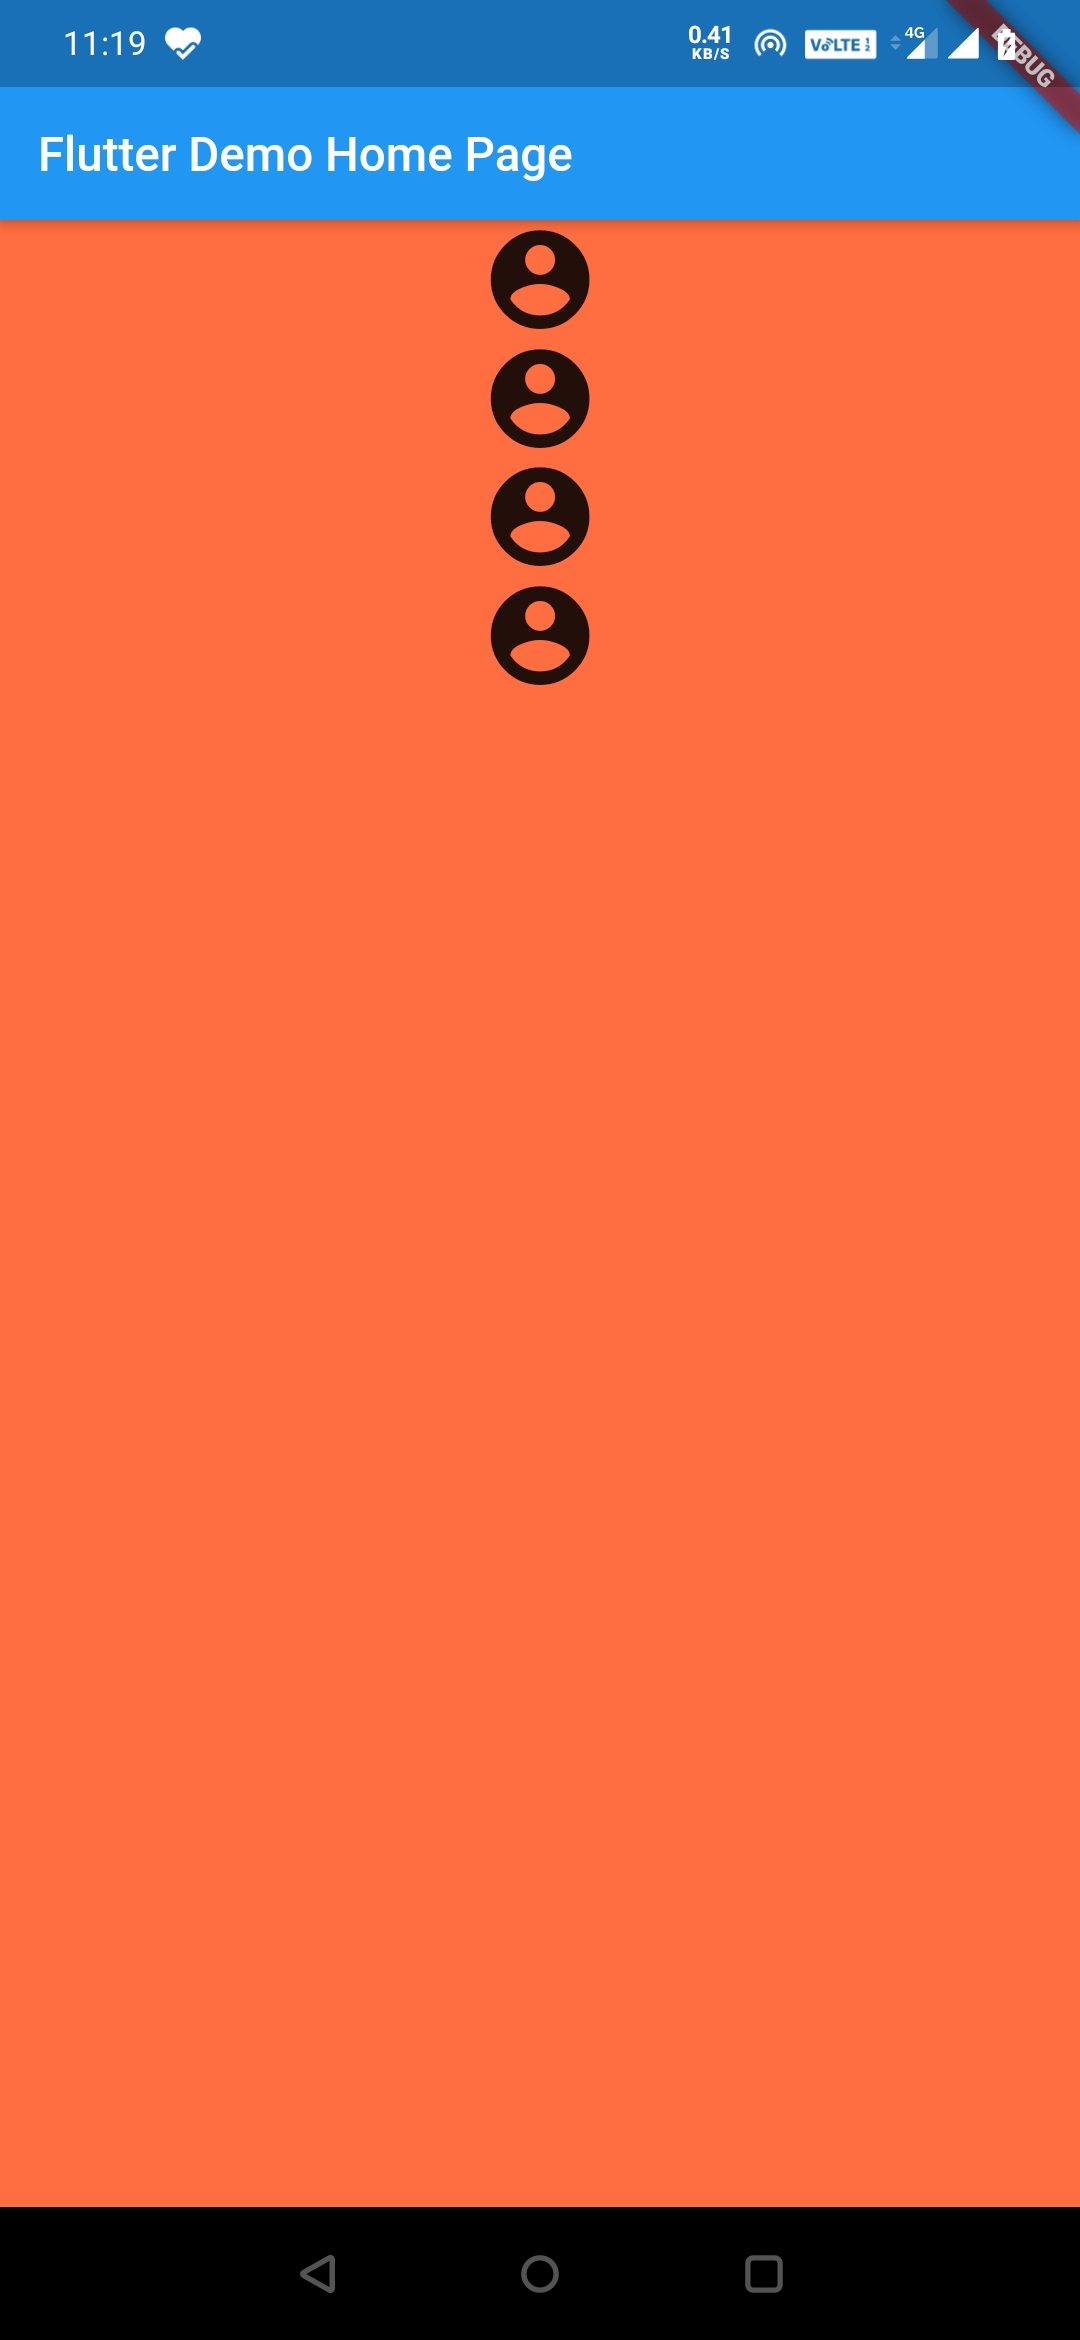
Row
Container(
        color: Colors.deepOrangeAccent,
        child:Row(
          crossAxisAlignment: CrossAxisAlignment.stretch,
          children: <Widget>[
            Icon(Icons.account_circle, size: 50),
            Icon(Icons.account_circle, size: 50),
            Icon(Icons.account_circle, size: 50),
            Icon(Icons.account_circle, size: 50),
          ],
        ),
      ),
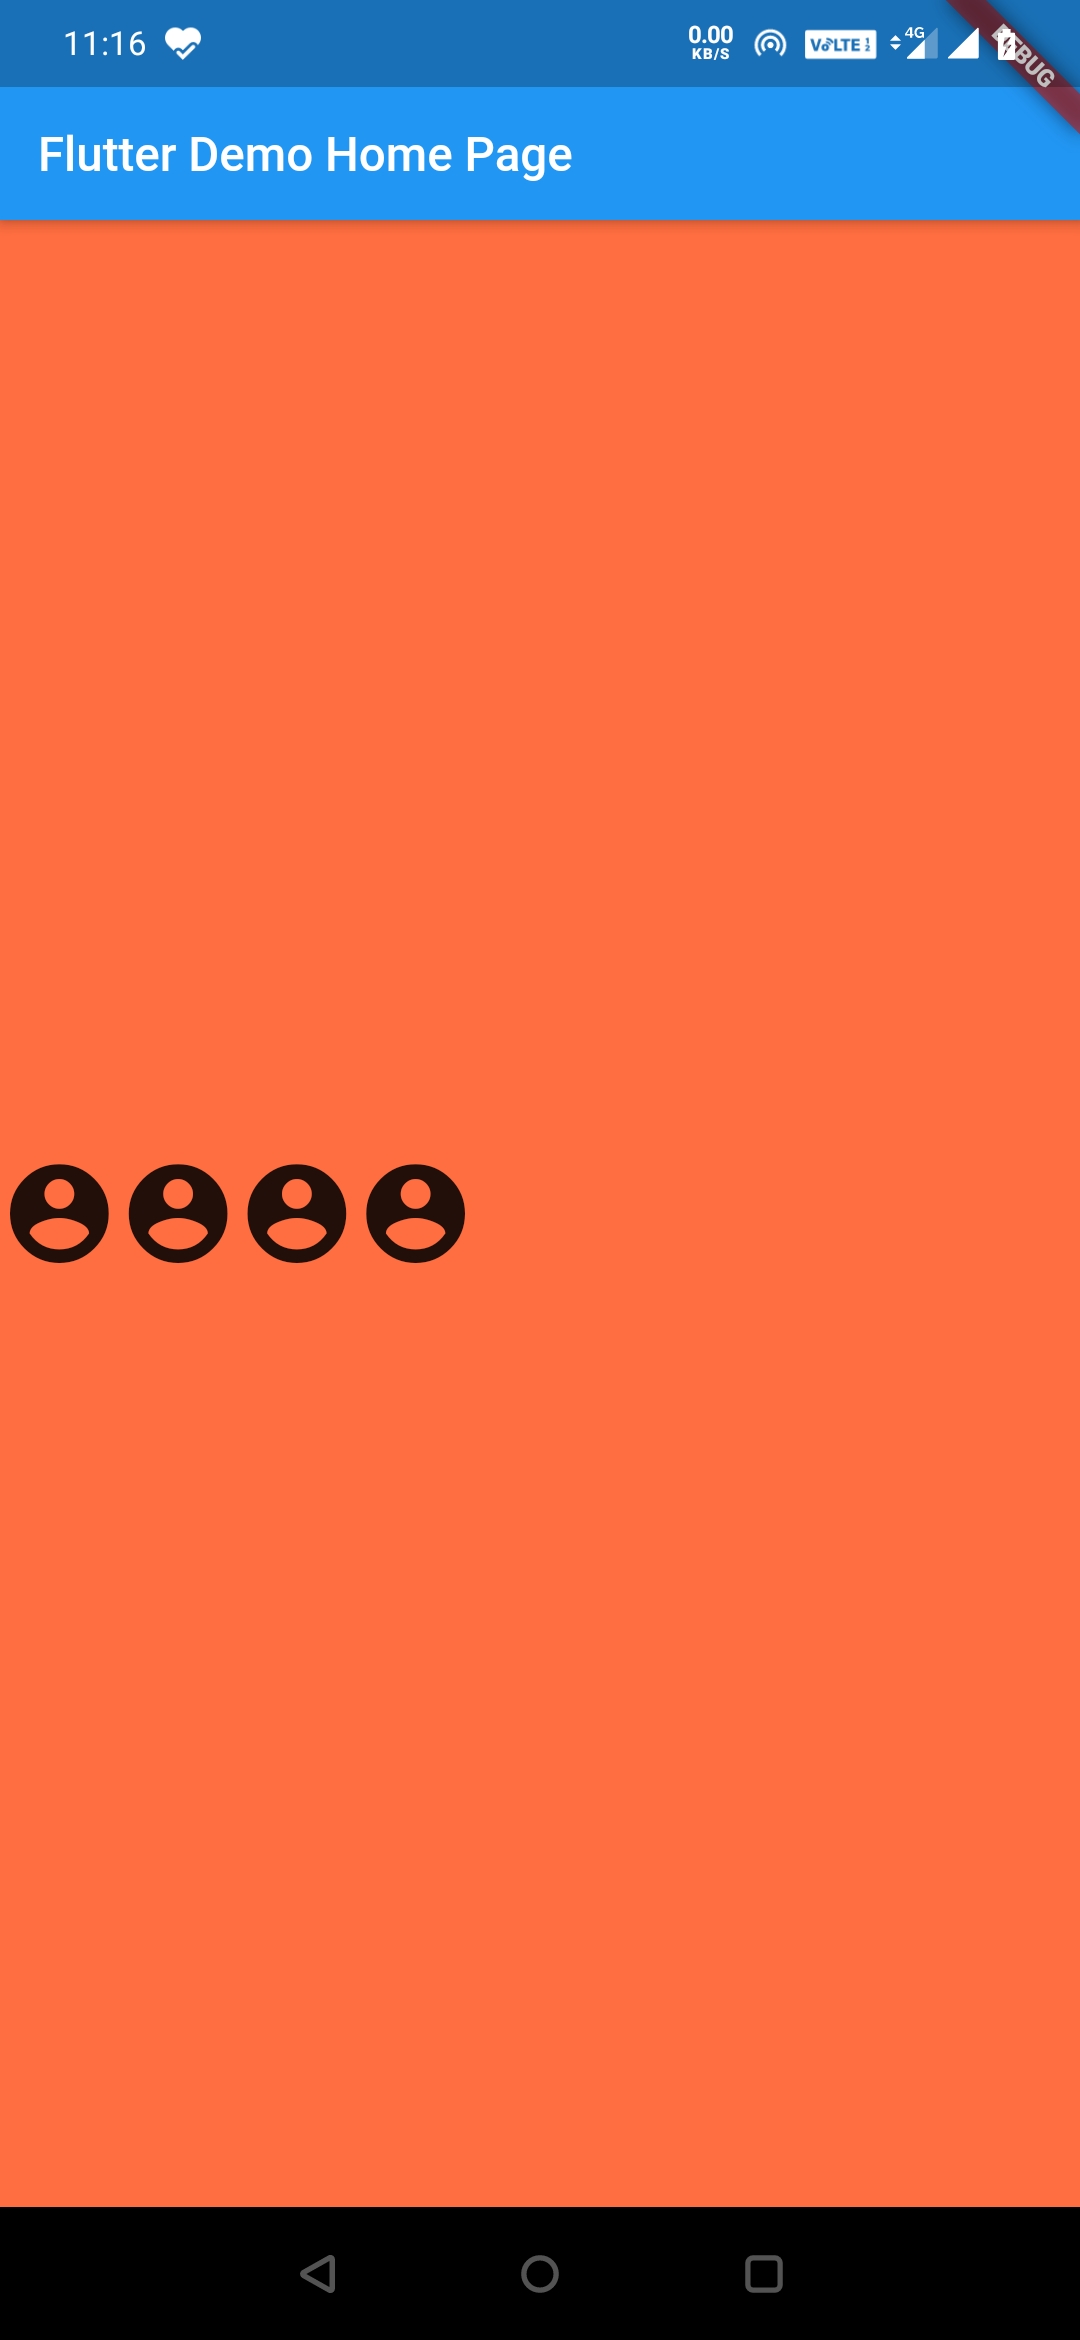
Column
Container(
        color: Colors.deepOrangeAccent,
        child:Column(
          crossAxisAlignment: CrossAxisAlignment.stretch,
          children: <Widget>[
            Icon(Icons.account_circle, size: 50),
            Icon(Icons.account_circle, size: 50),
            Icon(Icons.account_circle, size: 50),
            Icon(Icons.account_circle, size: 50),
          ],
        ),
      ),
Flutter Row and Column Widgets MainAxisSize
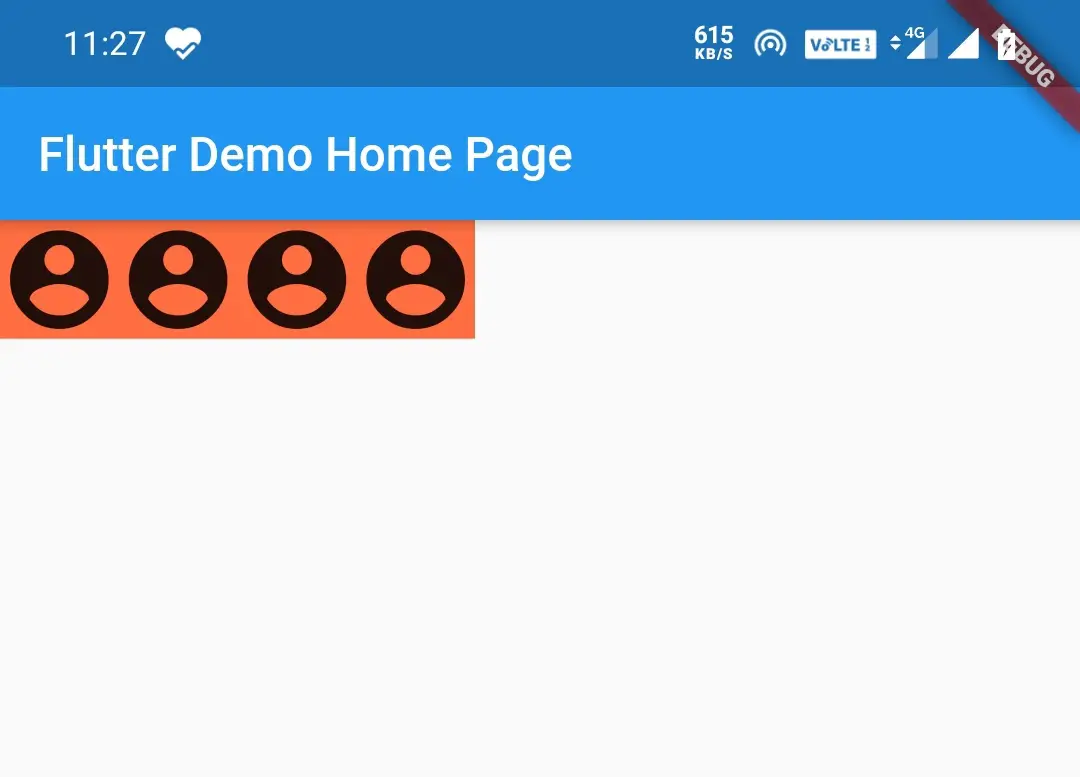
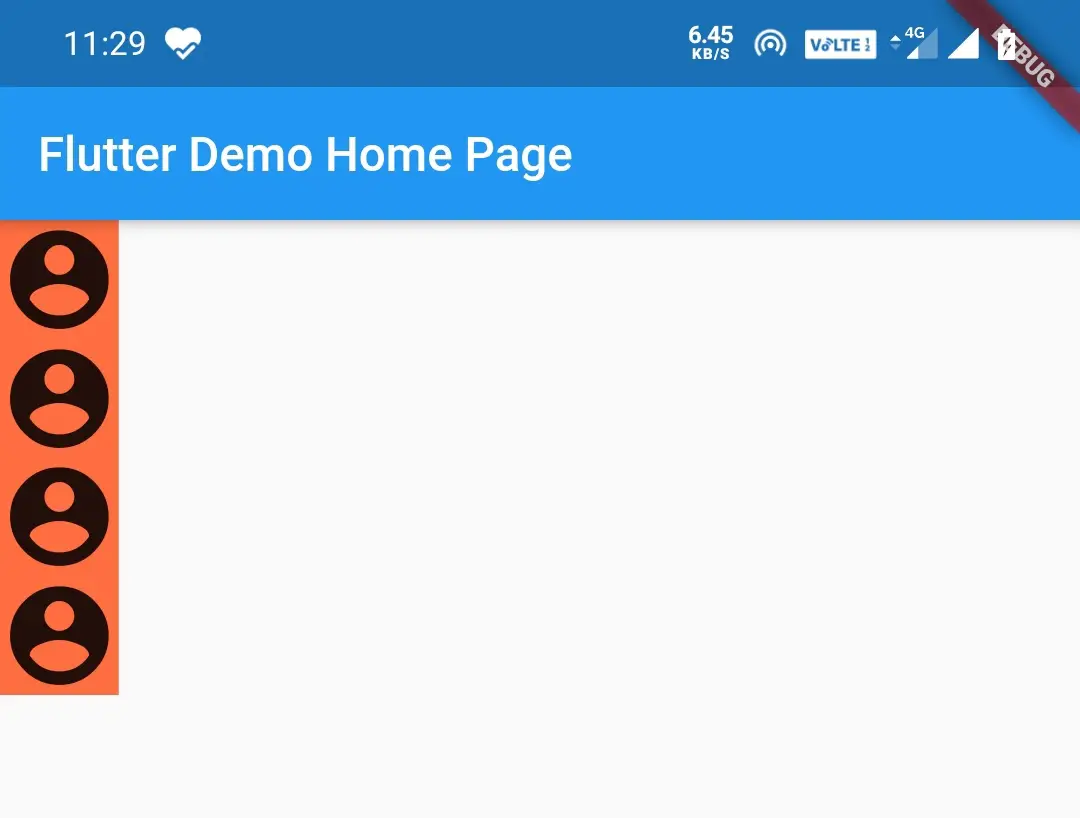
It is used to define the size of MainAxis.Its value can be min or max.
MainAxisSize.min
Row
Container(
        color: Colors.deepOrangeAccent,
        child:Row(
          mainAxisAlignment: MainAxisAlignment.start,
          mainAxisSize: MainAxisSize.min,
          children: <Widget>[
            Icon(Icons.account_circle, size: 50),
            Icon(Icons.account_circle, size: 50),
            Icon(Icons.account_circle, size: 50),
            Icon(Icons.account_circle, size: 50),
          ],
        ),
      ),
Column
Container(
        color: Colors.deepOrangeAccent,
        child:Column(
          mainAxisAlignment: MainAxisAlignment.start,
          mainAxisSize: MainAxisSize.min,
          children: <Widget>[
            Icon(Icons.account_circle, size: 50),
            Icon(Icons.account_circle, size: 50),
            Icon(Icons.account_circle, size: 50),
            Icon(Icons.account_circle, size: 50),
          ],
        ),
      ),
MainAxisSize.max
Row
Container(
        color: Colors.deepOrangeAccent,
        child:Row(
          mainAxisAlignment: MainAxisAlignment.start,
          mainAxisSize: MainAxisSize.max,
          children: <Widget>[
            Icon(Icons.account_circle, size: 50),
            Icon(Icons.account_circle, size: 50),
            Icon(Icons.account_circle, size: 50),
            Icon(Icons.account_circle, size: 50),
          ],
        ),
      ),

Column
Container(
        color: Colors.deepOrangeAccent,
        child:Column(
          mainAxisAlignment: MainAxisAlignment.start,
          mainAxisSize: MainAxisSize.max,
          children: <Widget>[
            Icon(Icons.account_circle, size: 50),
            Icon(Icons.account_circle, size: 50),
            Icon(Icons.account_circle, size: 50),
            Icon(Icons.account_circle, size: 50),
          ],
        ),
      ),

That’s all about Flutter Row and Column Widgets in detail with examples. We will see other flutter widgets in the next posts. Have a great day and happy coding!!
Do like and share if you find this post helpful. Thank you!!
Reference: Flutter Official Documentation


Good Very Good Tutorial
Thank you abdullah fiaz