
In this tutorial, we will learn how to use the bottom navigation bar in flutter. We will also see an example where we customize it’s style using different properties.
Bottom navigation bar is a material widget in flutter that is displayed at the bottom of the screen. The bottom navigation bar is used to display a row of items & the items should be more than two. The standard number of items to use inside a bottom navigation bar fall between three and five. Every item must have a label and an icon. When we select an item it will display content corresponding to that item.
The items of the bottom navigation bar should associate with views that contain the important features of the app. Doing that will help the user better understand the functions and features of the app quickly. For devices with larger screens, it is suggested to use navigation drawer instead.
Note : The length of items must be at least two and each item’s icon and title/label must not be null.
We can create a bottom navigation bar in flutter by calling its constructor and providing required properties. The bottom navigation bar has one required property items. This property is used to add items to the bottom navigation bar. Each item will be a BottomNavigationBarItem widget.
Bottom Navigation Bar Constructor :
BottomNavigationBar(
    {Key? key,
    required List<BottomNavigationBarItem> items,
    ValueChanged<int>? onTap,
    int currentIndex,
    double? elevation,
    BottomNavigationBarType? type,
    Color? fixedColor,
    Color? backgroundColor,
    double iconSize,
    Color? selectedItemColor,
    Color? unselectedItemColor,
    IconThemeData? selectedIconTheme,
    IconThemeData? unselectedIconTheme,
    double selectedFontSize,
    double unselectedFontSize,
    TextStyle? selectedLabelStyle,
    TextStyle? unselectedLabelStyle,
    bool? showSelectedLabels,
    bool? showUnselectedLabels,
    MouseCursor? mouseCursor,
    bool? enableFeedback}
)
Bottom navigation bar has one required property, items. Items is a List which accepts widgets of type BottomNavigationBarItem. This widget is used to create our item that will be displayed on the Bottom Navigation Bar.
Basic implementation of bottom navigation bar
BottomNavigationBar(
        items: [
          BottomNavigationBarItem(
            icon: Icon(Icons.home),
            label: 'Home',
          ),
          BottomNavigationBarItem(
            icon: Icon(Icons.account_circle),
            label: 'Profile',
          ),
          BottomNavigationBarItem(
            icon: Icon(Icons.shopping_bag),
            label: 'Shop',
          ),
        ]
    );
To display a bottom navigation bar we have to provide BottomNavigationBar widget to scaffold’s bottomNavigationBar property.
Scaffold(
      appBar: AppBar(
        title: Text("Flutter Learning"),
      ),
      body:Container(),
      bottomNavigationBar: BottomNavigationBar(),
    );
The most commonly used properties of bottom navigation bar are:
- onTap
- currentIndex
- elevation
- type
- backgroundColor
- iconSize
- selecteddItemColor
- unselectedItemColor
- selectedFontSize
- unselectedFontSize
- showSelectedLabels
- showUnselectedLabels
onTap
The ontap property returns a value of type integer which is the index of the item the user tapped on. Based on this index we will update the screen content.
BottomNavigationBar(
        items: [
          BottomNavigationBarItem(
            icon: Icon(Icons.home),
            label: 'Home',
          ),
          BottomNavigationBarItem(
            icon: Icon(Icons.account_circle),
            label: 'Profile',
          ),
          BottomNavigationBarItem(
            icon: Icon(Icons.shopping_bag),
            label: 'Shop',
          ),
        ],
      onTap: _onTap,
    );
// _onTap function
void _onTap(int index)
  {
    _selectedIndex = index;
    setState(() {

    });
  }
currentIndex
We will use currentIndex property to update the current item and its content. whenever the user taps on an item we have to update this property with the index of the item tapped by the user. so we will update the index with the id received in the onTap function above. In the below code _selectedIndex is a global variable.
// Global variable int _selectedIndex = 0;
BottomNavigationBar(
        items: [
          BottomNavigationBarItem(
            icon: Icon(Icons.home),
            label: 'Home',
          ),
          BottomNavigationBarItem(
            icon: Icon(Icons.account_circle),
            label: 'Profile',
          ),
          BottomNavigationBarItem(
            icon: Icon(Icons.shopping_bag),
            label: 'Shop',
          ),
        ],
      currentIndex: _selectedIndex,
      onTap: _onTap,
    );

// _onTap function
void _onTap(int index)
  {
    _selectedIndex = index;
    setState(() {

    });
  }
elevation
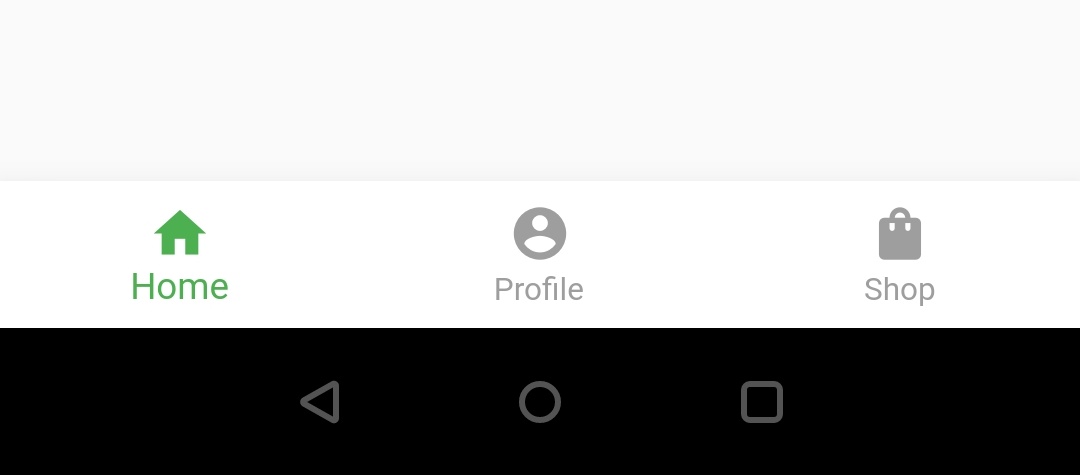
Elevation makes the Bottom navigation bar display on top of the screen contents. If we want to increase or decrease elevation we can do it by using elevation property.
BottomNavigationBar(
        items: [
          BottomNavigationBarItem(
            icon: Icon(Icons.home),
            label: 'Home',
          ),
          BottomNavigationBarItem(
            icon: Icon(Icons.account_circle),
            label: 'Profile',
          ),
          BottomNavigationBarItem(
            icon: Icon(Icons.shopping_bag),
            label: 'Shop',
          ),
        ],
      currentIndex: _selectedIndex,
      unselectedItemColor: Colors.grey,
      onTap: _onTap,
      elevation: 15,
    );
Output :
type
The bottom navigation bar is of two types fixed and shifting. If we don’t specify the type it will change based on the number of items we use for it. When there are less than four items it will automatically set to fixed. If the items are greater than four it will set to shifting.
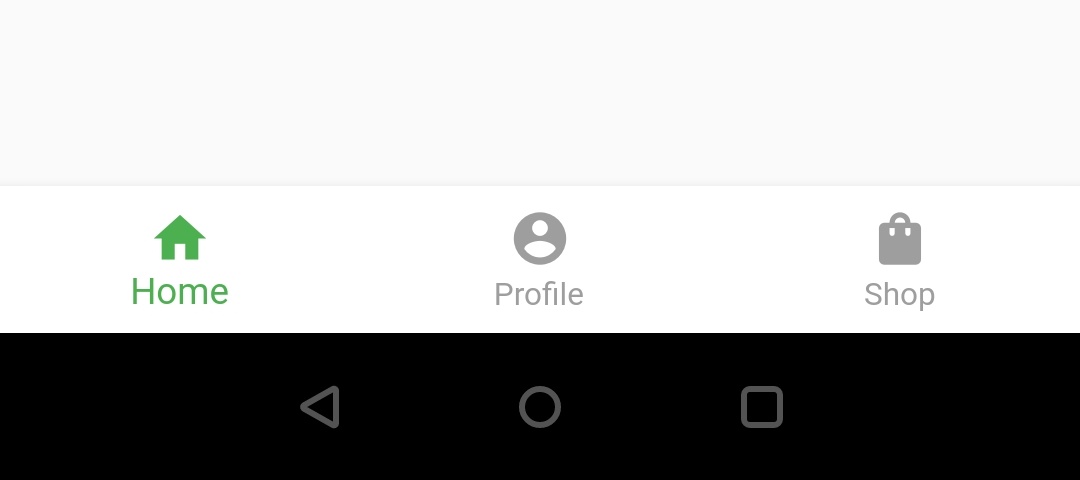
fixed :
It will display both label and icon and there will be no change in size of icon and label text even when we select the item.
BottomNavigationBar(
        items: [
          BottomNavigationBarItem(
            icon: Icon(Icons.home),
            label: 'Home',
          ),
          BottomNavigationBarItem(
            icon: Icon(Icons.account_circle),
            label: 'Profile',
          ),
          BottomNavigationBarItem(
            icon: Icon(Icons.shopping_bag),
            label: 'Shop',
          ),
        ],
      currentIndex: _selectedIndex,
      unselectedItemColor: Colors.grey,
      backgroundColor: Colors.white,
      onTap: _onTap,
      type: BottomNavigationBarType.fixed,
    );
Output :
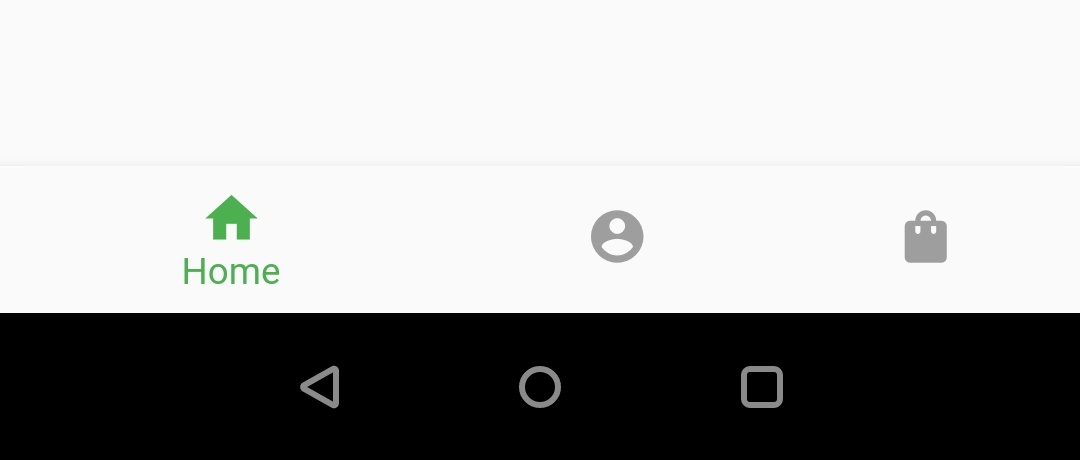
shifting :
When the bottom navigation bar type is shifting only icons will appear for unselected items. The selected item displays both icon and label.
BottomNavigationBar(
        items: [
          BottomNavigationBarItem(
            icon: Icon(Icons.home),
            label: 'Home',
          ),
          BottomNavigationBarItem(
            icon: Icon(Icons.account_circle),
            label: 'Profile',
          ),
          BottomNavigationBarItem(
            icon: Icon(Icons.shopping_bag),
            label: 'Shop',
          ),
        ],
      currentIndex: _selectedIndex,
      unselectedItemColor: Colors.grey,
      backgroundColor: Colors.white,
      onTap: _onTap,
      type: BottomNavigationBarType.shifting,
    );
Output :
backgroundColor
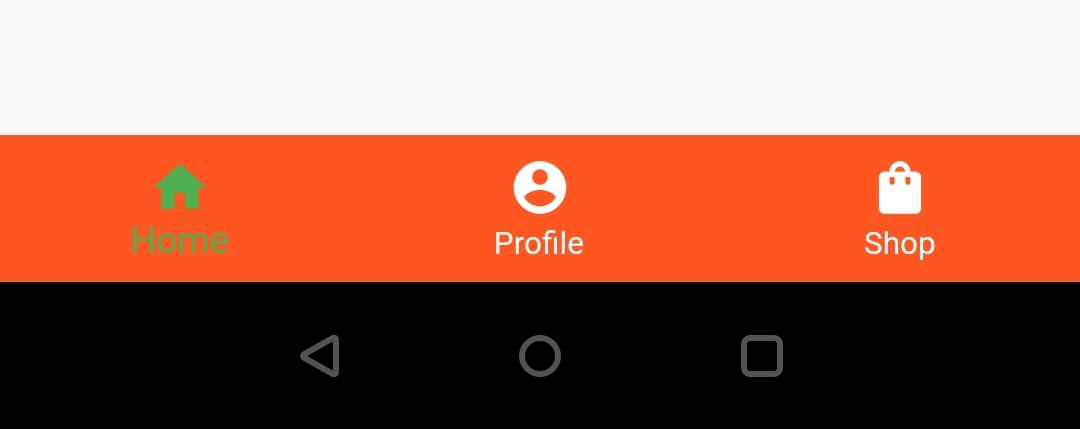
We will use this property to change the background color of the bottom navigation bar. By default the background color is light grey.
BottomNavigationBar(
        items: [
          BottomNavigationBarItem(
            icon: Icon(Icons.home),
            label: 'Home',
          ),
          BottomNavigationBarItem(
            icon: Icon(Icons.account_circle),
            label: 'Profile',
          ),
          BottomNavigationBarItem(
            icon: Icon(Icons.shopping_bag),
            label: 'Shop',
          ),
        ],
      currentIndex: _selectedIndex,
      selectedItemColor: Colors.green,
      unselectedItemColor: Colors.white,
      backgroundColor: Colors.deepOrange,
      onTap: _onTap,
    );
Output :
iconSize
If we want to change the size of the icon then we have to use iconSize property.
BottomNavigationBar(
        items: [
          BottomNavigationBarItem(
            icon: Icon(Icons.home),
            label: 'Home',
          ),
          BottomNavigationBarItem(
            icon: Icon(Icons.account_circle),
            label: 'Profile',
          ),
          BottomNavigationBarItem(
            icon: Icon(Icons.shopping_bag),
            label: 'Shop',
          ),
        ],
      currentIndex: _selectedIndex,
      selectedItemColor: Colors.green,
      unselectedItemColor: Colors.grey,
      iconSize: 30,
      onTap: _onTap,
    );
Output :
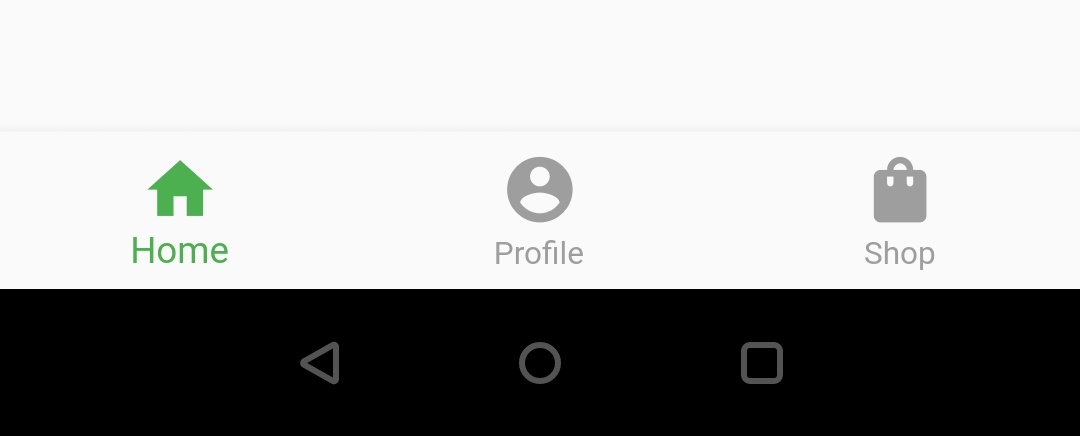
selectedItemColor
This property will change the color of both icon and label text of the selected item.
BottomNavigationBar(
        items: [
          BottomNavigationBarItem(
            icon: Icon(Icons.home),
            label: 'Home',
          ),
          BottomNavigationBarItem(
            icon: Icon(Icons.account_circle),
            label: 'Profile',
          ),
          BottomNavigationBarItem(
            icon: Icon(Icons.shopping_bag),
            label: 'Shop',
          ),
        ],
      currentIndex: _selectedIndex,
      selectedItemColor: Colors.deepOrange,
      unselectedItemColor: Colors.grey,
      iconSize: 30,
      onTap: _onTap,
    );
Output :
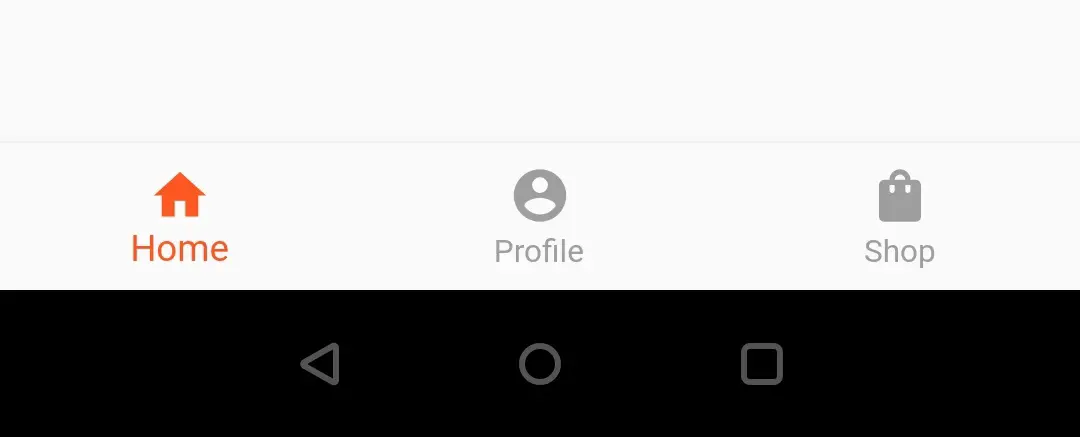
unselectedItemColor
This property will change the color of both icon and label text of the unselected items.
BottomNavigationBar(
        items: [
          BottomNavigationBarItem(
            icon: Icon(Icons.home),
            label: 'Home',
          ),
          BottomNavigationBarItem(
            icon: Icon(Icons.account_circle),
            label: 'Profile',
          ),
          BottomNavigationBarItem(
            icon: Icon(Icons.shopping_bag),
            label: 'Shop',
          ),
        ],
      currentIndex: _selectedIndex,
      selectedItemColor: Colors.deepOrange,
      unselectedItemColor: Colors.green,
      iconSize: 30,
      onTap: _onTap,
    );
Output :
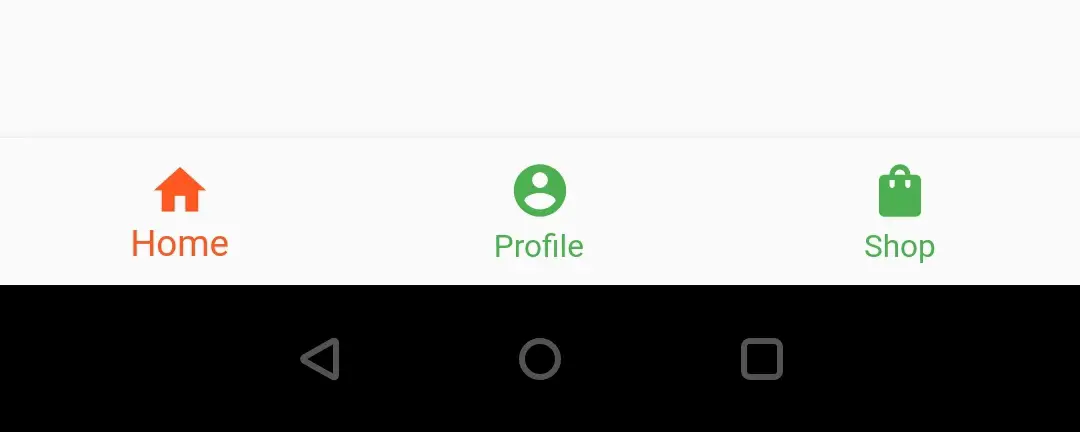
selectedFontSize
To change the font size of the selected item we have to use selectFontSize property.
BottomNavigationBar(
        items: [
          BottomNavigationBarItem(
            icon: Icon(Icons.home),
            label: 'Home',
          ),
          BottomNavigationBarItem(
            icon: Icon(Icons.account_circle),
            label: 'Profile',
          ),
          BottomNavigationBarItem(
            icon: Icon(Icons.shopping_bag),
            label: 'Shop',
          ),
        ],
      currentIndex: _selectedIndex,
      selectedItemColor: Colors.deepOrange,
      unselectedItemColor: Colors.grey,
      selectedFontSize: 20,
      onTap: _onTap,
    );
Output :
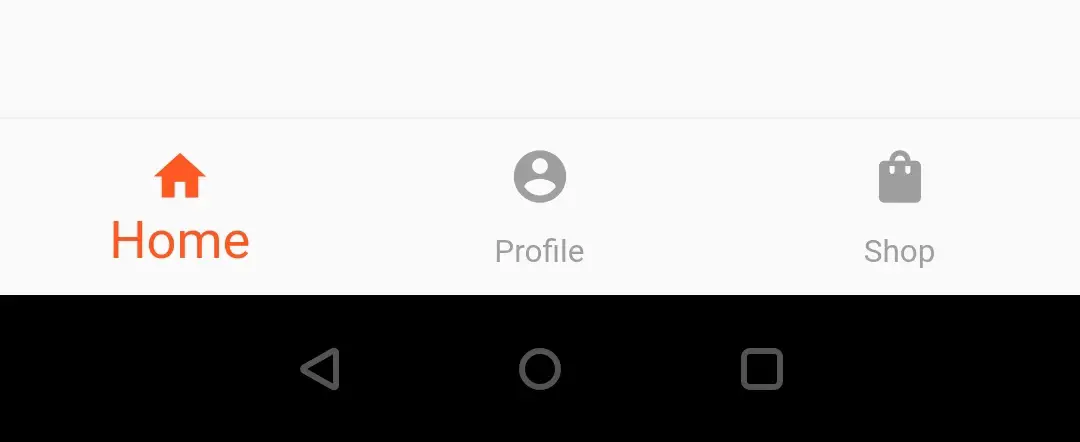
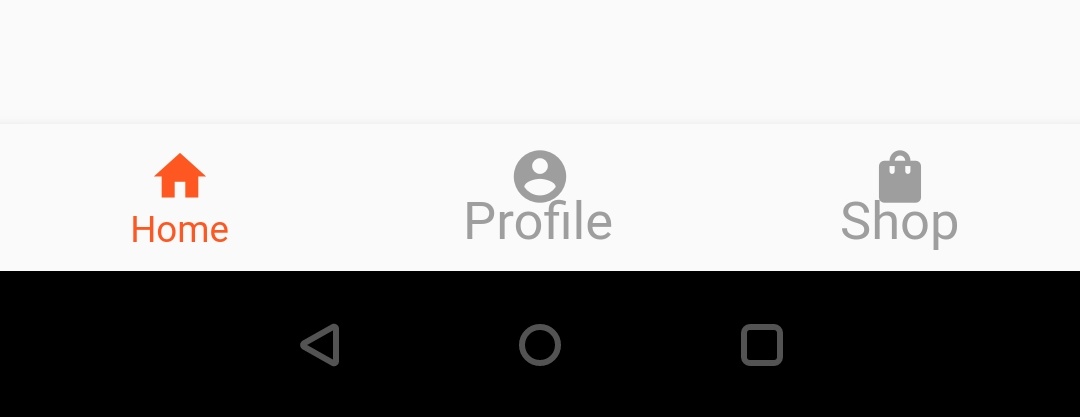
unselectedFontsize
To change the font size of the unselected item we have to use unselectFontSize property.
BottomNavigationBar(
        items: [
          BottomNavigationBarItem(
            icon: Icon(Icons.home),
            label: 'Home',
          ),
          BottomNavigationBarItem(
            icon: Icon(Icons.account_circle),
            label: 'Profile',
          ),
          BottomNavigationBarItem(
            icon: Icon(Icons.shopping_bag),
            label: 'Shop',
          ),
        ],
      currentIndex: _selectedIndex,
      selectedItemColor: Colors.deepOrange,
      unselectedItemColor: Colors.grey,
      unselectedFontSize: 20,
      onTap: _onTap,
    );
Output :
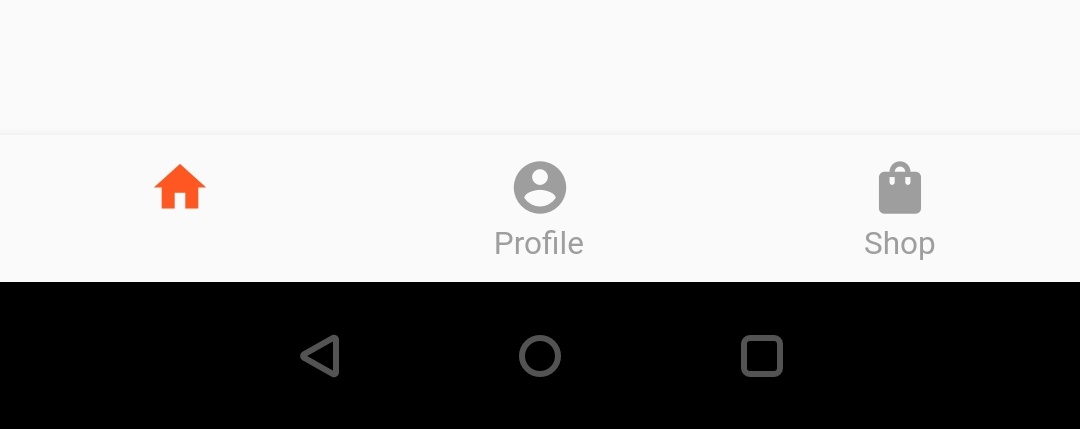
showSelectedLabels
It is a boolean value that we will use to show or hide label of selected item. If we set it to true it will show the label for selected item and hides the label if set to false.
BottomNavigationBar(
        items: [
          BottomNavigationBarItem(
            icon: Icon(Icons.home),
            label: 'Home',
          ),
          BottomNavigationBarItem(
            icon: Icon(Icons.account_circle),
            label: 'Profile',
          ),
          BottomNavigationBarItem(
            icon: Icon(Icons.shopping_bag),
            label: 'Shop',
          ),
        ],
      currentIndex: _selectedIndex,
      selectedItemColor: Colors.deepOrange,
      unselectedItemColor: Colors.grey,
      showSelectedLabels: false,
      onTap: _onTap,
    );
Output :
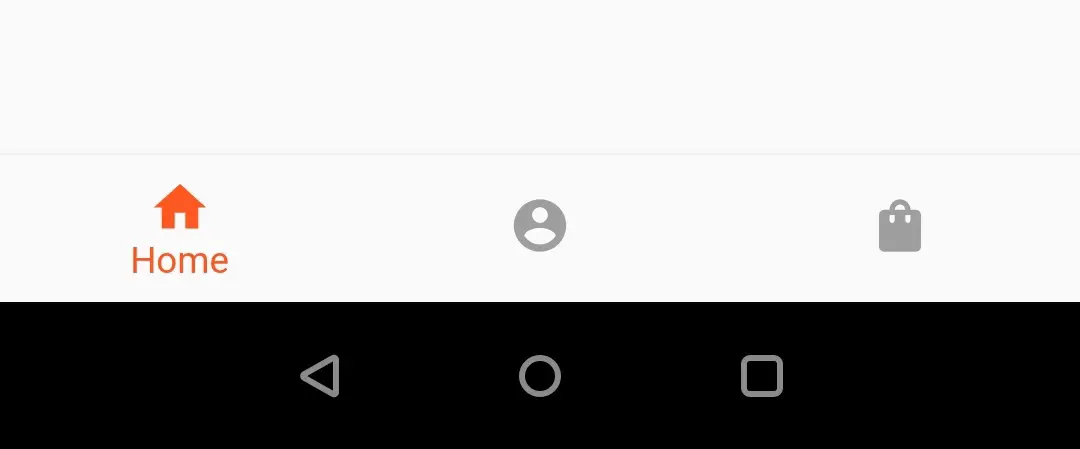
showUnselectedLabels
It is a boolean value that we will use to show or hide label of unselected items. If we set it to true it will show the label for unselected items and hides the labels if set to false.
BottomNavigationBar(
        items: [
          BottomNavigationBarItem(
            icon: Icon(Icons.home),
            label: 'Home',
          ),
          BottomNavigationBarItem(
            icon: Icon(Icons.account_circle),
            label: 'Profile',
          ),
          BottomNavigationBarItem(
            icon: Icon(Icons.shopping_bag),
            label: 'Shop',
          ),
        ],
      currentIndex: _selectedIndex,
      selectedItemColor: Colors.deepOrange,
      unselectedItemColor: Colors.grey,
      showUnselectedLabels: false,
      onTap: _onTap,
    );
Output :
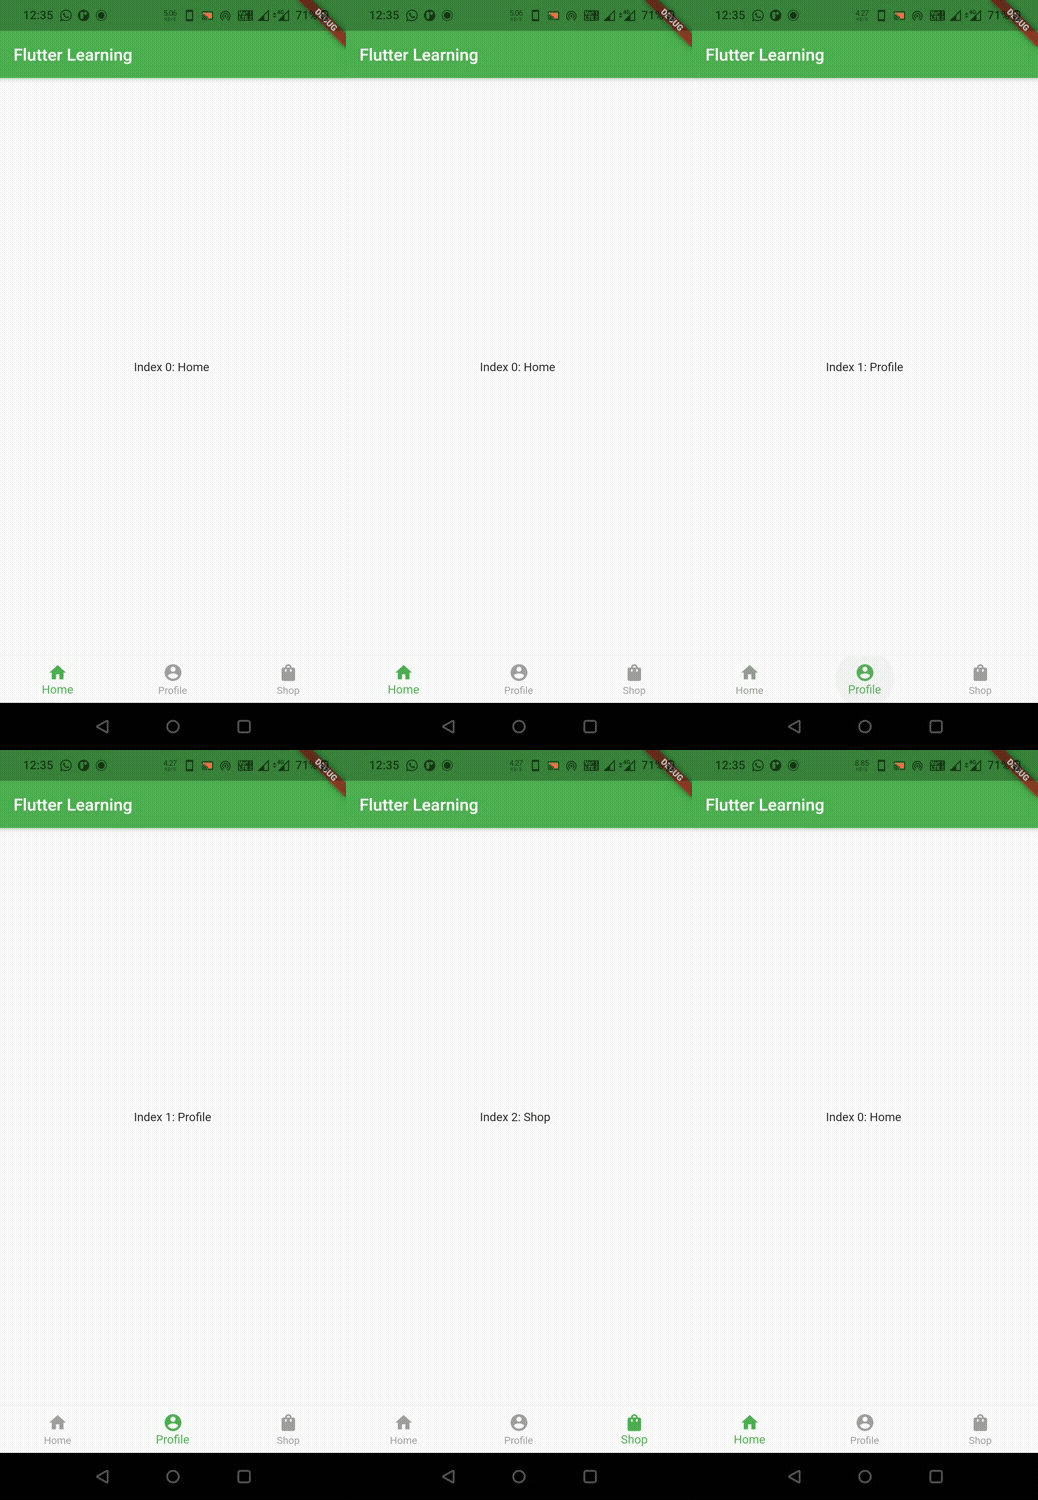
Let’s create an example where we display a bottom navigation bar with three items. Whenever the user taps on an item we will display data according to the item in the center of the screen. For this purpose we will need a global variable _selectedindex to hold the index of the tapped item. We will update selected item and its data based on this index.
By default we will display the first item as selected.
int _selectedIndex = 0;
Now let’s declare a List _items which will hold our widgets that will appear based on item selected.
List<Widget> _items = [
    Text(
    'Index 0: Home',
    ),
    Text(
      'Index 1: Profile',
    ),
    Text(
      'Index 2: Shop',
    ),
  ];
We will also need a function to get the index of the item we select so that we can update the global variable _selectedIndex with that index.
void _onTap(int index)
  {
    _selectedIndex = index;
    setState(() {

    });
  }
Let’s update the content of the screen based on index.
Scaffold(
      appBar: AppBar(
        title: Text("Flutter Learning"),
      ),
      body:Center(
        child: _items.elementAt(_selectedIndex),
      ),
      bottomNavigationBar: _showBottomNav(),
    );
You cannot save the state of the pages by using above code. For example, if you are searching for something in a page and switched the page and returned to same page the search query will be lost. You have to type your query again. To save the state of a page use IndexedStack Instead.
Scaffold(
      appBar: AppBar(
        title: Text("Flutter Learning"),
      ),
      body:Center(
        child: IndexedStack(
          index: _selectedIndex,
          children: _items
        ),
      ),
      bottomNavigationBar: _showBottomNav(),
    );
Now we will create a function _showBottomNav() which will return a BottomNavigationBar widget to scaffold’s bottomNavgationBar property.
Scaffold(
      appBar: AppBar(
        title: Text("Flutter Learning"),
      ),
      bottomNavigationBar: _showBottomNav(),
    );
Widget _showBottomNav()
  {
    return BottomNavigationBar(
        items: [
          BottomNavigationBarItem(
            icon: Icon(Icons.home),
            label: 'Home',
          ),
          BottomNavigationBarItem(
            icon: Icon(Icons.account_circle),
            label: 'Profile',
          ),
          BottomNavigationBarItem(
            icon: Icon(Icons.shopping_bag),
            label: 'Shop',
          ),
        ],
      currentIndex: _selectedIndex,
      selectedItemColor: Colors.deepOrange,
      unselectedItemColor: Colors.grey,
      onTap: _onTap,
    );
  }
Complete Code :
Let’s sum up the entire functionality to create a bottom navigation bar completely
import 'dart:io';
import 'package:flutter/cupertino.dart';
import 'package:flutter/material.dart';
import 'package:flutter/widgets.dart';
import 'widgets/add_entry_dialog.dart';
void main()
{
  runApp(MyApp());
}

class MyApp extends StatelessWidget {
  @override
  Widget build(BuildContext context) {
    return MaterialApp(
      title: 'Flutter Learning',
      theme: ThemeData(
        primarySwatch: Colors.green,
      ),
      home: MyHomePage(),
    );
  }
}

class MyHomePage extends StatefulWidget {
  @override
  _MyHomePageState createState()
  {
    return _MyHomePageState();
  }
}

class _MyHomePageState extends State<MyHomePage> {
  //List<String> _titles = ["Home", "Profile", "Shop"];
  List<Widget> _items = [
    Text(
    'Index 0: Home',
    ),
    Text(
      'Index 1: Profile',
    ),
    Text(
      'Index 2: Shop',
    ),
  ];
  int _selectedIndex = 0;

  @override
  Widget build(BuildContext context) {
    return Scaffold(
      appBar: AppBar(
        title: Text("Flutter Learning"),
      ),
      body:Center(
        child: IndexedStack(
          index: _selectedIndex,
          children: _items
        )//_items.elementAt(_index),
      ),
      bottomNavigationBar: _showBottomNav(),
    );
  }

  Widget _showBottomNav()
  {
    return BottomNavigationBar(
        items: [
          BottomNavigationBarItem(
            icon: Icon(Icons.home),
            label: 'Home',
          ),
          BottomNavigationBarItem(
            icon: Icon(Icons.account_circle),
            label: 'Profile',
          ),
          BottomNavigationBarItem(
            icon: Icon(Icons.shopping_bag),
            label: 'Shop',
          ),
        ],
      currentIndex: _selectedIndex,
      selectedItemColor: Colors.green,
      unselectedItemColor: Colors.grey,
      onTap: _onTap,
    );
  }

  void _onTap(int index)
  {
    _selectedIndex = index;
    setState(() {

    });
  }
}
Output :
I hope you understand this tutorial about how to create and display or show bottom navigation bar in flutter. We have also seen an example where we’ve used BottomNavigationBar widget and customized it’s style. Let’s catch up with some other widget in the next post. Have a great day!!
Do share, subscribe and like my facebook page if you find this post helpful. Thank you!!
Reference : Flutter Official Documentation


Leave a Reply