
Flutter AlertDialog
AlertDialog is a material widget in flutter which is used to take confirmation before performing an action. For example, when we try to log out of an application it will ask confirmation with yes and no actions. We have to use alert dialog in such cases. An alert dialog has three important properties title, content and actions which are optional. Even though the content is optional there is no point in using an alert dialog without content. The title is displayed at the top & content will be displayed below the title. The actions will be displayed at the bottom of the dialog.
In this tutorial we will learn how to use AlertDialog widget in flutter wit example. We will also customize its style with different properties.
Constructor :
AlertDialog(
{
   Key key,
   Widget title,
   EdgeInsetsGeometry titlePadding,
   TextStyle titleTextStyle,
   Widget content,
   EdgeInsetsGeometry contentPadding: const EdgeInsets.fromLTRB(24.0, 20.0, 24.0, 24.0),
   TextStyle contentTextStyle,
   List<Widget> actions,
   EdgeInsetsGeometry actionsPadding: EdgeInsets.zero,
   VerticalDirection actionsOverflowDirection,
   double actionsOverflowButtonSpacing,
   EdgeInsetsGeometry buttonPadding,
   Color backgroundColor,
   double elevation,
   String semanticLabel,
   EdgeInsets insetPadding: _defaultInsetPadding,
   Clip clipBehavior: Clip.none,
   ShapeBorder shape,
   bool scrollable: false
 }
)
Creating AlertDialog In Flutter
We can create an Alertdialog in flutter by using the constructor. To display the alert dialog we have to use showDialog() method. We will return alertdialog as the child widget to ShowDialog, which displays the dialog.
Let’s create an alert dialog and display it. First, we have to design the UI and a function where we will call the showDialog method that displays the alert dialog. Let’s get to work.
Designing The UI
We will design the UI where we will display a Button widget and a text widget. Clicking on the button will call the showDialog method that will show the AlertDialog. When the user chooses an option we will display the selected option in the text widget.
@override
  Widget build(BuildContext context) {
    return Scaffold(
      appBar: AppBar(
        title: Text("Flutter AlertDialog"),
      ),
      body: Center(
        child: Column(
          mainAxisAlignment: MainAxisAlignment.center,
          children: <Widget>[
            ElevatedButton(
                onPressed: () {
                  _displayDialog(context);
                },
              child: Text("Show Dialog"),
            ),
            Text("${selectedTime.hour}:${selectedTime.minute}"),
          ],
        ),
      ),
    );
  }
Designing UI Of AlertDialog
Let’s design the UI for alertdialog where we will have a title, message, and two actions YES and NO. The title and message are text widgets and the actions are button widgets.
AlertDialog(
            title: Text('Welcome'),
            content: Text('Do you wanna learn flutter?'),
            actions: [
              TextButton(
                onPressed: () {
                  Navigator.of(context).pop();
                },
                child: Text('YES', style: TextStyle(color: Colors.black),),
              ),
              TextButton(
                onPressed: () {
                  Navigator.of(context).pop();
                },
                child: Text('NO', style: TextStyle(color: Colors.black),),
              ),
            ],
          ),
Creating the showDialog() method
Now we will create a function _displayDialog where we call the showDialog() method which will display AlertDialog with title, message, and two buttons.
_displayDialog(BuildContext context) async {
    showDialog(
      context: context,
      builder: (BuildContext context) {
        return Expanded(
          child: AlertDialog(
            title: Text('Welcome'),
            content: Text('Do you wanna learn flutter?'),
            actions: [
              TextButton(
                onPressed: () {
                  Navigator.of(context).pop();
                },
                child: Text('YES', style: TextStyle(color: Colors.black),),
              ),
              TextButton(
                onPressed: () {
                  Navigator.of(context).pop();
                },
                child: Text('NO', style: TextStyle(color: Colors.black),),
              ),
            ],
          ),
        );
      },
    );
  }
If you don’t want the user to dismiss the dialog without selecting an action, set barrierDismissible property of showDialog method to false.
showDialog(
      context: context,
      builder: (BuildContext context) {
        return Expanded(
          child: AlertDialog(
            title: Text('Welcome'),
            content: Text('Do you wanna learn flutter?'),
            actions: [
              TextButton(
                onPressed: () {
                  Navigator.of(context).pop();
                },
                child: Text('YES', style: TextStyle(color: Colors.black),),
              ),
              TextButton(
                onPressed: () {
                  Navigator.of(context).pop();
                },
                child: Text('NO', style: TextStyle(color: Colors.black),),
              ),
            ],
          ),
        );
      },
    );
Flutter AlertDialog Example Complete Code
Let’s see an example where we create and display an alert dialog in flutter. For creating dialog will use AlertDialog widget and add two text buttons as actions. To display the dialog we will use showDialog function.
import 'dart:io';
import 'package:flutter/cupertino.dart';
import 'package:flutter/material.dart';
void main()
{
  runApp(MyApp());
}
class MyApp extends StatelessWidget {
  @override
  Widget build(BuildContext context) {
    return MaterialApp(
      title: 'Flutter AlertDialog',
      theme: ThemeData(
        primarySwatch: Colors.blue,
      ),
      home: MyHomePage(),
    );
  }
}

class MyHomePage extends StatefulWidget {
  @override
  _MyHomePageState createState()
  {
    return _MyHomePageState();
  }
}

class _MyHomePageState extends State<MyHomePage> {
  @override
  Widget build(BuildContext context) {
    return Scaffold(
      appBar: AppBar(
        title: Text("Flutter AlertDialog"),
      ),
      body: Center(
        child: Column(
          mainAxisAlignment: MainAxisAlignment.center,
          children: <Widget>[
            ElevatedButton(
                onPressed: () {
                  _showDialog(context);
                },
              child: Text("Show Dialog"),
            ),
          ],
        ),
      ),
    );
  }
  _showDialog(BuildContext context) {
    showDialog(
      context: context,
      builder: (BuildContext context) {
        return Expanded(
          child: AlertDialog(
            title: Text('Welcome'),
            content: Text('Do you wanna learn flutter?'),
            actions: [
              TextButton(
                onPressed: () {
                  Navigator.of(context).pop();
                },
                child: Text('YES', style: TextStyle(color: Colors.black),),
              ),
              TextButton(
                onPressed: () {
                  Navigator.of(context).pop();
                },
                child: Text('NO', style: TextStyle(color: Colors.black),),
              ),
            ],
          ),
        );
      },
    );
  }
}
Output:
Properties of AlertDialog
The most used properties of AlertDialog are:
- title
- content
- actions
- backgroundColor
- elevation
Since we have already seen the title, content actions in the above code example let’s check out background and elevation.
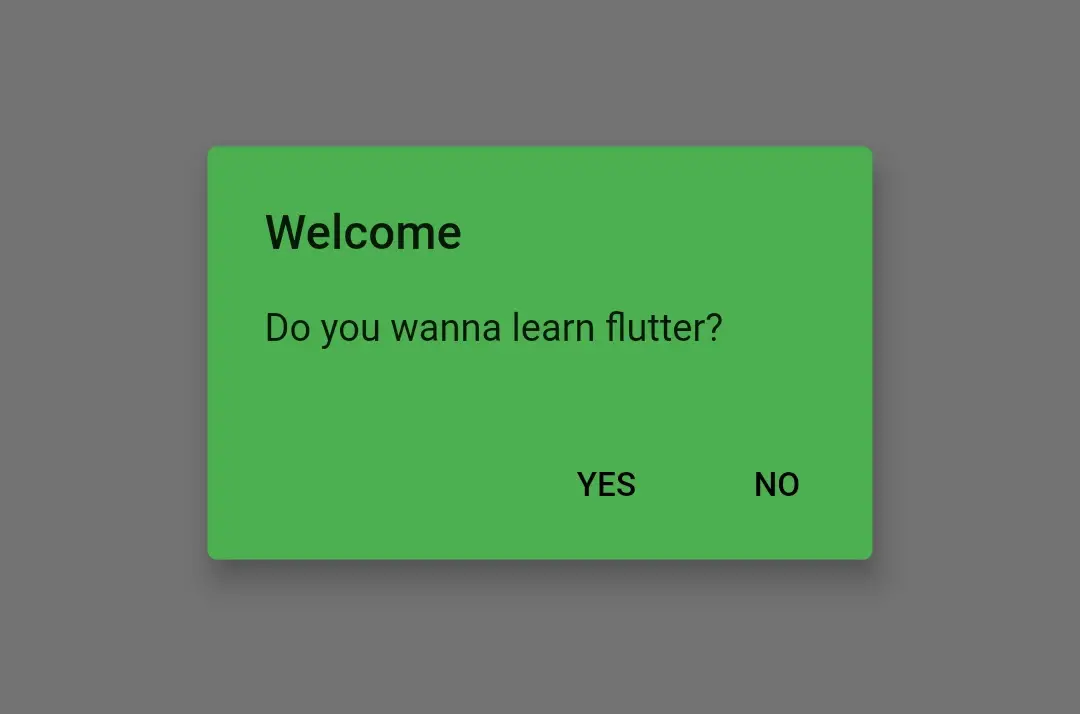
How to change background color and elevation of Alertdialog
AlertDialog(
            title: Text('Welcome'),
            content: Text('Do you wanna learn flutter?'),
            actions: [
              TextButton(
                onPressed: () {
                  Navigator.of(context).pop();
                },
                child: Text('YES', style: TextStyle(color: Colors.black),),
              ),
              TextButton(
                onPressed: () {
                  Navigator.of(context).pop();
                },
                child: Text('NO', style: TextStyle(color: Colors.black),),
              ),
            ],
            elevation: 10,
            backgroundColor: Colors.green,
          ),
Output:
That brings an end to the tutorial about how to use AlertDialog widget in flutter with example. I hope you understand how to create and display AlertDialog in flutter. Let’s catch up with some other widget in the next post. Have a great day!!
Do share, subscribe, and like my Facebook page if you find this post helpful. Thank you!!
Reference: Flutter Official Documentation.


hi
i have a question,
what is the difference of these codes and working of both of them are the same?
// the first one
_displayDialog(BuildContext context) async {
showDialog(
context: context,
builder: (BuildContext context) {
return Expanded(
child: AlertDialog( … )
// the second one
_displayDialog() {
showDialog(
context: context,
builder: (BuildContext context) {
return Expanded(
child: AlertDialog( … )
They both are pretty much same the first method runs asynchronously and the second runs on main thread, that’s it.