
Flutter Cupertino Activity Indicator
Cupertino activity indicator is a widget in flutter used to display ios style activity indicator. Sometimes we may have to display an indicator to the user when the application is busy. Cupertino activity indicator comes in handy in such situations. It prevents the user from interacting with the app. It will display an animating indicator when the application is busy. For example, while fetching data from API, downloading & uploading content, etc. Cupertino activity indicator is similar to a circular progress indicator in android which spins clockwise.
Flutter provides two types of constructors for Cupertino Activity Indicator. They are:
- CupertinoActivityIndicator
- CupertinoActivityIndicator.partiallyRevealed
This tutorial shows you how to use cupertino activity Indicator in flutter. You will also learn how to customize & style the widget with different properties with an example.
How To Create Cupertino Activity Indicator ?
We can create a cupertino activity indicator in flutter by calling the constructor of CupertinoActivityIndicator class and providing required arguments. There are no required properties for CupertinoActivityIndicator Widget. So we can simply call the constructor to display the activity indicator.
Flutter Cupertino Activity Indicator Constructor:
CupertinoActivityIndicator(
{Key? key,
 bool animating,
 double radius
}
)
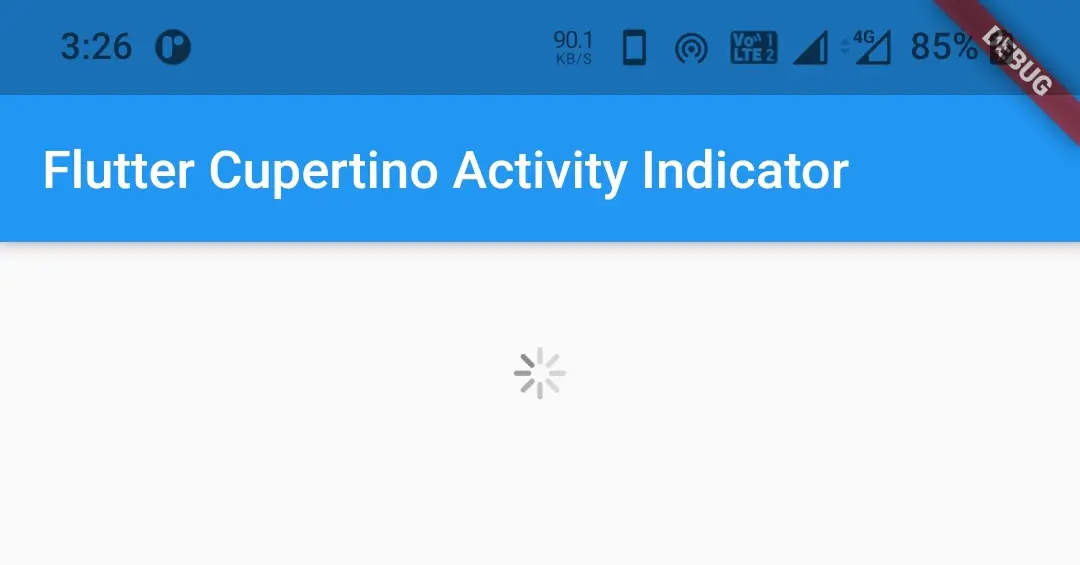
Basic implementation of cupertino activity indicator
CupertinoActivityIndicator()
Output:
Flutter Cupertino Activity Indicator Properties
The properties of cupertino activity indicator are:
- animating: Use this property to enable or disable animation. It is a boolean value.
- radius: Use this property to increase the size of the indicator.
How To Enable or Disable Animation Of Cupertino Activity Indicator?
To enable or disable the animation of the activity indicator we will use the animating property. It takes boolean as value. By default this value is true.
CupertinoActivityIndicator(
            animating: false,
)
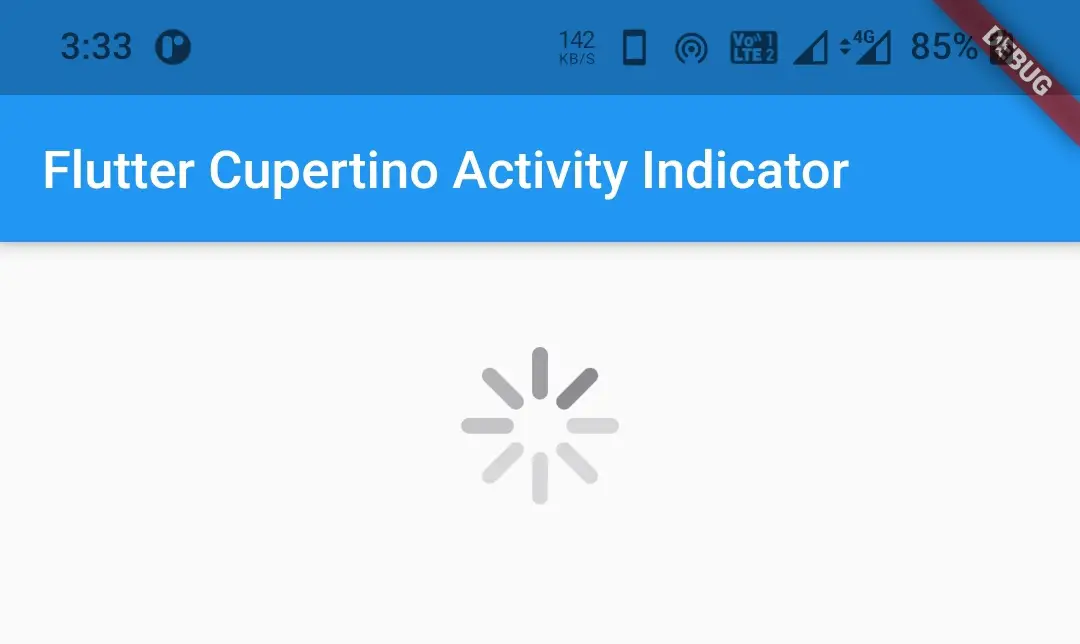
How To Change The Size Or Radius Of Cupertino Activity Indicator?
To change the size or radius of the activity indicator we will use the radius property. It takes double as value. By default its value is 10px.
CupertinoActivityIndicator(
            animating: true,
            radius: 30,
          )
Output:
CupertinoActivityIndicator.partiallyRevealed
This constructor will display a cupertino activity indicator with no animation. It has an additional property called progress along with radius property. This property indicates the amount of completion of the task that is running. The value for progress must fall between 0 to 1. By default, it is 1.0.
Constructor:
CupertinoActivityIndicator.partiallyRevealed(
{Key? key,
 double radius,
 double progress}
)
Flutter Cupertino Activity Indicator Example
Let us create an example that demonstrates the use of cupertino activity indicator. In this example, we will display a button clicking on which will display a cupertino activity indicator and CupertinoActivityIndicator.partiallyRevealed.
Declare a variable value whose value is initially 0.
double value = 0;
Assign the variable as value to progress property of cupertionActivityIndicator.partiallyRevealed constructor.
CupertinoActivityIndicator.partiallyRevealed(
                progress:value ,
                radius: 30,
              );
Now we will create a function uploadFile. Inside this function we will create new Timer.periodic and add 0.2 to the value variable every second inside the callback function of the timer. We will also update the state every time the callback function is invoked so that the UI gets updated with the progress. When the value becomes 1.0 we will cancel the timer.
void uploadFile(){
    new Timer.periodic(
        Duration(seconds: 1),
            (Timer timer){
          setState(() {
            if(value == 1) {
              timer.cancel();
            }
            else {
              value = value + 0.2;
            }
          });
        }
    );
  }
Let us call the above function inside onPressed callback of an elevated button. Also, assign 0 to the value variable declared in the beginning and update the state so that the progress starts from 0 and the UI will also be updated with the value.
ElevatedButton(
                child: Text("Upload File"),
                onPressed: () {
                  value = 0;
                  uploadFile();
                  setState(() {
                  });
                },
              ),
Let us add the button and indicators to the body of the scaffold in main.dart file.
body:Container(
          margin: EdgeInsets.all(40),
          alignment: Alignment.topCenter,
          child: Column(
            mainAxisAlignment: MainAxisAlignment.spaceEvenly,
            children: [

              CupertinoActivityIndicator(
                animating: true,
                radius:30
              ),
              CupertinoActivityIndicator.partiallyRevealed(
                progress: value,
                radius: 30,
              ),
              ElevatedButton(
                child: Text("Upload File"),
                onPressed: () {
                  value = 0;
                  uploadFile();
                  setState(() {
                  });
                },
              ),
            ]
        ),
        ),
Complete Code:
Let us sum up all the code snippets above to complete our example.
import 'dart:async';
import 'package:flutter/cupertino.dart';
import 'package:flutter/material.dart';
import 'package:flutter/widgets.dart';

void main()
{
  runApp(MyApp());
}

class MyApp extends StatelessWidget {
  @override
  Widget build(BuildContext context) {
    return MaterialApp(
      title: 'Flutter Learning',
      theme: ThemeData(
        primarySwatch: Colors.blue,
      ),
      home:MyHomePage(),
    );
  }
}

class MyHomePage extends StatefulWidget {
  @override
  _MyHomePageState createState()
  {
    return _MyHomePageState();
  }
}

class _MyHomePageState extends State<MyHomePage> {
  double value = 0;
  @override
  Widget build(BuildContext context) {
    return new Scaffold(
        appBar: AppBar(
          title: Text("Flutter Cupertino Activity Indicator"),
        ),
        body:Container(
          margin: EdgeInsets.all(40),
          alignment: Alignment.topCenter,
          child: Column(
            mainAxisAlignment: MainAxisAlignment.spaceEvenly,
            children: [
              ElevatedButton(
                child: Text("Upload File"),
                onPressed: () {
                  value = 0;
                  uploadFile();
                  setState(() {
                  });
                },
              ),

              CupertinoActivityIndicator.partiallyRevealed(
                progress: value,
                radius: 30,
              )
            ]
        ),
        ),
    );
  }

  void uploadFile(){
    new Timer.periodic(
        Duration(seconds: 1),
            (Timer timer){
          setState(() {
            if(value == 1) {
              timer.cancel();
            }
            else {
              value = value + 0.2;
            }
          });
        }
    );
  }
}
Output:
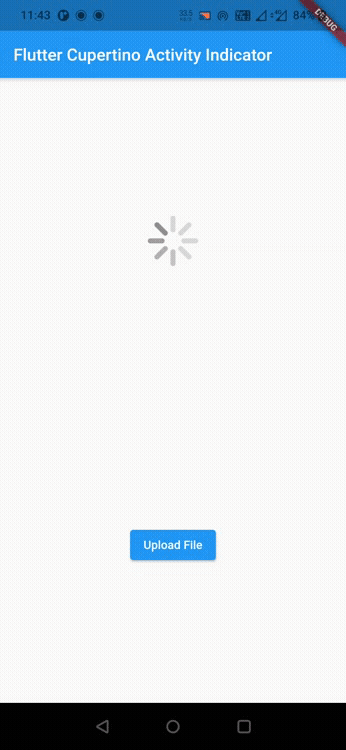
That brings an end to the tutorial on how to use cupertino activity indicator in flutter. We have also seen an example where we’ve used the widget and customized it. Let’s catch up with some other widget in the next post. Have a great day!!
Do like & share my Facebook page. Subscribe to the newsletter if you find this post helpful. Thank you !!
Reference: Flutter Official Documentation


Leave a Reply