
Flutter ListView
Listview in flutter is a widget used to display items in a linear manner. For example, list view is used in apps like zomato & swiggy to display a list of restaurants. Since it is a scrollable widget we can display multiple items on the same screen. If the scroll direction is vertical the children will be arranged one after another from top to bottom. Every child should fill the listview horizontally. When the scroll direction is horizontal the children will be arranged from left to right. Generally, we will use ListTiles as children for a listview but we can use any widget instead.
Flutter provides a widget called ListView which helps us in adding a list view to our application. The most common usage of ListView is the FileManager app. It displays all the directories and files one after another in a list. In this tutorial, we will learn how to use the ListView widget in flutter with example.
Creating ListView In Flutter
In Flutter, ListView class offers 4 types of constructors which help us create ListView based on different cases. Let’s see them below.
- ListView()
- ListView.builder()
- ListView.seperated()
- Listview.custom()
ListView
This default ListView is suitable if we want to display a small number of children. Use it to display a static list of children whose count don’t change. For example, we can use this listview for displaying a menu in our app.
To create a ListView call the constructor of the ListView class provided by flutter and provide required properties. There are no required properties for a listview widget. But we have to provide data to the children property, in order to display the listview.
Flutter ListView Constructor :
ListView(

    {Key? key,
    Axis scrollDirection = Axis.vertical,
    bool reverse = false,
    ScrollController? controller,
    bool? primary,
    ScrollPhysics? physics,
    bool shrinkWrap = false,
    EdgeInsetsGeometry? padding,
    double? itemExtent,
    bool addAutomaticKeepAlives = true,
    bool addRepaintBoundaries = true,
    bool addSemanticIndexes = true,
    double? cacheExtent,
    List<Widget> children = const <Widget>[],
    int? semanticChildCount,
    DragStartBehavior dragStartBehavior = DragStartBehavior.start,
    ScrollViewKeyboardDismissBehavior keyboardDismissBehavior = ScrollViewKeyboardDismissBehavior.manual,
    String? restorationId,
    Clip clipBehavior = Clip.hardEdge}

)
Basic implementation of ListView.
ListView(
        children: [
          child widget1,
          child widget2,
          .....
        ],
        scrollDirection: Axis.horizontal,
      )
Flutter ListView Properties
The important properties of a ListView are :
- padding
- shrinkWrap
- reverse
- scrollDirection
- itemExtent
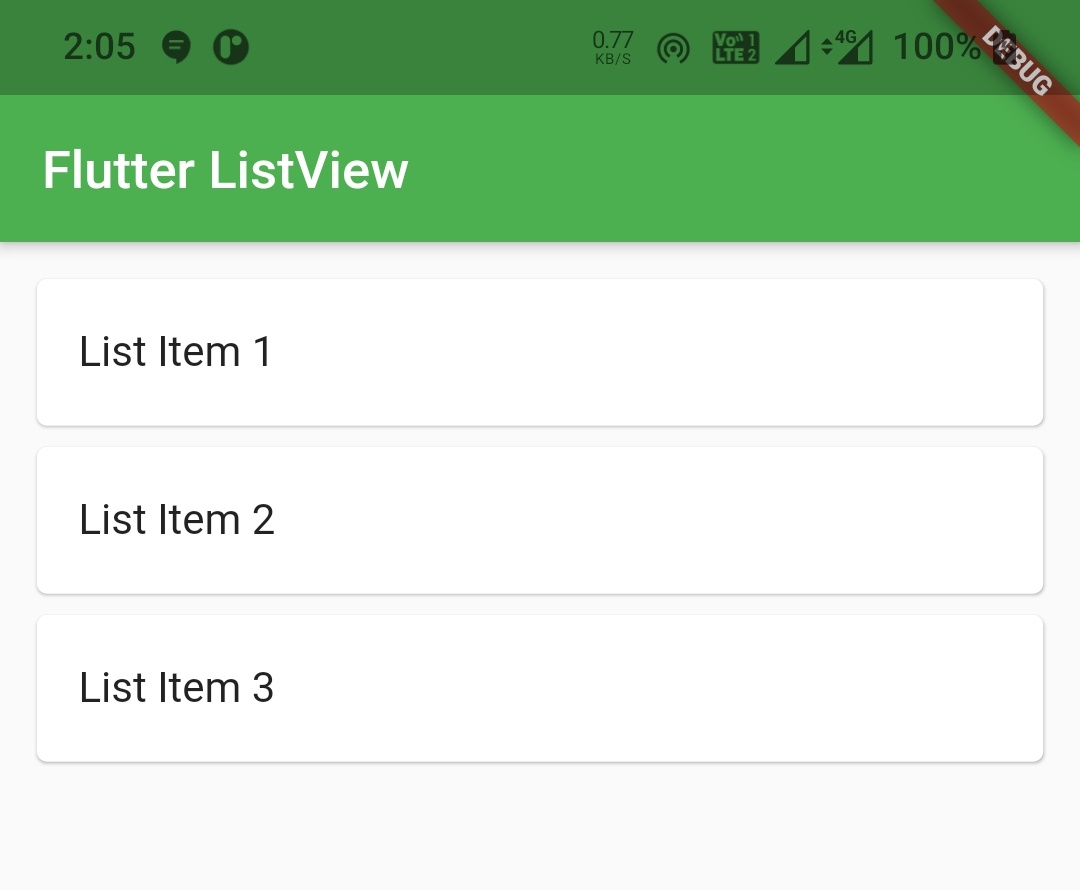
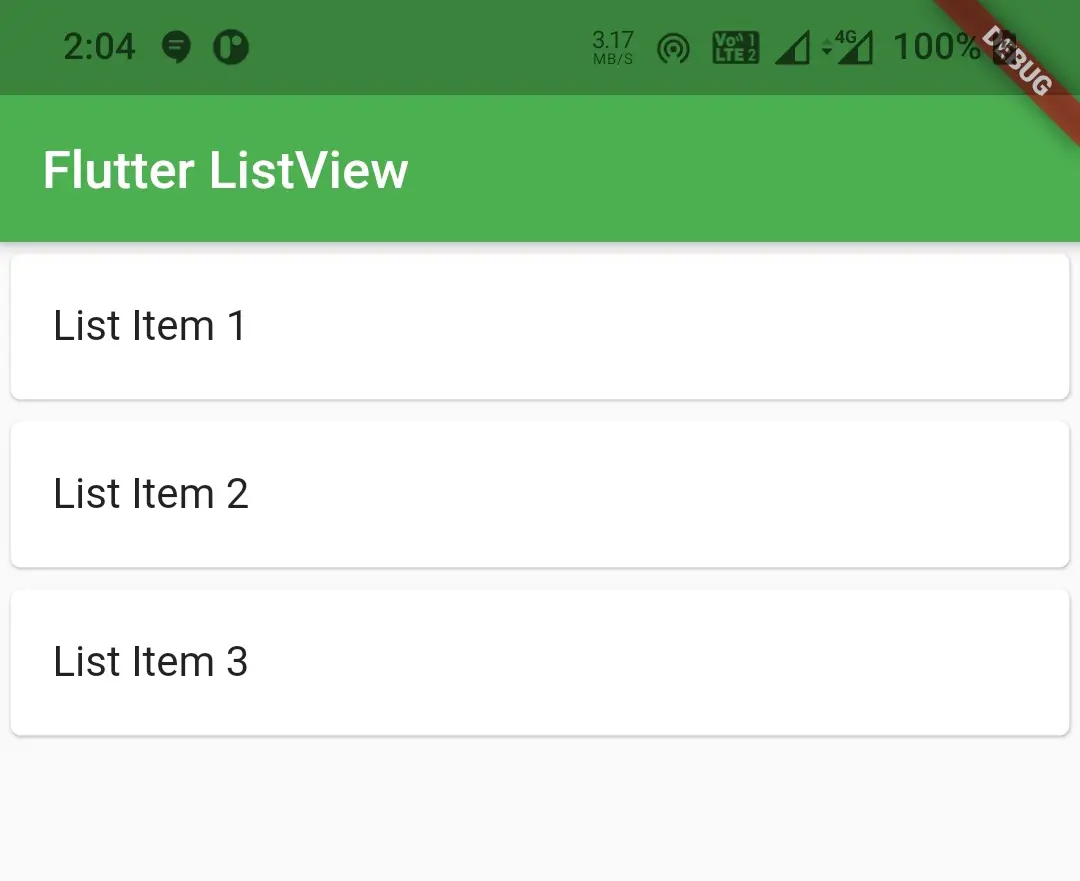
padding
It takes EdgeInsetsGeometry as value. Use this property to apply padding to the listview.
ListView(
        children: [
          Card(
            child: ListTile(
              title:Text("List Item 1") ,
            )
          ),
          Card(
            child: ListTile(
              title: Text("List Item 2"),
            ),
          ),
          Card(
            child: ListTile(
              title: Text("List Item 3"),
            )
          ),
        ],
        padding: EdgeInsets.all(10),
      )
Output :
shrinkWrap
If shrinkWrap is false it will cause memory wastage and reduces the app performance. So to avoid memory leakage we have to set it to true which will wrap the child widgets with shrinkWrap. It takes boolean as value which is false by default.
ListView(
        children: [
          Card(
            child: ListTile(
              title:Text("List Item 1") ,
            )
          ),
          Card(
            child: ListTile(
              title: Text("List Item 2"),
            ),
          ),
          Card(
            child: ListTile(
              title: Text("List Item 3"),
            )
          ),
        ],
        padding: EdgeInsets.all(10),
        shrinkWrap: true,
      )
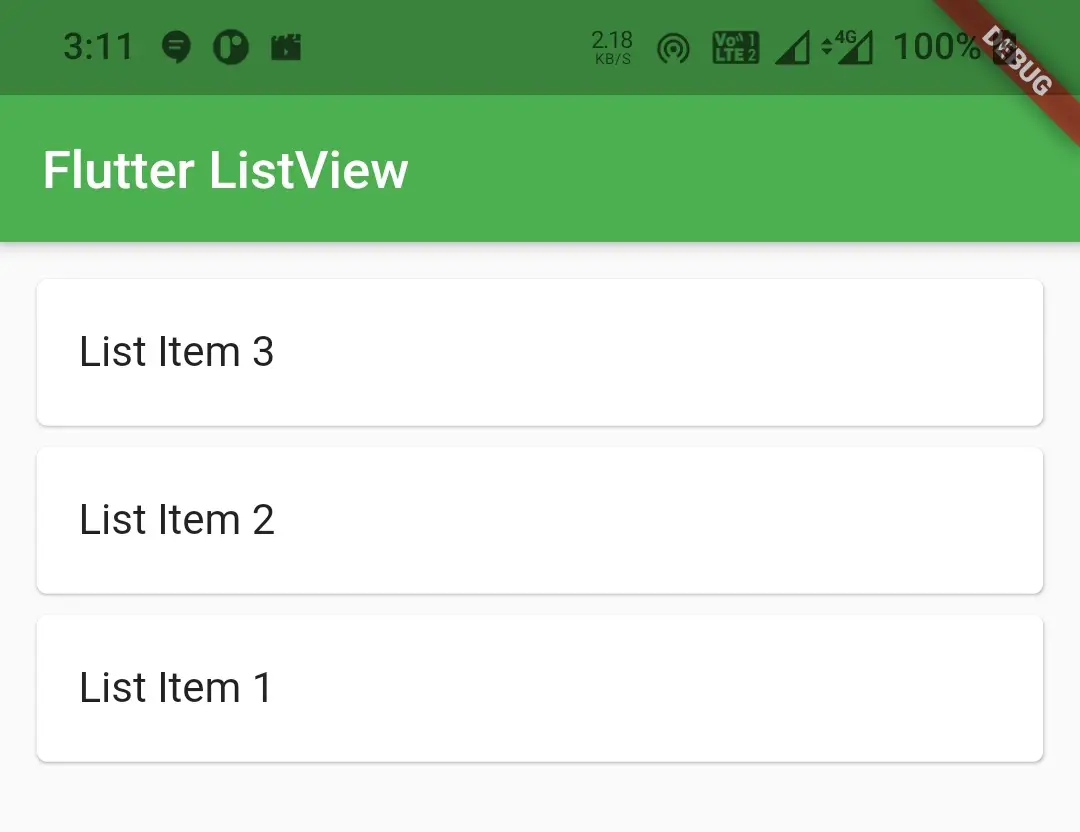
reverse
Use this property to display the list in reverse order. It takes boolean as value which is false by default. Setting this property to true will make the list display the item in last to first order.
ListView(
        children: [
          Card(
            child: ListTile(
              title:Text("List Item 1") ,
            )
          ),
          Card(
            child: ListTile(
              title: Text("List Item 2"),
            ),
          ),
          Card(
            child: ListTile(
              title: Text("List Item 3"),
            )
          ),
        ],
        shrinkWrap: true,
        reverse: true,
        padding: EdgeInsets.all(10),
      )
Output :
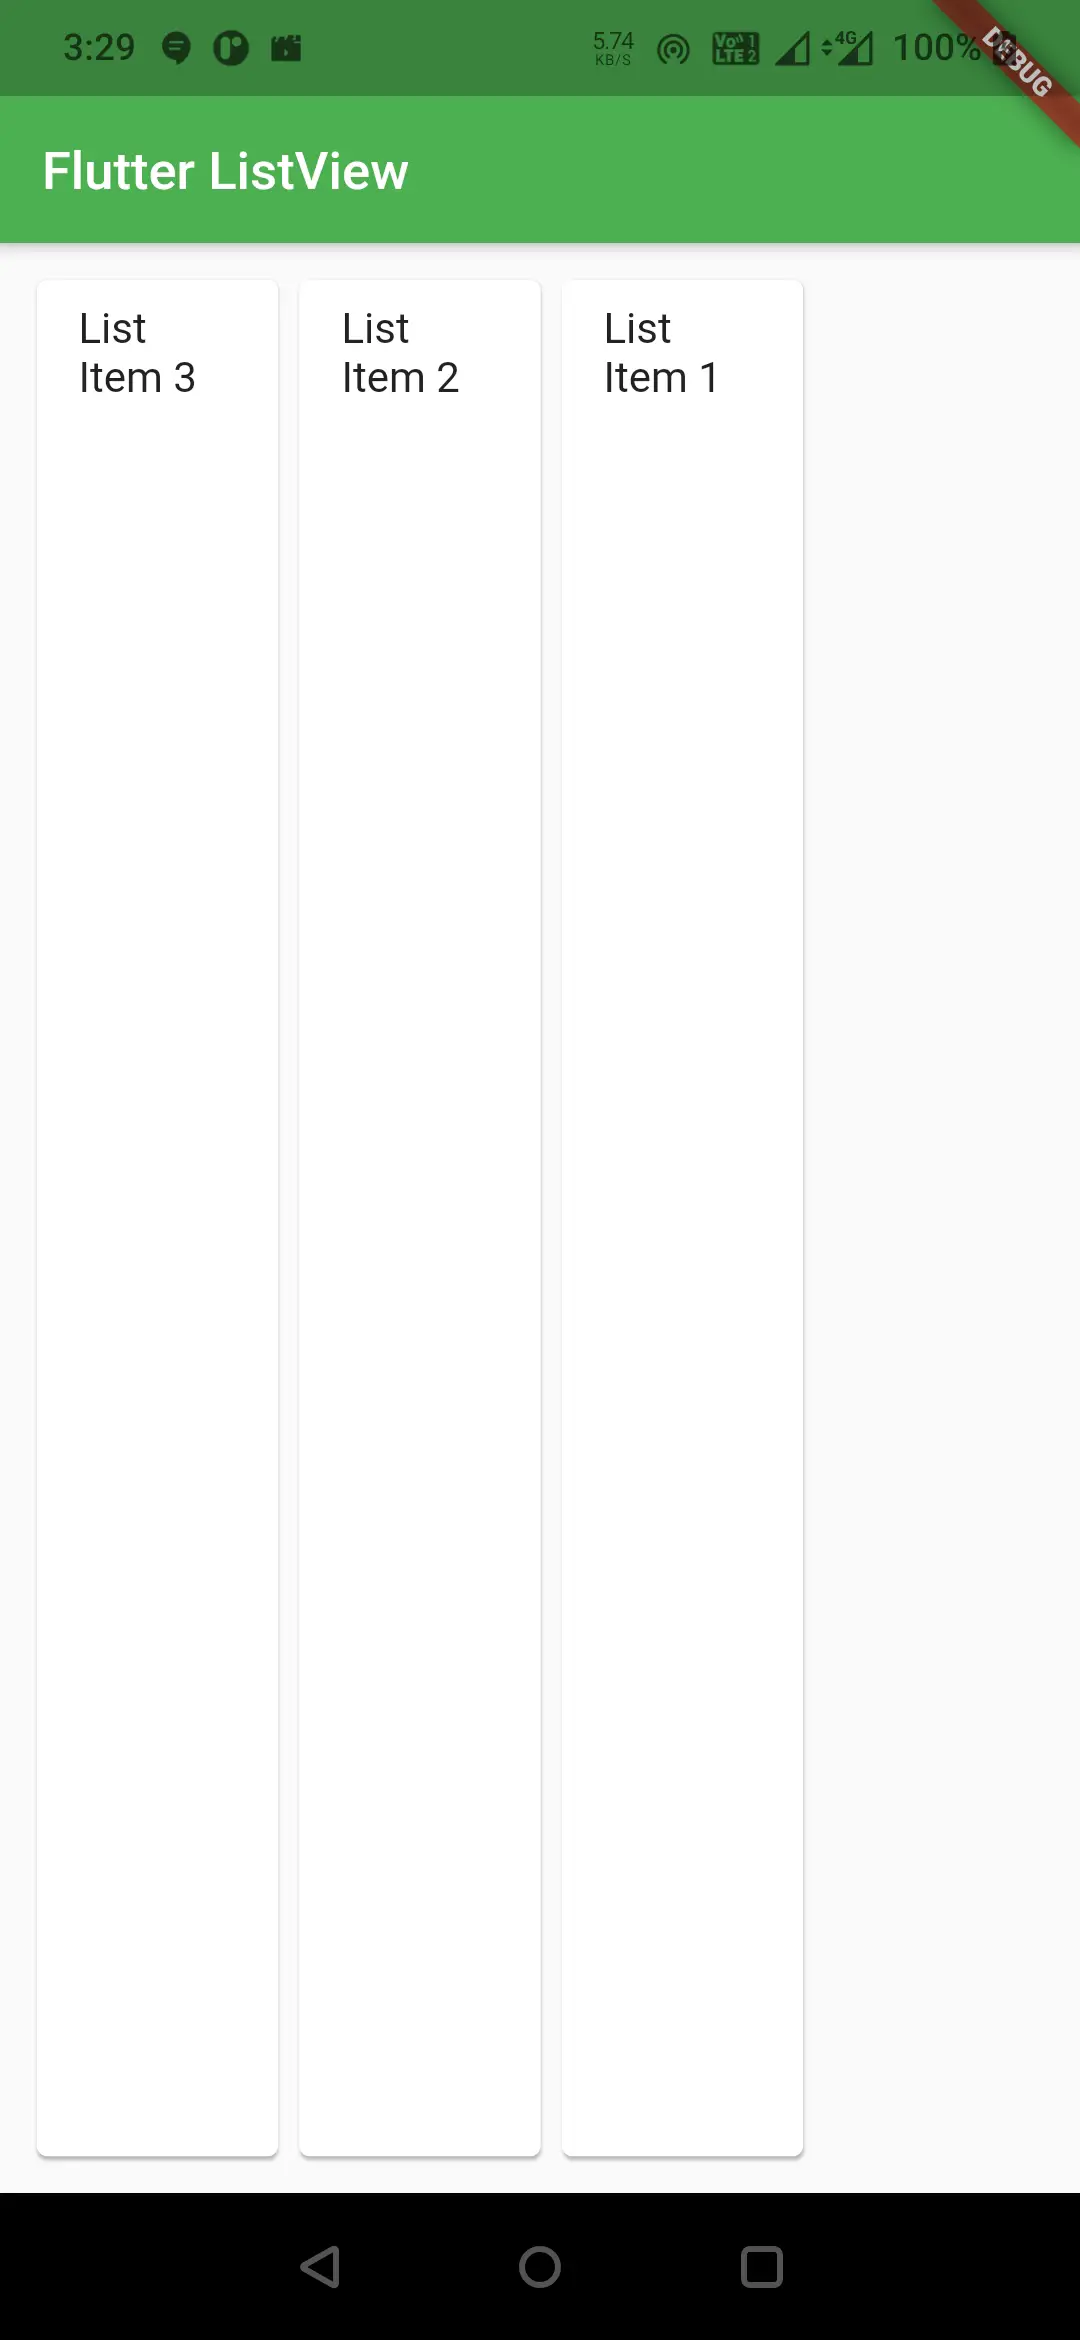
scrollDirection
It takes Axis as value. Use this property to change the scroll direction of the ListView. By default the value is Axis.vertical.
ListView(
        children: [
          Card(
            child: ListTile(
              title:Text("List Item 1") ,
            )
          ),
          Card(
            child: ListTile(
              title: Text("List Item 2"),
            ),
          ),
          Card(
            child: ListTile(
              title: Text("List Item 3"),
            )
          ),
        ],
        shrinkWrap: true,
        reverse: true,
        padding: EdgeInsets.all(10),
        itemExtent: 100,
        scrollDirection: Axis.horizontal,
      )
Output :
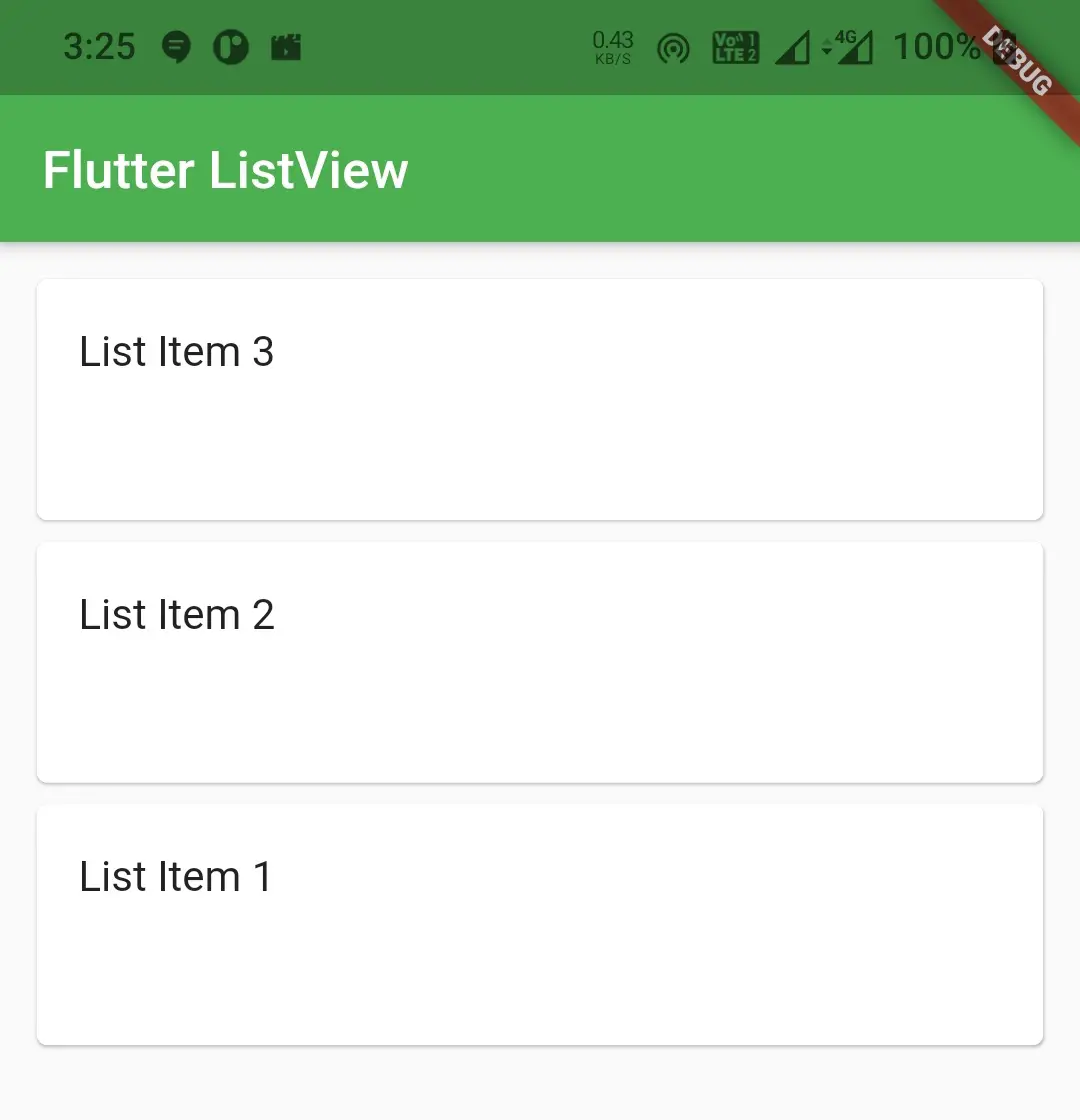
itemExtent
It takes double as value. Use this property to extend ( increase ) the item in scroll direction. when the scroll direction is vertical it increases height and when vertical it increases the width of the item.
ListView(
        children: [
          Card(
            child: ListTile(
              title:Text("List Item 1") ,
            )
          ),
          Card(
            child: ListTile(
              title: Text("List Item 2"),
            ),
          ),
          Card(
            child: ListTile(
              title: Text("List Item 3"),
            )
          ),
        ],
        shrinkWrap: true,
        reverse: true,
        padding: EdgeInsets.all(10),
        itemExtent: 100,
      )
Output :
Flutter ListView Example
Let’s see an example where we will display a ListView with three children. We will use ListTile inside card widget as children. Create a new flutter project and replace the code in main.dart file with the below code.
import 'package:flutter/cupertino.dart';
import 'package:flutter/material.dart';

void main() {
  runApp(MyApp());
}

class MyApp extends StatelessWidget {
  @override
  Widget build(BuildContext context) {
    return MaterialApp(
      title: 'Flutter App Learning',
      theme: ThemeData(
        primarySwatch: Colors.green,
      ),
      home: MyHomePage()
    );
  }
}

class MyHomePage extends StatefulWidget {
  MyHomePage({Key? key}) : super(key: key);
  @override
  _MyHomePageState createState() => _MyHomePageState();
}

class _MyHomePageState extends State<MyHomePage> {

  @override
  Widget build(BuildContext context) {
    return Scaffold(
      appBar: AppBar(
        title: Text("Flutter GridView"),
      ),
      body: ListView(
        children: [
          Card(
            child: ListTile(
              title:Text("List Item 1") ,
            )
          ),
          Card(
            child: ListTile(
              title: Text("List Item 2"),
            ),
          ),
          Card(
            child: ListTile(
              title: Text("List Item 3"),
            )
          ),
        ],
        shrinkWrap: true,
      )
    );
  }
}
Output :
ListView.builder()
Use this constructor to generate the ListView dynamically or with data from API(backend). This constructor is suitable if we don’t know the number of children.
To create a ListView.builder call the constructor and provide the required properties. It has one required property itemBuilder. We will use this property to generate the children for the listview. Provide a value to itemCount to improve the ability of the ListView to estimate the maximum scroll extent.
Flutter ListView.builder() Constructor :
ListView.builder(

    {Key? key,
    Axis scrollDirection = Axis.vertical,
    bool reverse = false,
    ScrollController? controller,
    bool? primary,
    ScrollPhysics? physics,
    bool shrinkWrap = false,
    EdgeInsetsGeometry? padding,
    double? itemExtent,
    required IndexedWidgetBuilder itemBuilder,
    int? itemCount,
    bool addAutomaticKeepAlives = true,
    bool addRepaintBoundaries = true,
    bool addSemanticIndexes = true,
    double? cacheExtent,
    int? semanticChildCount,
    DragStartBehavior dragStartBehavior = DragStartBehavior.start,
    ScrollViewKeyboardDismissBehavior keyboardDismissBehavior = ScrollViewKeyboardDismissBehavior.manual,
    String? restorationId,
    Clip clipBehavior = Clip.hardEdge}

)
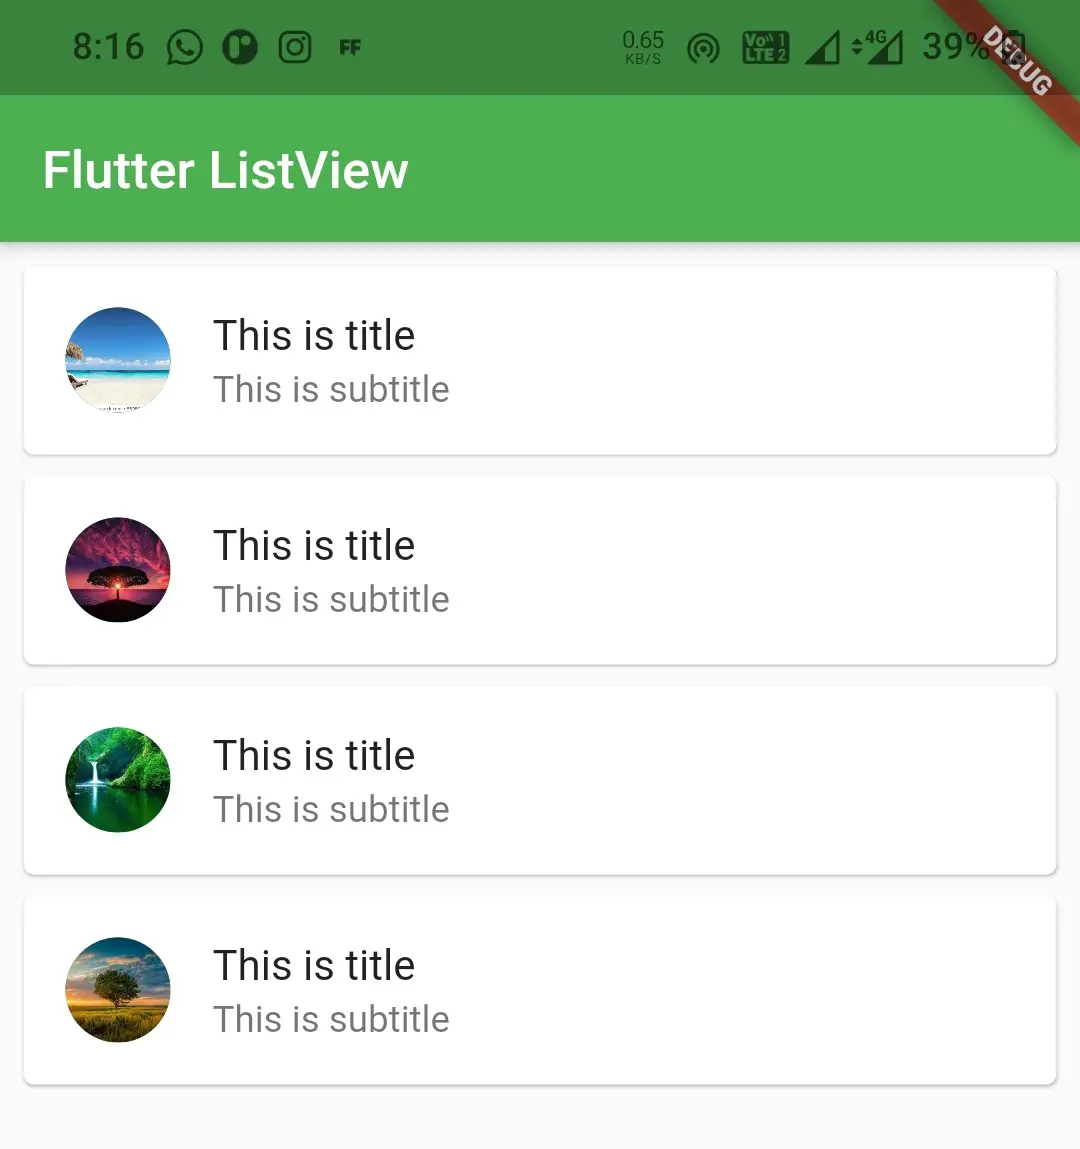
ListView.builder() Example In Flutter
Let’s have an example where we will display a ListView with four children. Each child will have an image, title and subtitle. Each item in the list will be a Card with ListTile as a child.
In this example we will generate the children dynamically using itemBuilder. We will get the images for the children from a list. Create a new flutter project and replace the code in main.dart file with the code below.
Add images to the project with image names i’ve used in the below example. To use your own images, replace the image names in the below example with your image names.
import 'package:flutter/cupertino.dart';
import 'package:flutter/material.dart';

void main() {
  runApp(MyApp());
}

class MyApp extends StatelessWidget {
  @override
  Widget build(BuildContext context) {
    return MaterialApp(
      title: 'Flutter App Learning',
      theme: ThemeData(
        primarySwatch: Colors.green,
      ),
      home: MyHomePage()
    );
  }
}

class MyHomePage extends StatefulWidget {
  MyHomePage({Key? key}) : super(key: key);
  @override
  _MyHomePageState createState() => _MyHomePageState();
}

class _MyHomePageState extends State<MyHomePage> {
 List<String> images = [
   "assets/images/scenary.jpg",
   "assets/images/scenary_red.jpg",
   "assets/images/waterfall.jpg",
   "assets/images/tree.jpg",
 ];
  @override
  Widget build(BuildContext context) {
    return Scaffold(
      appBar: AppBar(
        title: Text("Flutter ListView"),
      ),
      body: ListView.builder(
        itemBuilder: (BuildContext, index){
          return Card(
            child: ListTile(
              leading: CircleAvatar(backgroundImage: AssetImage(images[index]),),
              title: Text("This is title"),
              subtitle: Text("This is subtitle"),
            ),
          );
        },
        itemCount: images.length,
        shrinkWrap: true,
        padding: EdgeInsets.all(5),
        scrollDirection: Axis.vertical,
      )
    );
  }
}
Output :
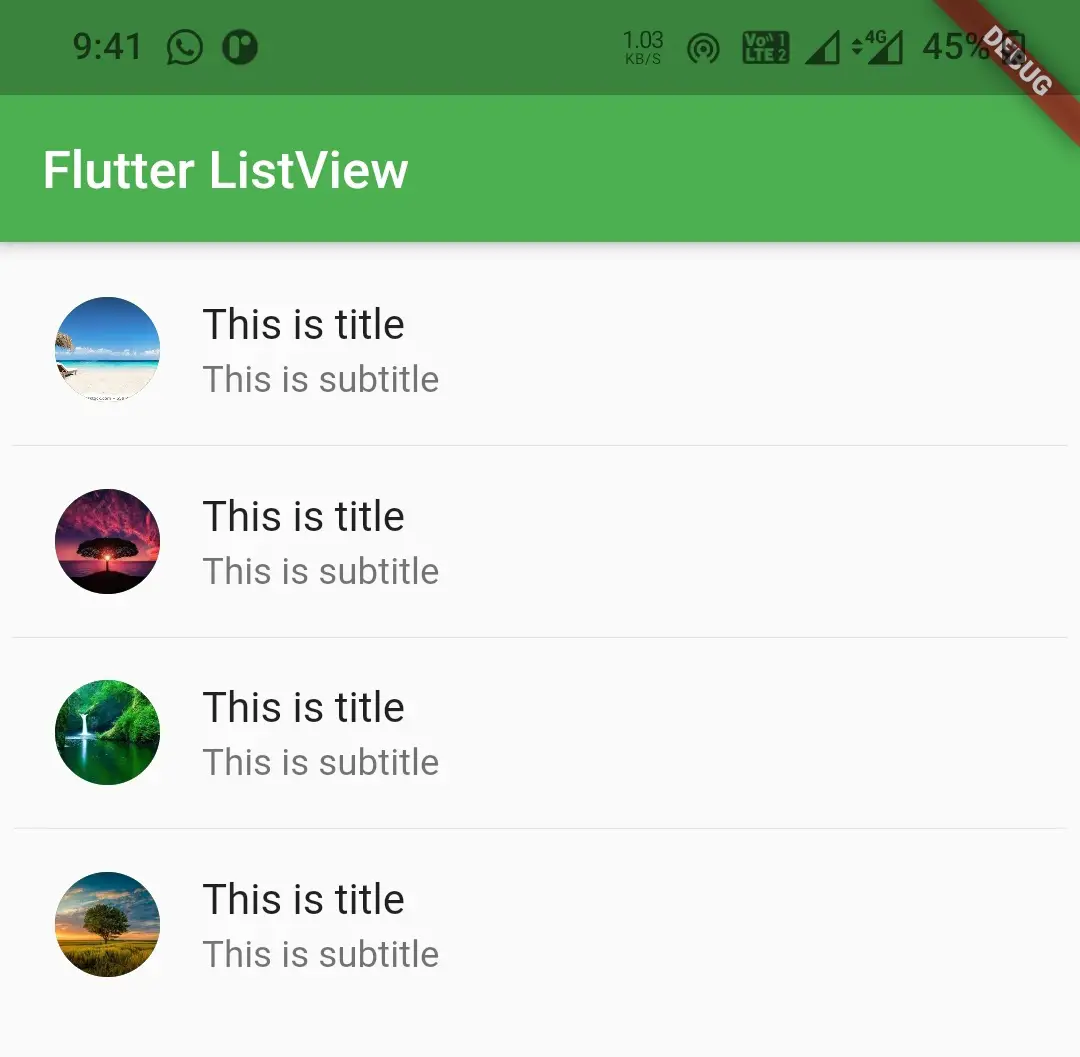
ListView.separated()
To display a listview with separators / dividers use ListView.separated() constructor. It is almost similar to listView.builder() but it has an extra property separatorBuilder. This property is used to build separator to the items of the Listview.
To create a ListView.separator() call the constructor and provide the required properties. There are two required properties itemBuilder & separatorBuilder. The first one will generate children and the second one will generate separators / dividers.
Flutter ListView.separated() constructor :
ListView.separated(

    {Key? key,
    Axis scrollDirection = Axis.vertical,
    bool reverse = false,
    ScrollController? controller,
    bool? primary,
    ScrollPhysics? physics,
    bool shrinkWrap = false,
    EdgeInsetsGeometry? padding,
    required IndexedWidgetBuilder itemBuilder,
    required IndexedWidgetBuilder separatorBuilder,
    required int itemCount,
    bool addAutomaticKeepAlives = true,
    bool addRepaintBoundaries = true,
    bool addSemanticIndexes = true,
    double? cacheExtent,
    DragStartBehavior dragStartBehavior = DragStartBehavior.start,
    ScrollViewKeyboardDismissBehavior keyboardDismissBehavior = ScrollViewKeyboardDismissBehavior.manual,
    String? restorationId,
    Clip clipBehavior = Clip.hardEdge}

)
ListView.separated() Example In Flutter
In this example we will add separators to the ListView created in the previous example. We will also use ListTile directly instead of using it as a child of card widget.
import 'package:flutter/cupertino.dart';
import 'package:flutter/material.dart';

void main() {
  runApp(MyApp());
}

class MyApp extends StatelessWidget {
  @override
  Widget build(BuildContext context) {
    return MaterialApp(
      title: 'Flutter App Learning',
      theme: ThemeData(
        primarySwatch: Colors.green,
      ),
      home: MyHomePage()
    );
  }
}

class MyHomePage extends StatefulWidget {
  MyHomePage({Key? key}) : super(key: key);
  @override
  _MyHomePageState createState() => _MyHomePageState();
}

class _MyHomePageState extends State<MyHomePage> {
 List<String> images = [
   "assets/images/scenary.jpg",
   "assets/images/scenary_red.jpg",
   "assets/images/waterfall.jpg",
   "assets/images/tree.jpg",
 ];
  @override
  Widget build(BuildContext context) {
    return Scaffold(
      appBar: AppBar(
        title: Text("Flutter ListView"),
      ),
      body: ListView.separated(
        itemBuilder: (BuildContext, index){
          return ListTile(
            leading: CircleAvatar(backgroundImage: AssetImage(images[index]),),
            title: Text("This is title"),
            subtitle: Text("This is subtitle"),
          );
        },
        separatorBuilder: (BuildContext,index)
        {
          return Divider(height: 1);
        },
        itemCount: images.length,
        shrinkWrap: true,
        padding: EdgeInsets.all(5),
        scrollDirection: Axis.vertical,
      )
    );
  }
}
Output :
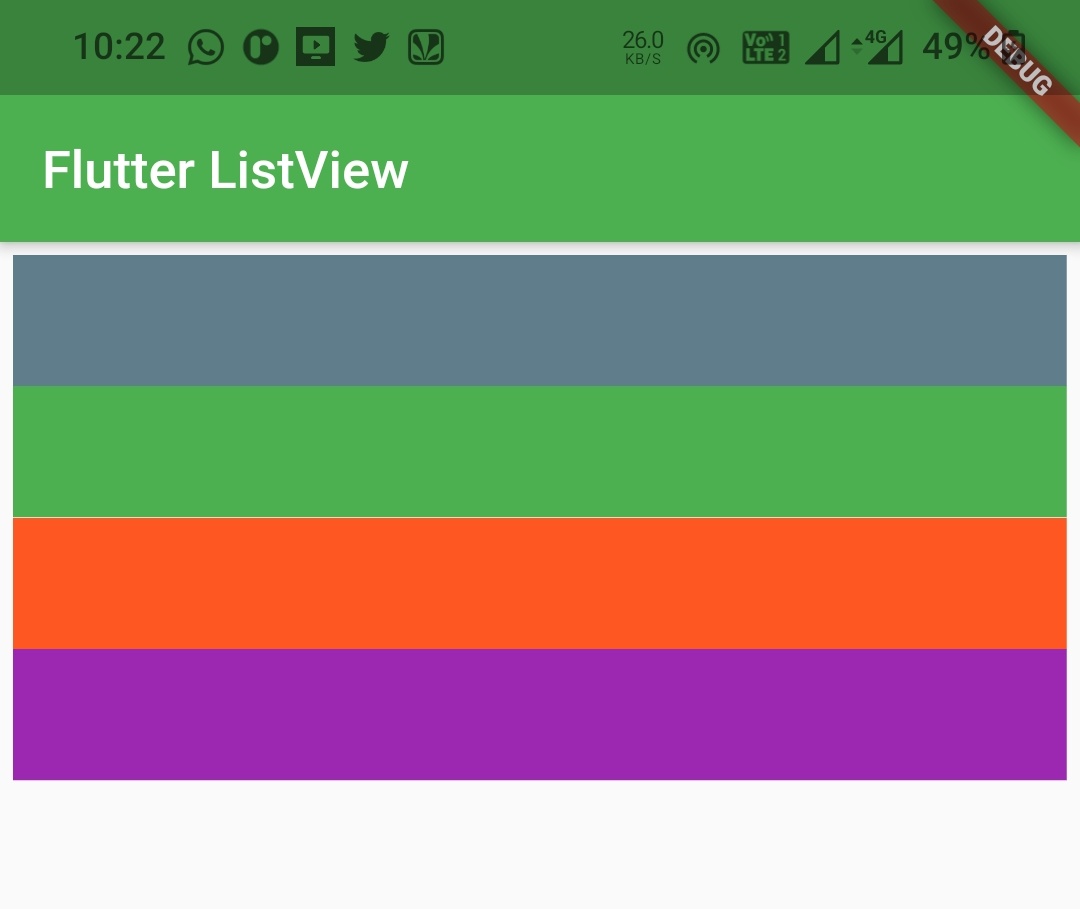
ListView.custom()
This constructor uses SliverChildBuilderDelegate() for generating list items of the ListView. To create a ListView.custom call the constructor and provide required properties. This constructor has one required property which is childrenDelegate. It is used to generate the children for the Listview. It accepts SliverChildBuilderDelegate() as value.
Flutter ListView.custom() Constructor :
const ListView.custom(

    {Key? key,
    Axis scrollDirection = Axis.vertical,
    bool reverse = false,
    ScrollController? controller,
    bool? primary,
    ScrollPhysics? physics,
    bool shrinkWrap = false,
    EdgeInsetsGeometry? padding,
    double? itemExtent,
    required SliverChildDelegate childrenDelegate,
    double? cacheExtent,
    int? semanticChildCount,
    DragStartBehavior dragStartBehavior = DragStartBehavior.start,
    ScrollViewKeyboardDismissBehavior keyboardDismissBehavior = ScrollViewKeyboardDismissBehavior.manual,
    String? restorationId,
    Clip clipBehavior = Clip.hardEdge}

)
ListView.custom() Example In Flutter
In this example we will display list items with different colors using ListView.custom() constructor.
import 'package:flutter/cupertino.dart';
import 'package:flutter/material.dart';

void main() {
  runApp(MyApp());
}

class MyApp extends StatelessWidget {
  @override
  Widget build(BuildContext context) {
    return MaterialApp(
      title: 'Flutter App Learning',
      theme: ThemeData(
        primarySwatch: Colors.green,
      ),
      home: MyHomePage()
    );
  }
}

class MyHomePage extends StatefulWidget {
  MyHomePage({Key? key}) : super(key: key);
  @override
  _MyHomePageState createState() => _MyHomePageState();
}

class _MyHomePageState extends State<MyHomePage> {
 List<Color> colors = [
   Colors.blueGrey,
   Colors.green,
   Colors.deepOrange,
   Colors.purple
 ];
  @override
  Widget build(BuildContext context) {
    return Scaffold(
      appBar: AppBar(
        title: Text("Flutter ListView"),
      ),
      body: ListView.custom(
          childrenDelegate: SliverChildBuilderDelegate((BuildContext, index) {
            return Container(
              height: 50,
              width: 50,
              alignment: Alignment.center,
              color: colors[index],
            );
          },
          childCount: 4,
        ),
        shrinkWrap: true,
        padding: EdgeInsets.all(5),
        scrollDirection: Axis.vertical,
      )
    );
  }
}
Output :
That ‘s all about the tutorial on how to create and use a ListView in flutter. We have also seen different constructors of ListView with examples. Let’s catch up with some other widget in the next post. Have a great day !!
Do like & share my facebook page. Subscribe to newsletter if you find this post helpful. Thank you !!
Reference : Flutter Official Documentation.


This is the best flutter listview explanation available online. Thanks for this great piece.
Thank you Micheal.